

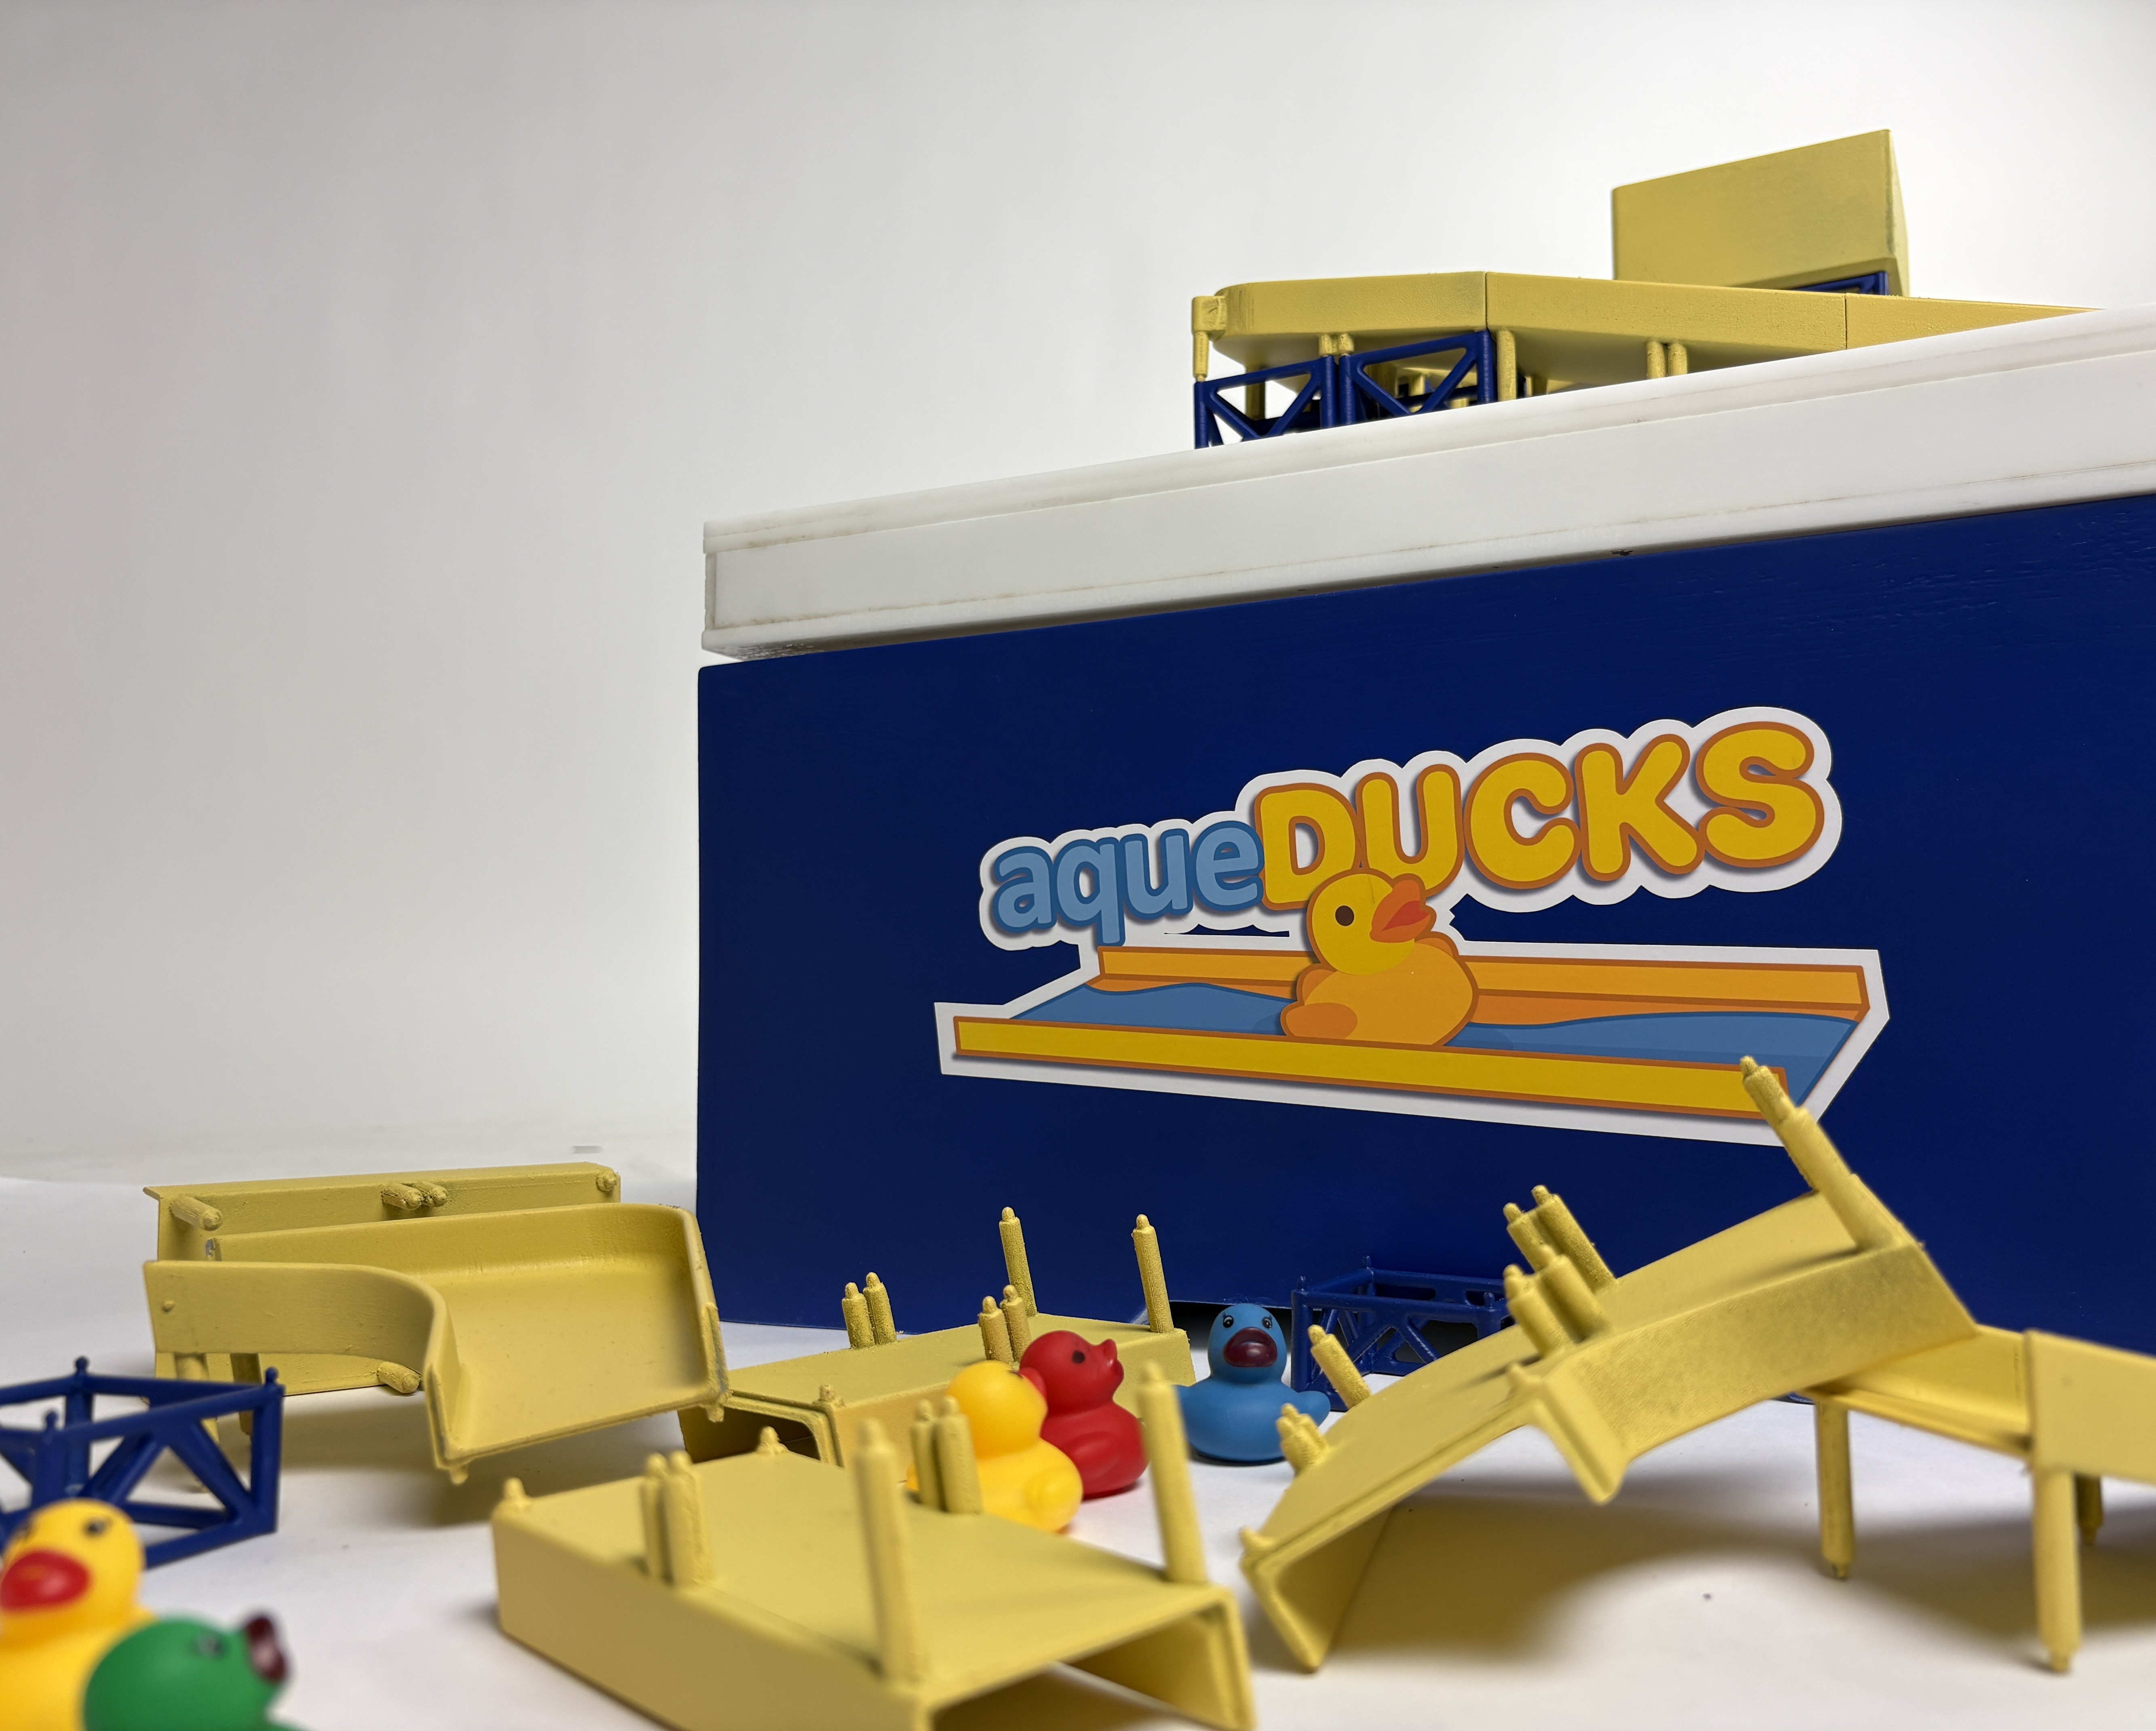
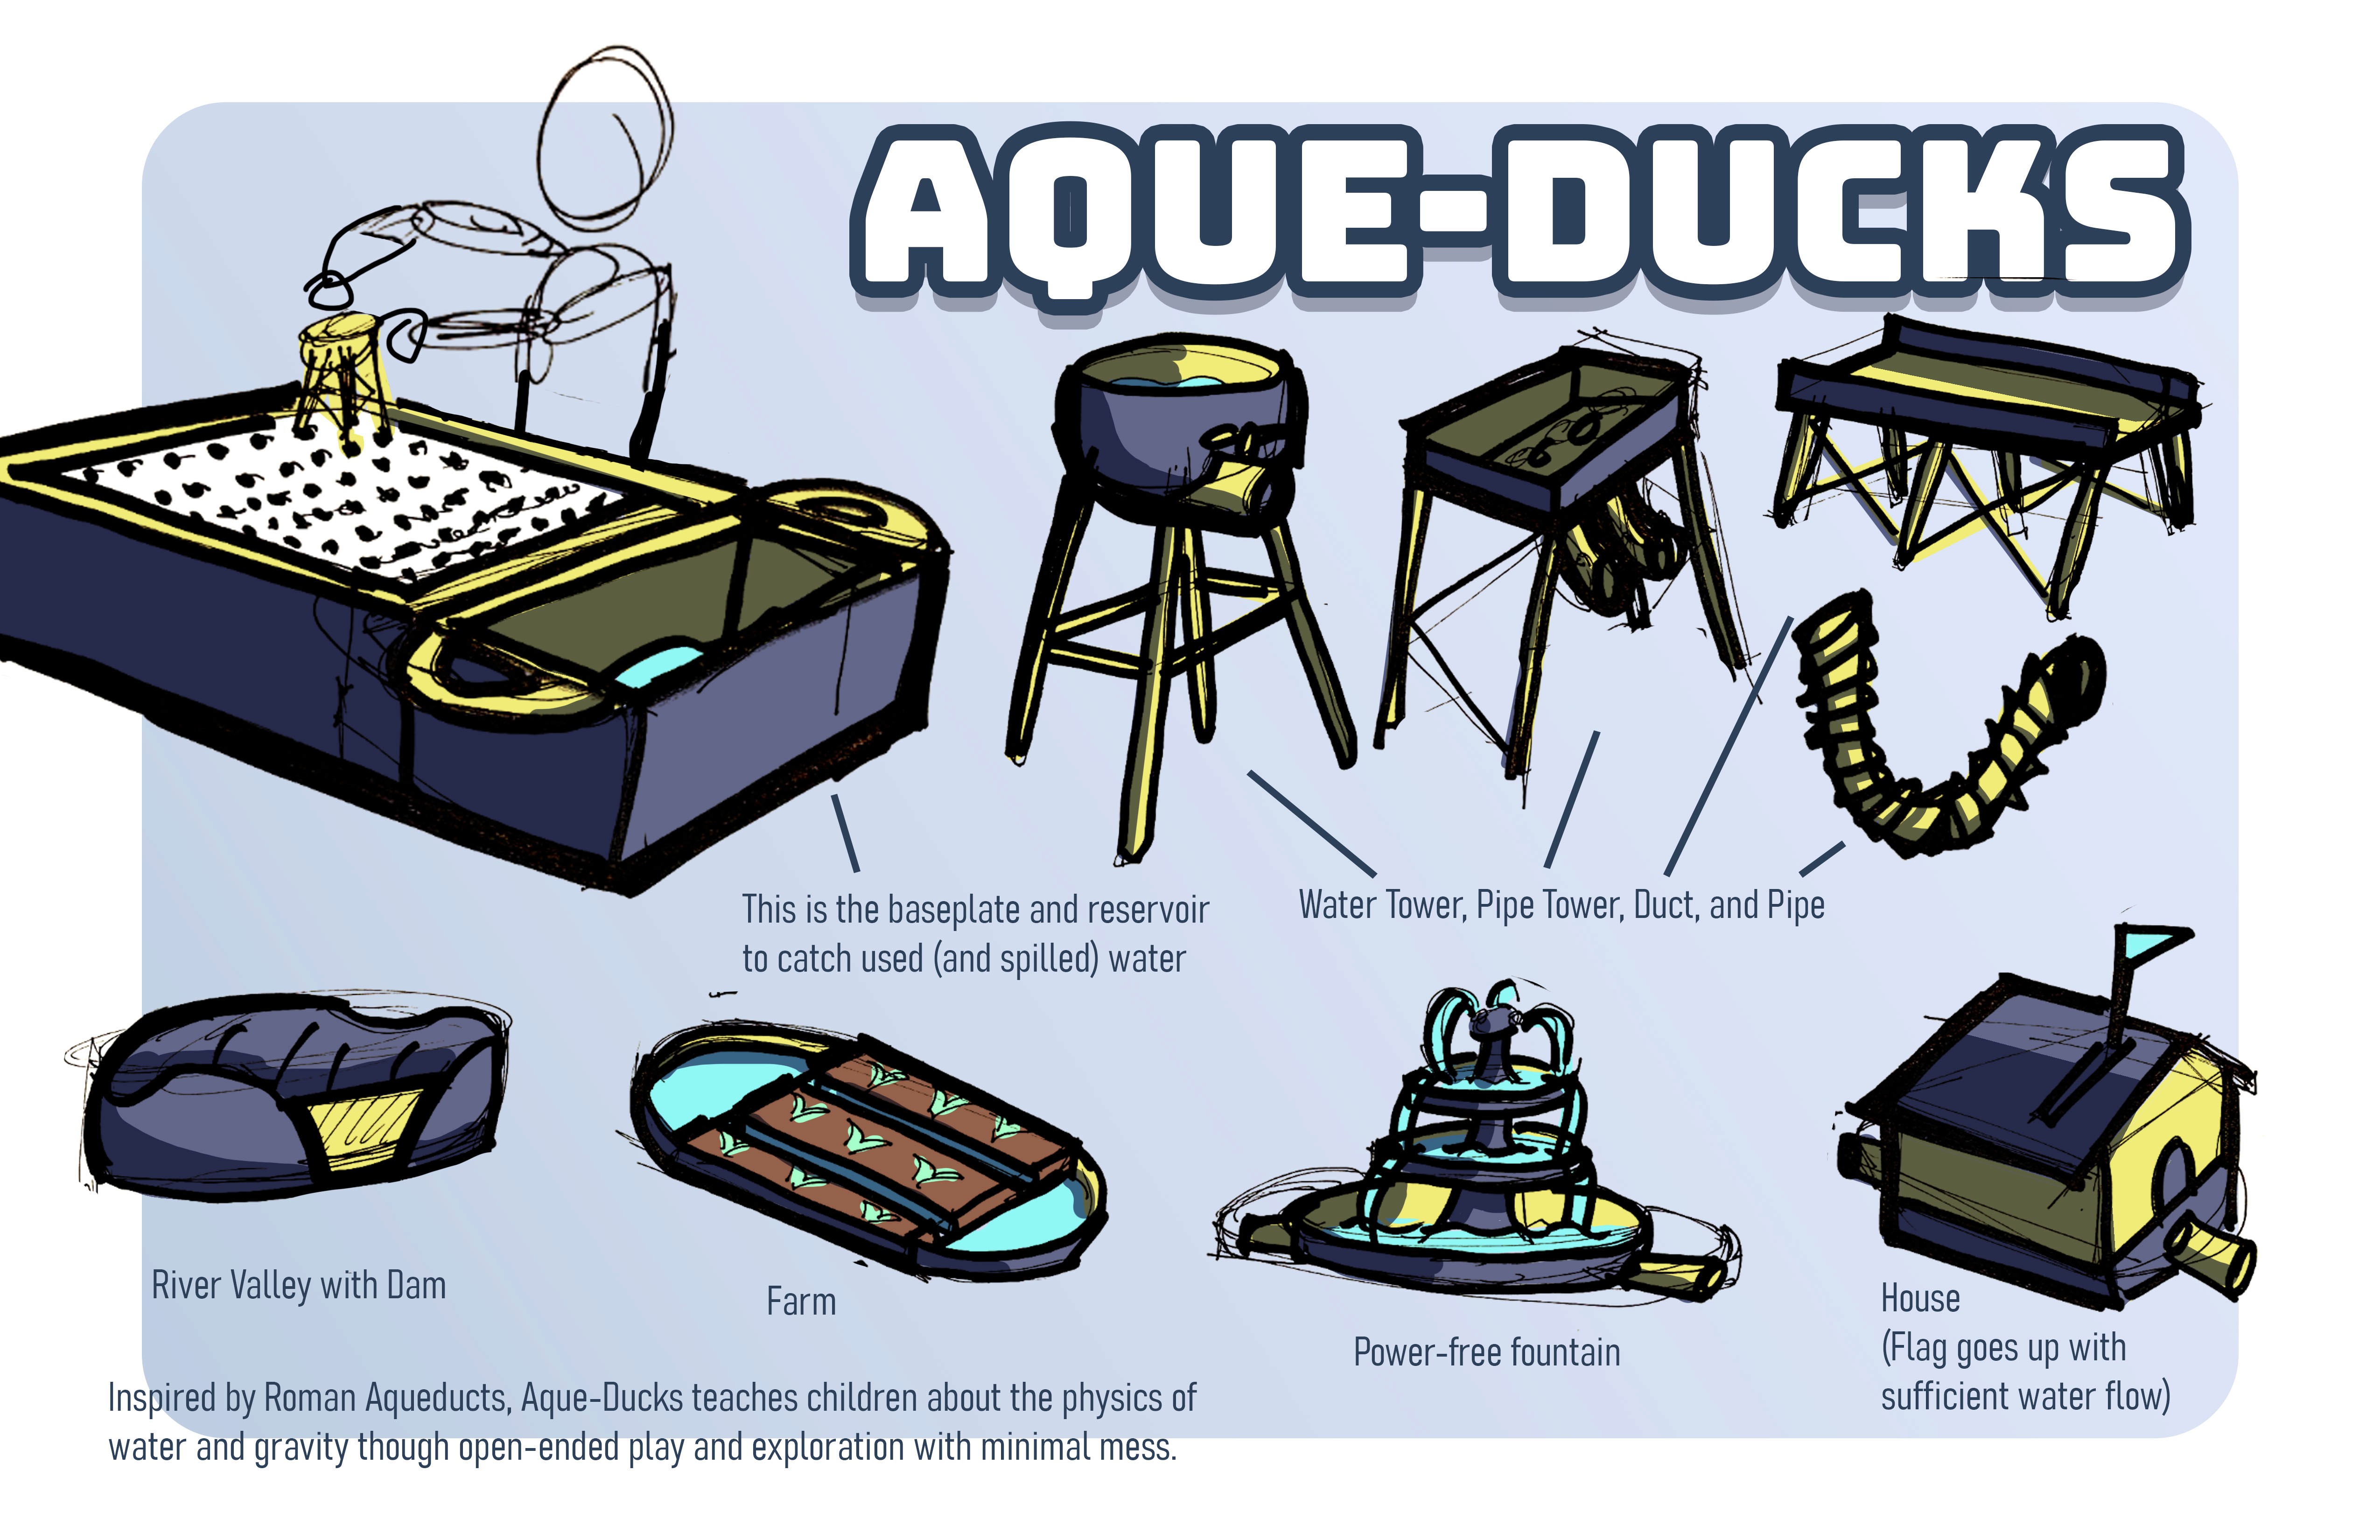
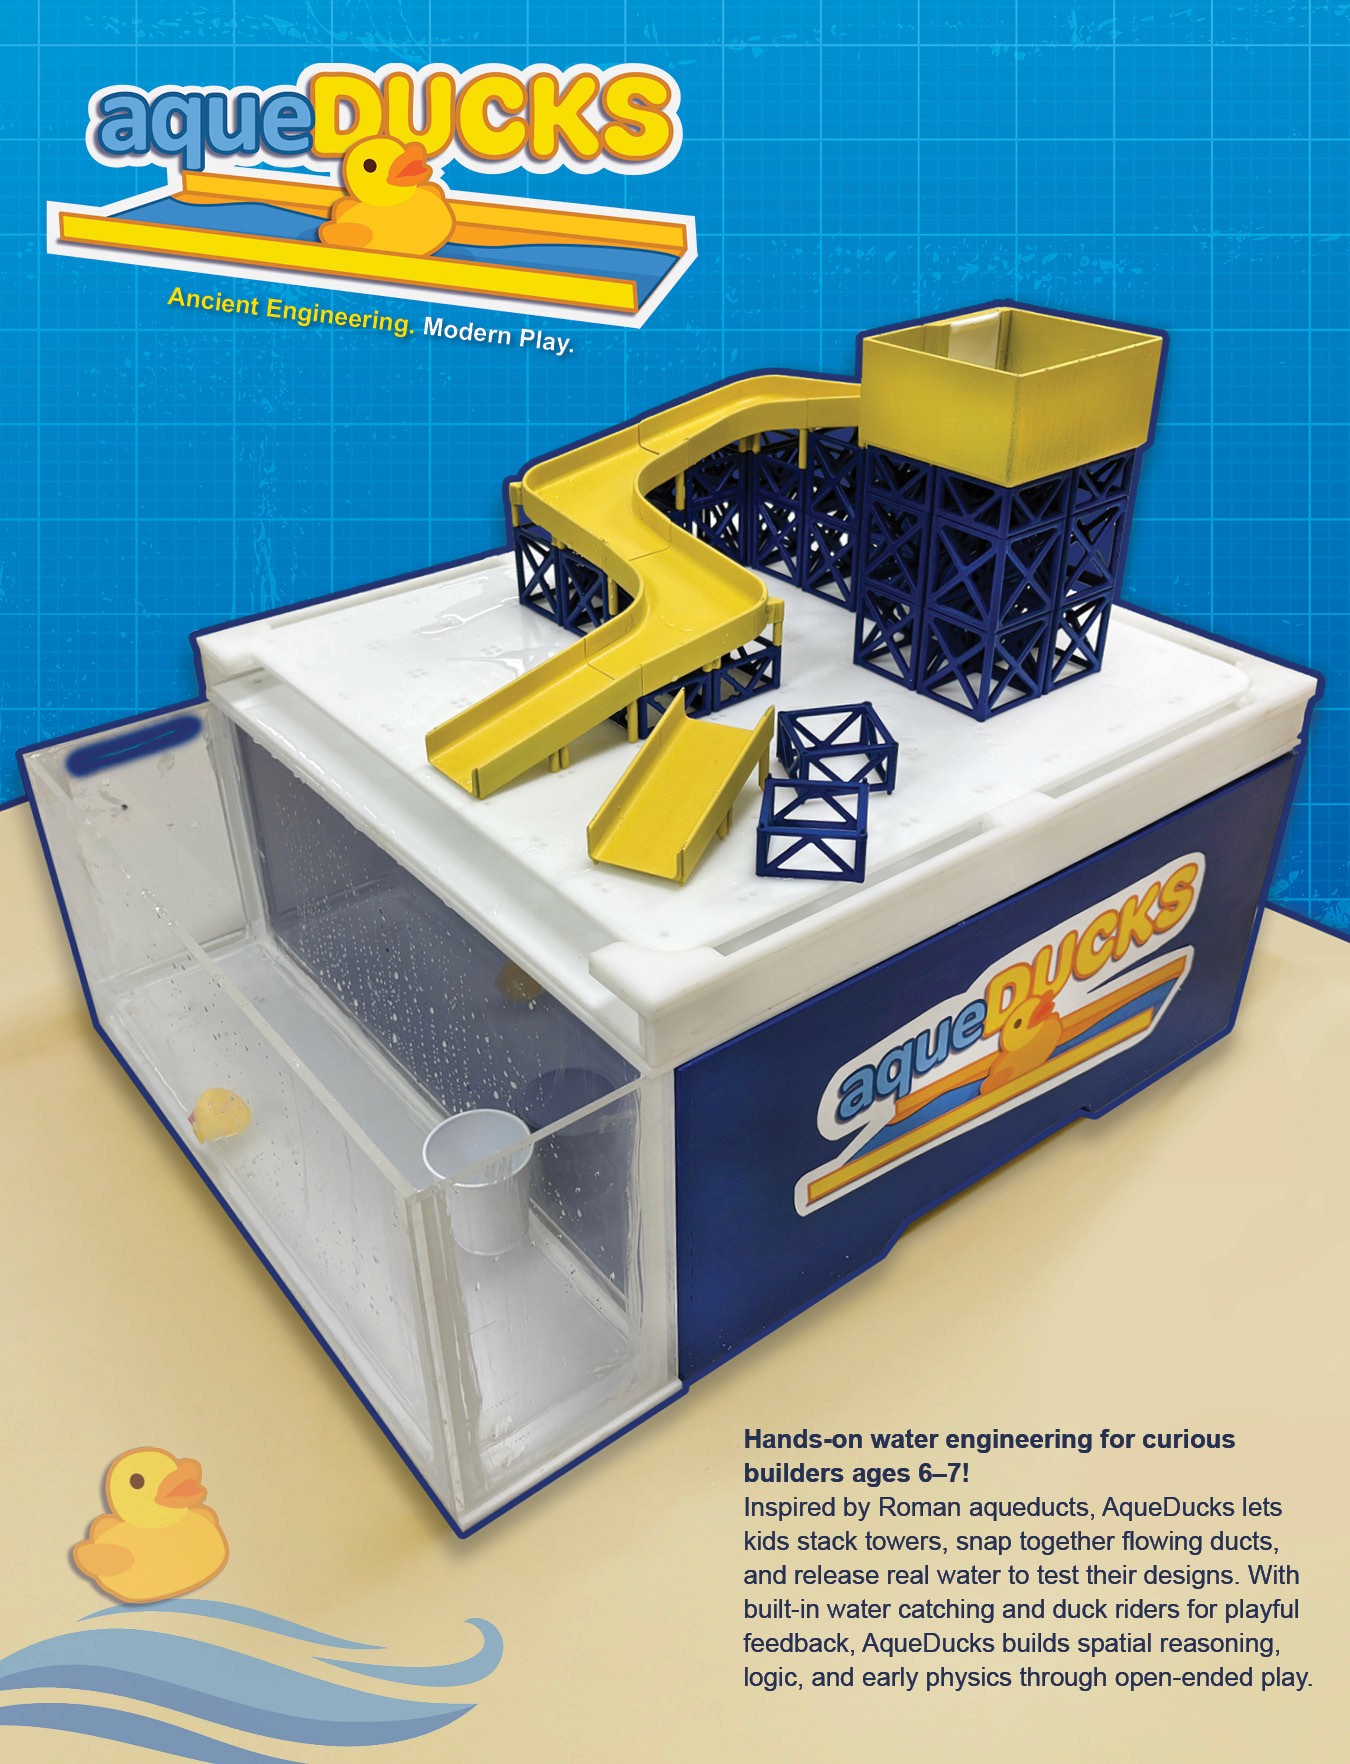
Inspired by Roman aqueducts, AqueDucks builds logic and physics understanding through open ended play for kids ages 6-7.
Role
Solo Designer
Context
Second-Year Studio
Duration
5.5 Weeks, Fall 2025
The Brief
Design a FUN toy that TEACHES an important learning concept that is age appropriate for 4,5, 6 or 7 year old children. The toy must be designed to be age appropriate, fun, and fit the scale of the child.
Constraints
This was a very open-ended project, so constraints were self-imposed. My main goal for this project was to get a functioning looks-like/works-like prototype as fast as possible and then tweak it from there. This became more and more important as the scale of the project grew rapidly.
Research
Research for this project centered on understanding development goals for kids at different ages. I very quickly targeted the upper bound of our available age range, 5-7 years, because I wanted to do something to build logic and an understanding of the world around them.
CDC's Developmental Milestones
The CDC has developmental milestones up to age 5. One thing that really stood out to me was the guideline to "Ask your child what she is playing. Help her expand her answers by asking "Why?" and "How?" For example, say "That's a nice bridge you're building. Why did you put it there?" and "Play with toys that encourage your child to put things together."
Initial Ideation
Based on my research, I set out to design a fun toy to accelerate extrinsic spatial awareness and reasoning skills in children age 6-7. I sketched some initial ideas, then put together 5 concepts to choose between.
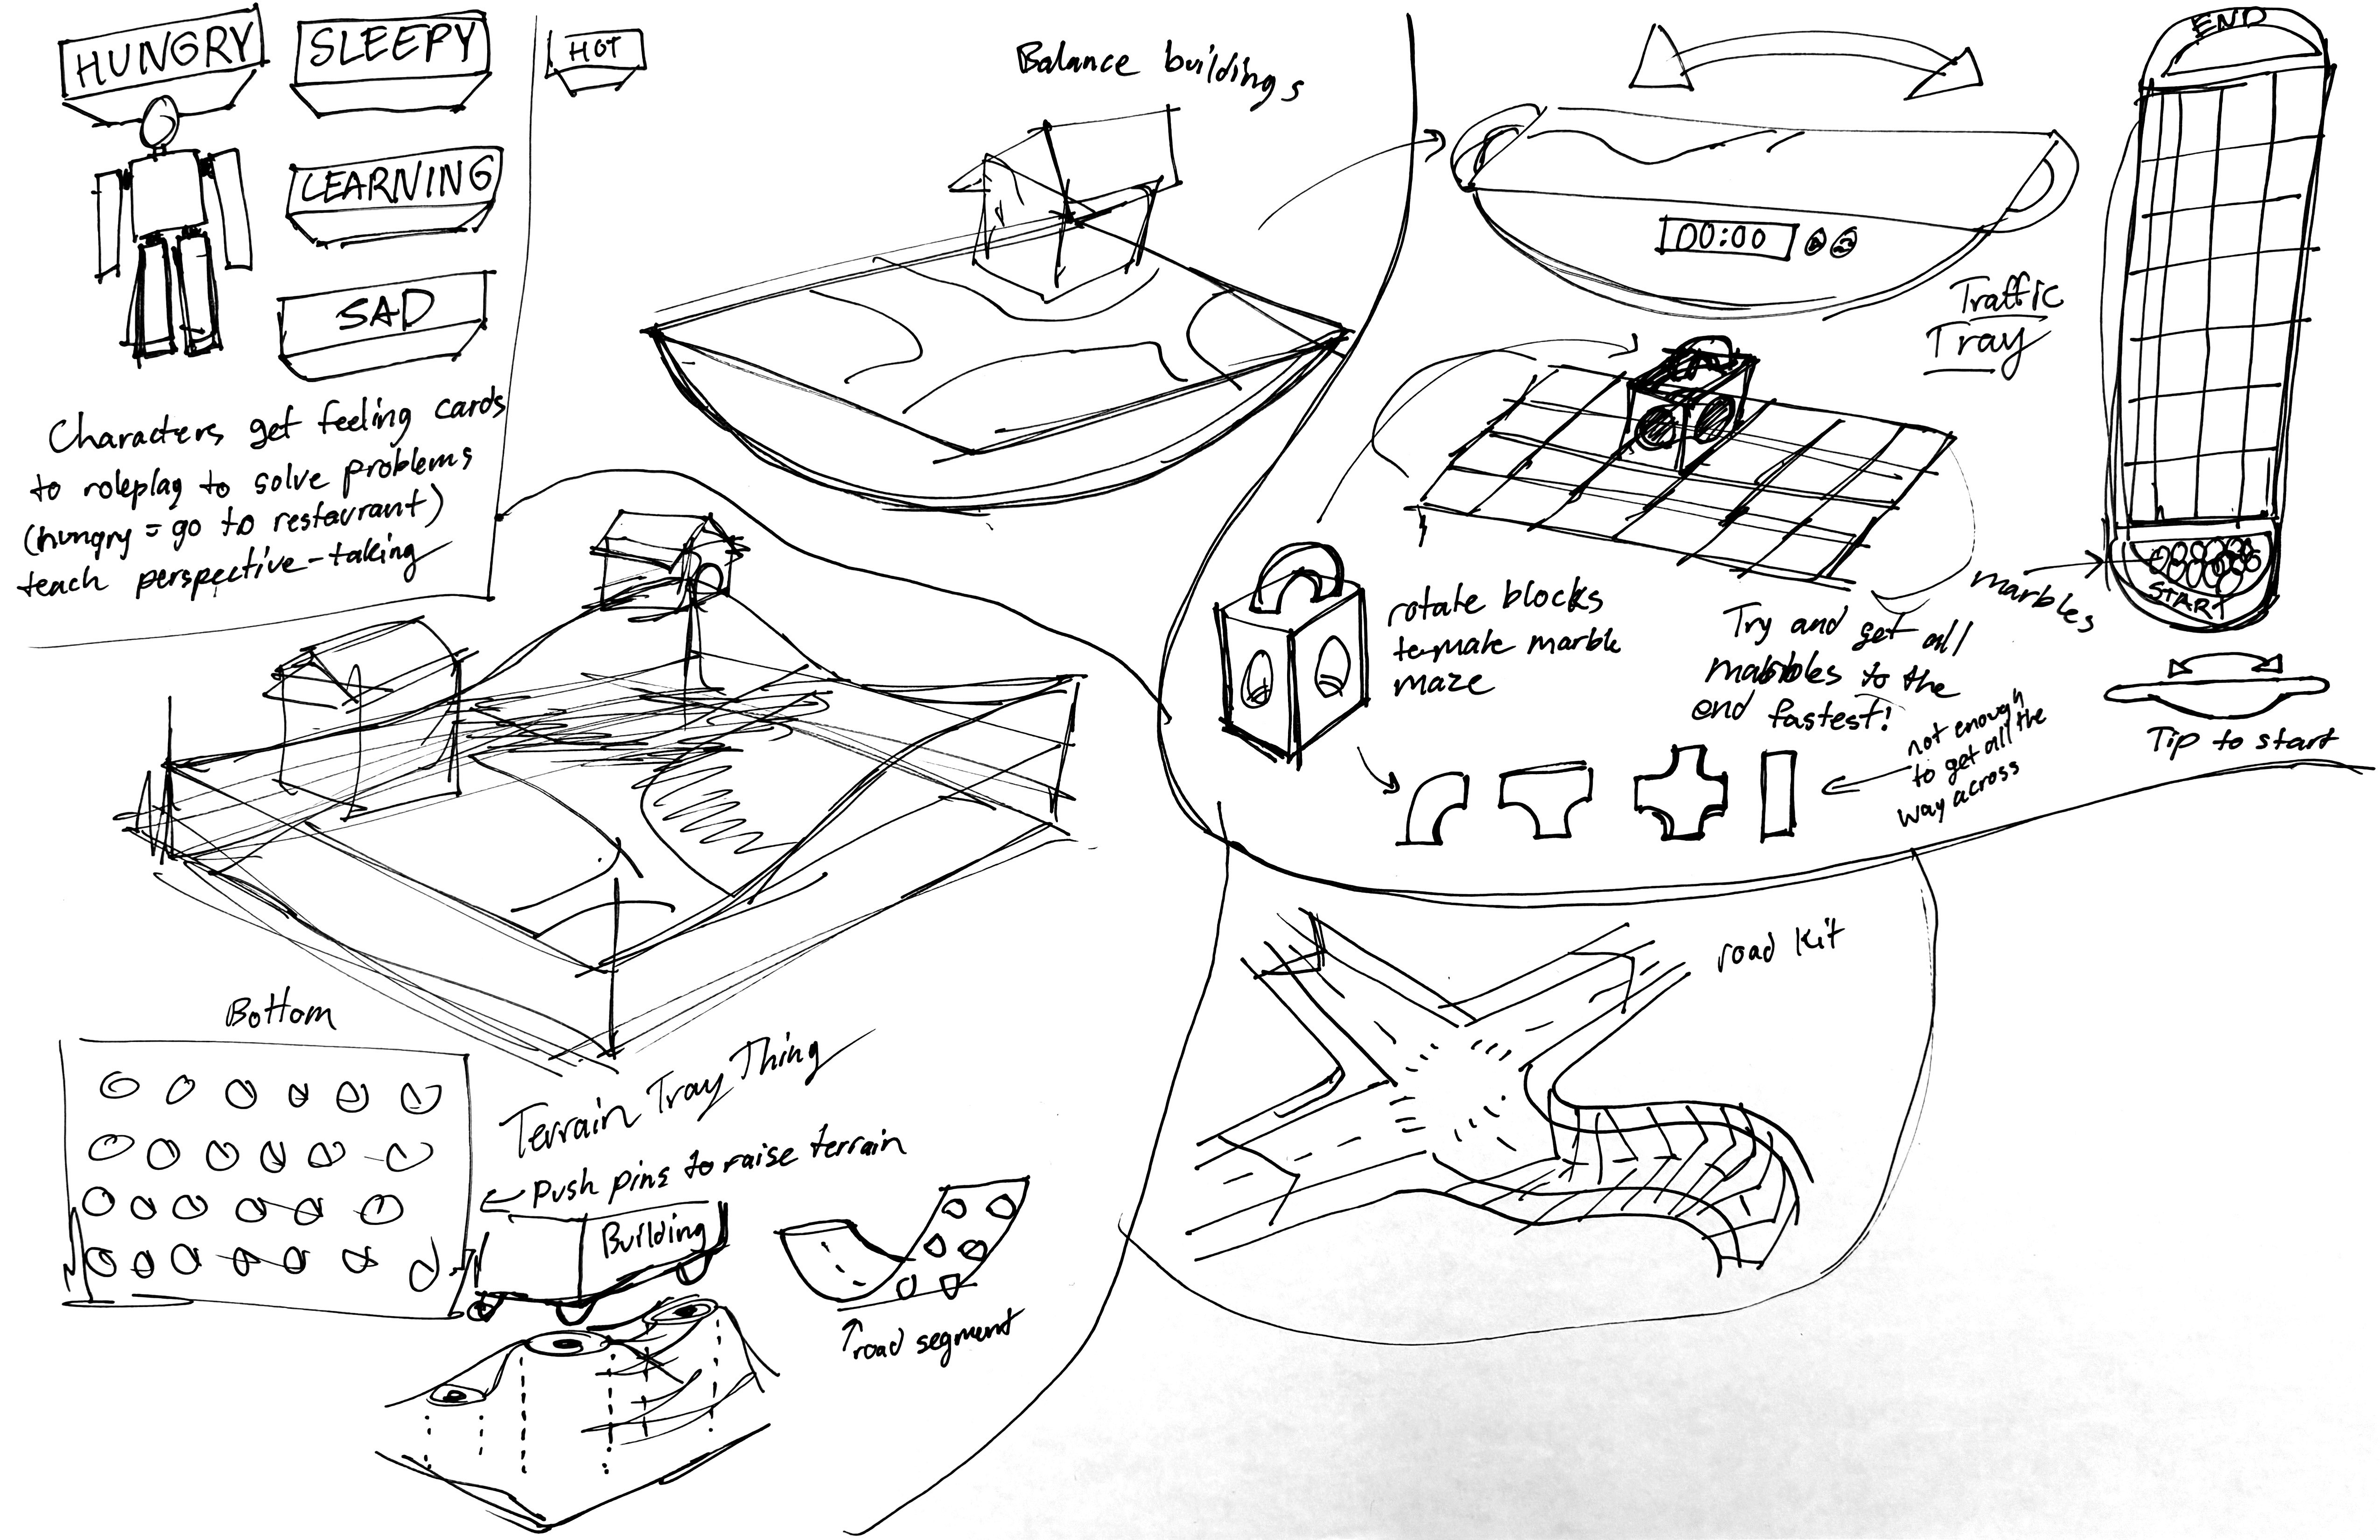
AqueDucks
In the end, I decided to go with AqueDucks because it felt like the option that provided the most unique project. It teaches kids about water physics and how we get water from place to place by allowing them to build a Roman aqueduct-inspired path to get water from one point to another, downhill. It would also be made fun by including rubber duckies to ride the water down.
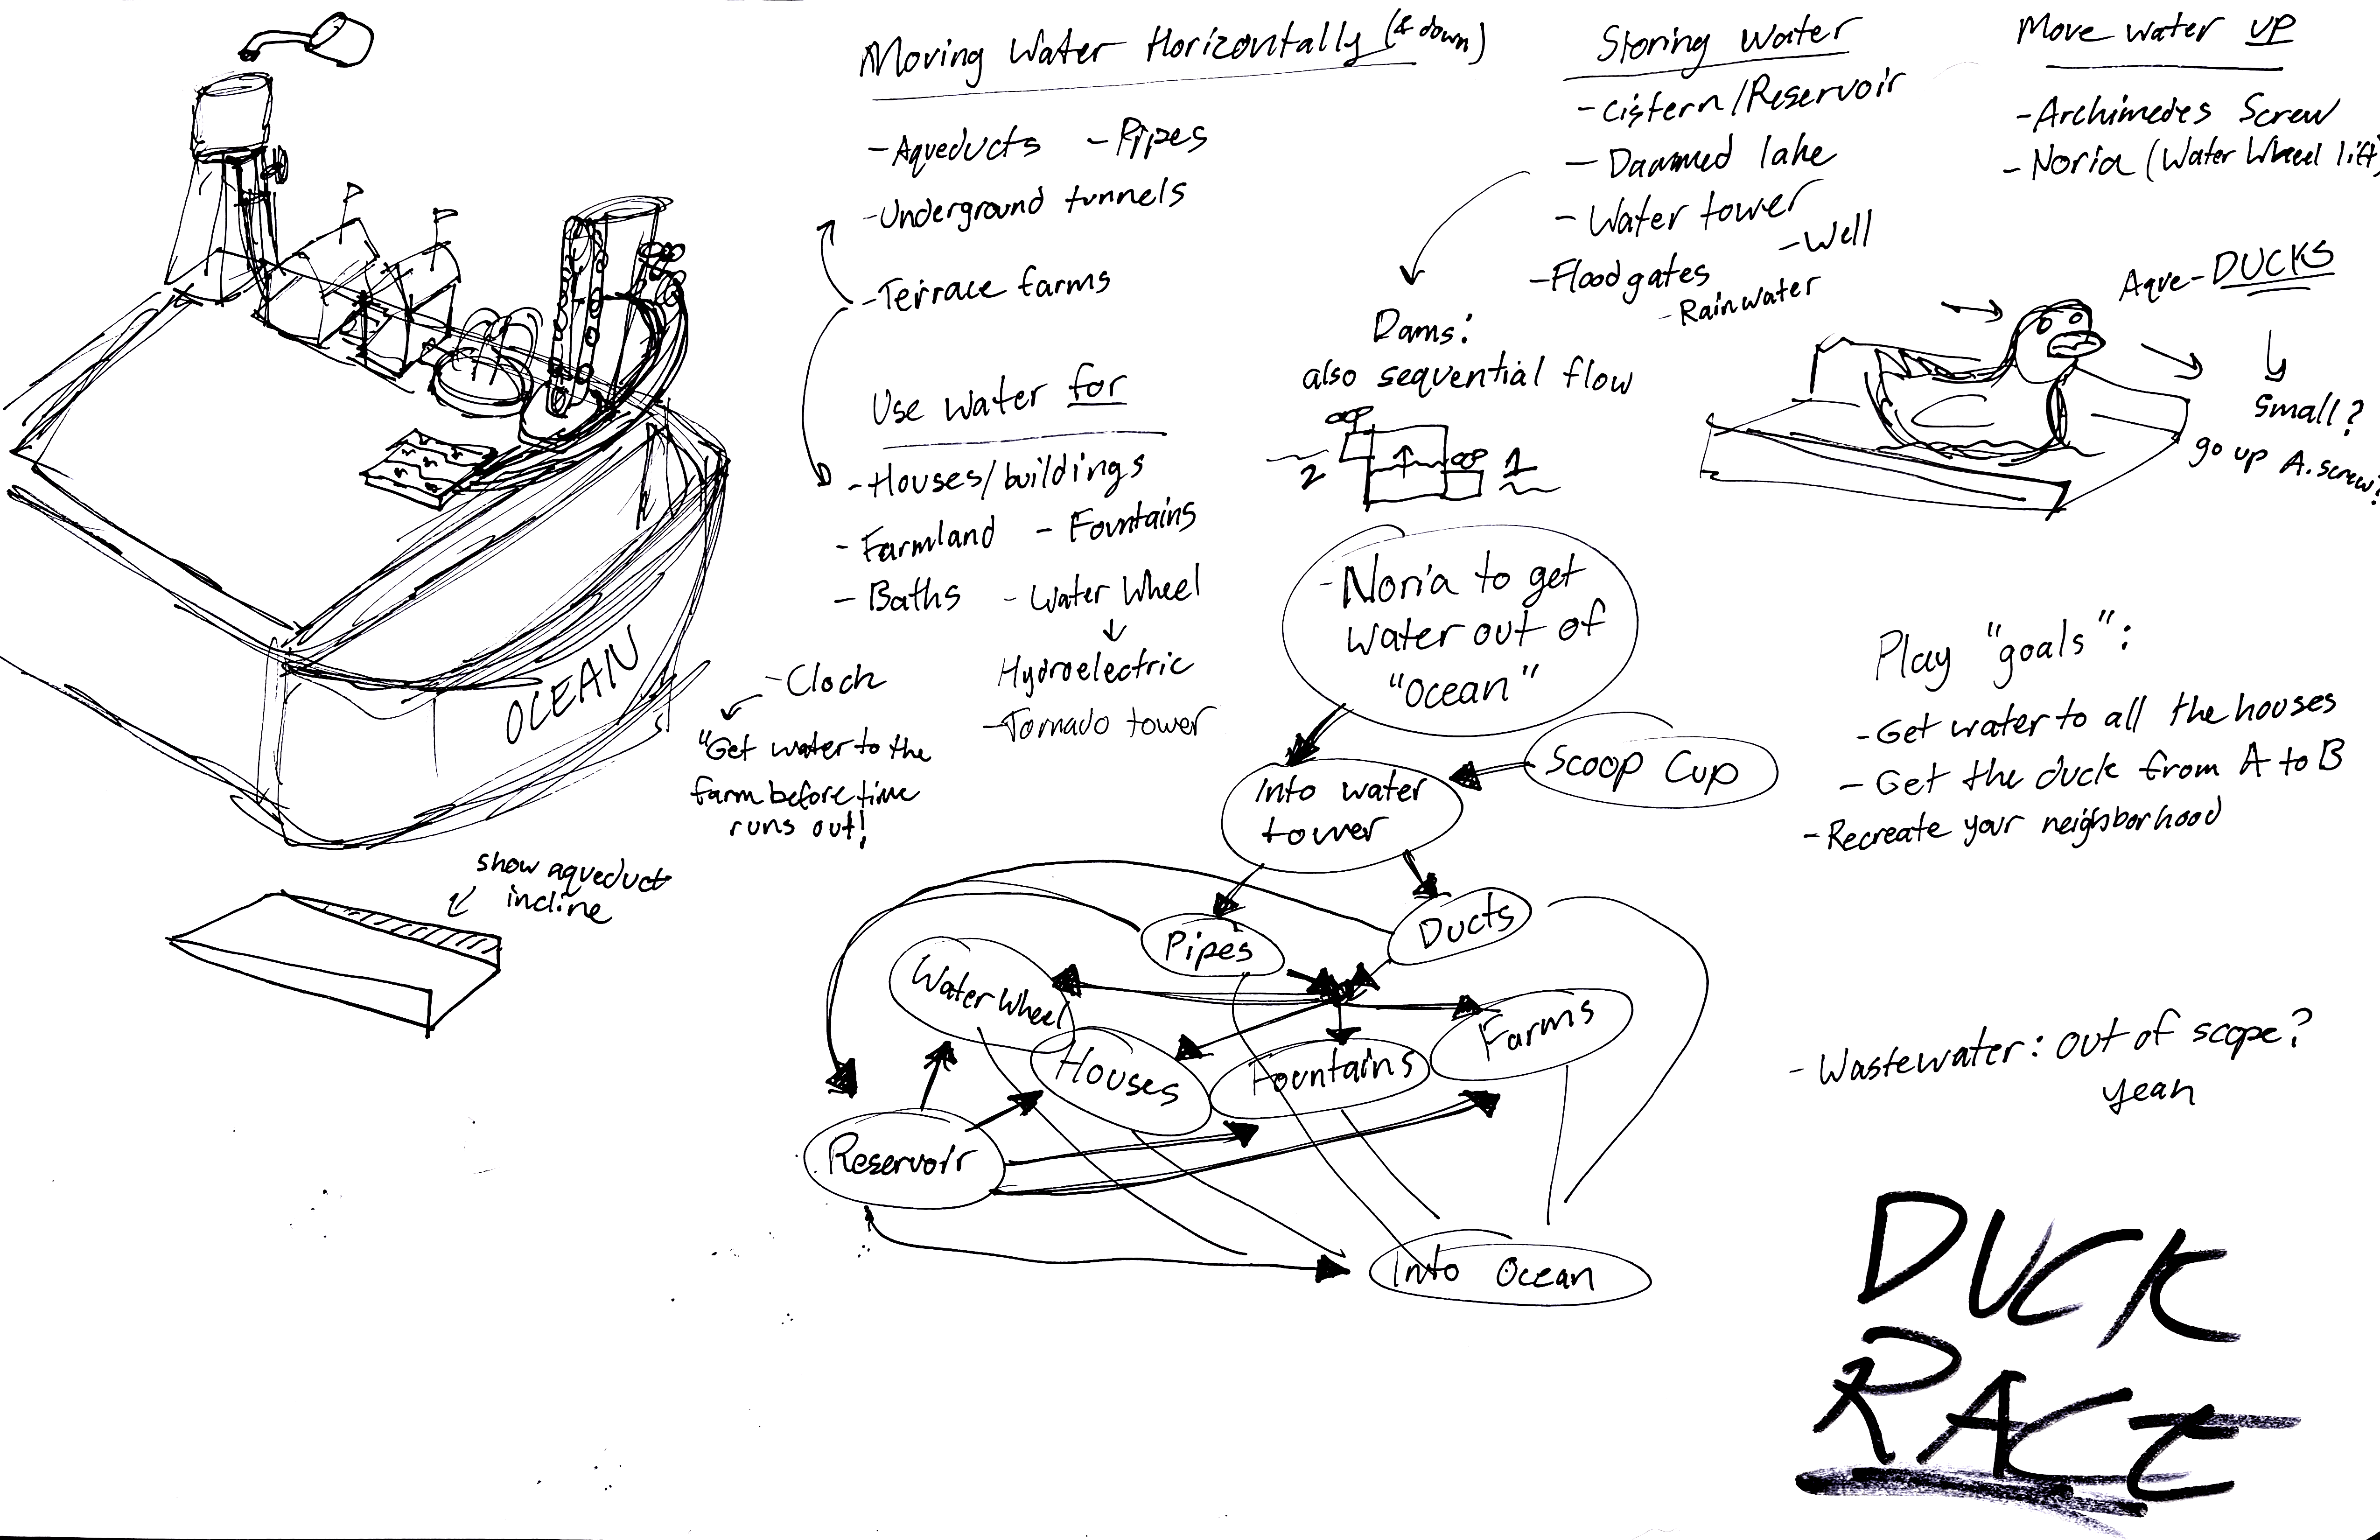
Once I was confident in my direction, I started ideating on potential elements this building set could have. With my intense deadline, I decided to start with the bare minimum and add more parts from there.
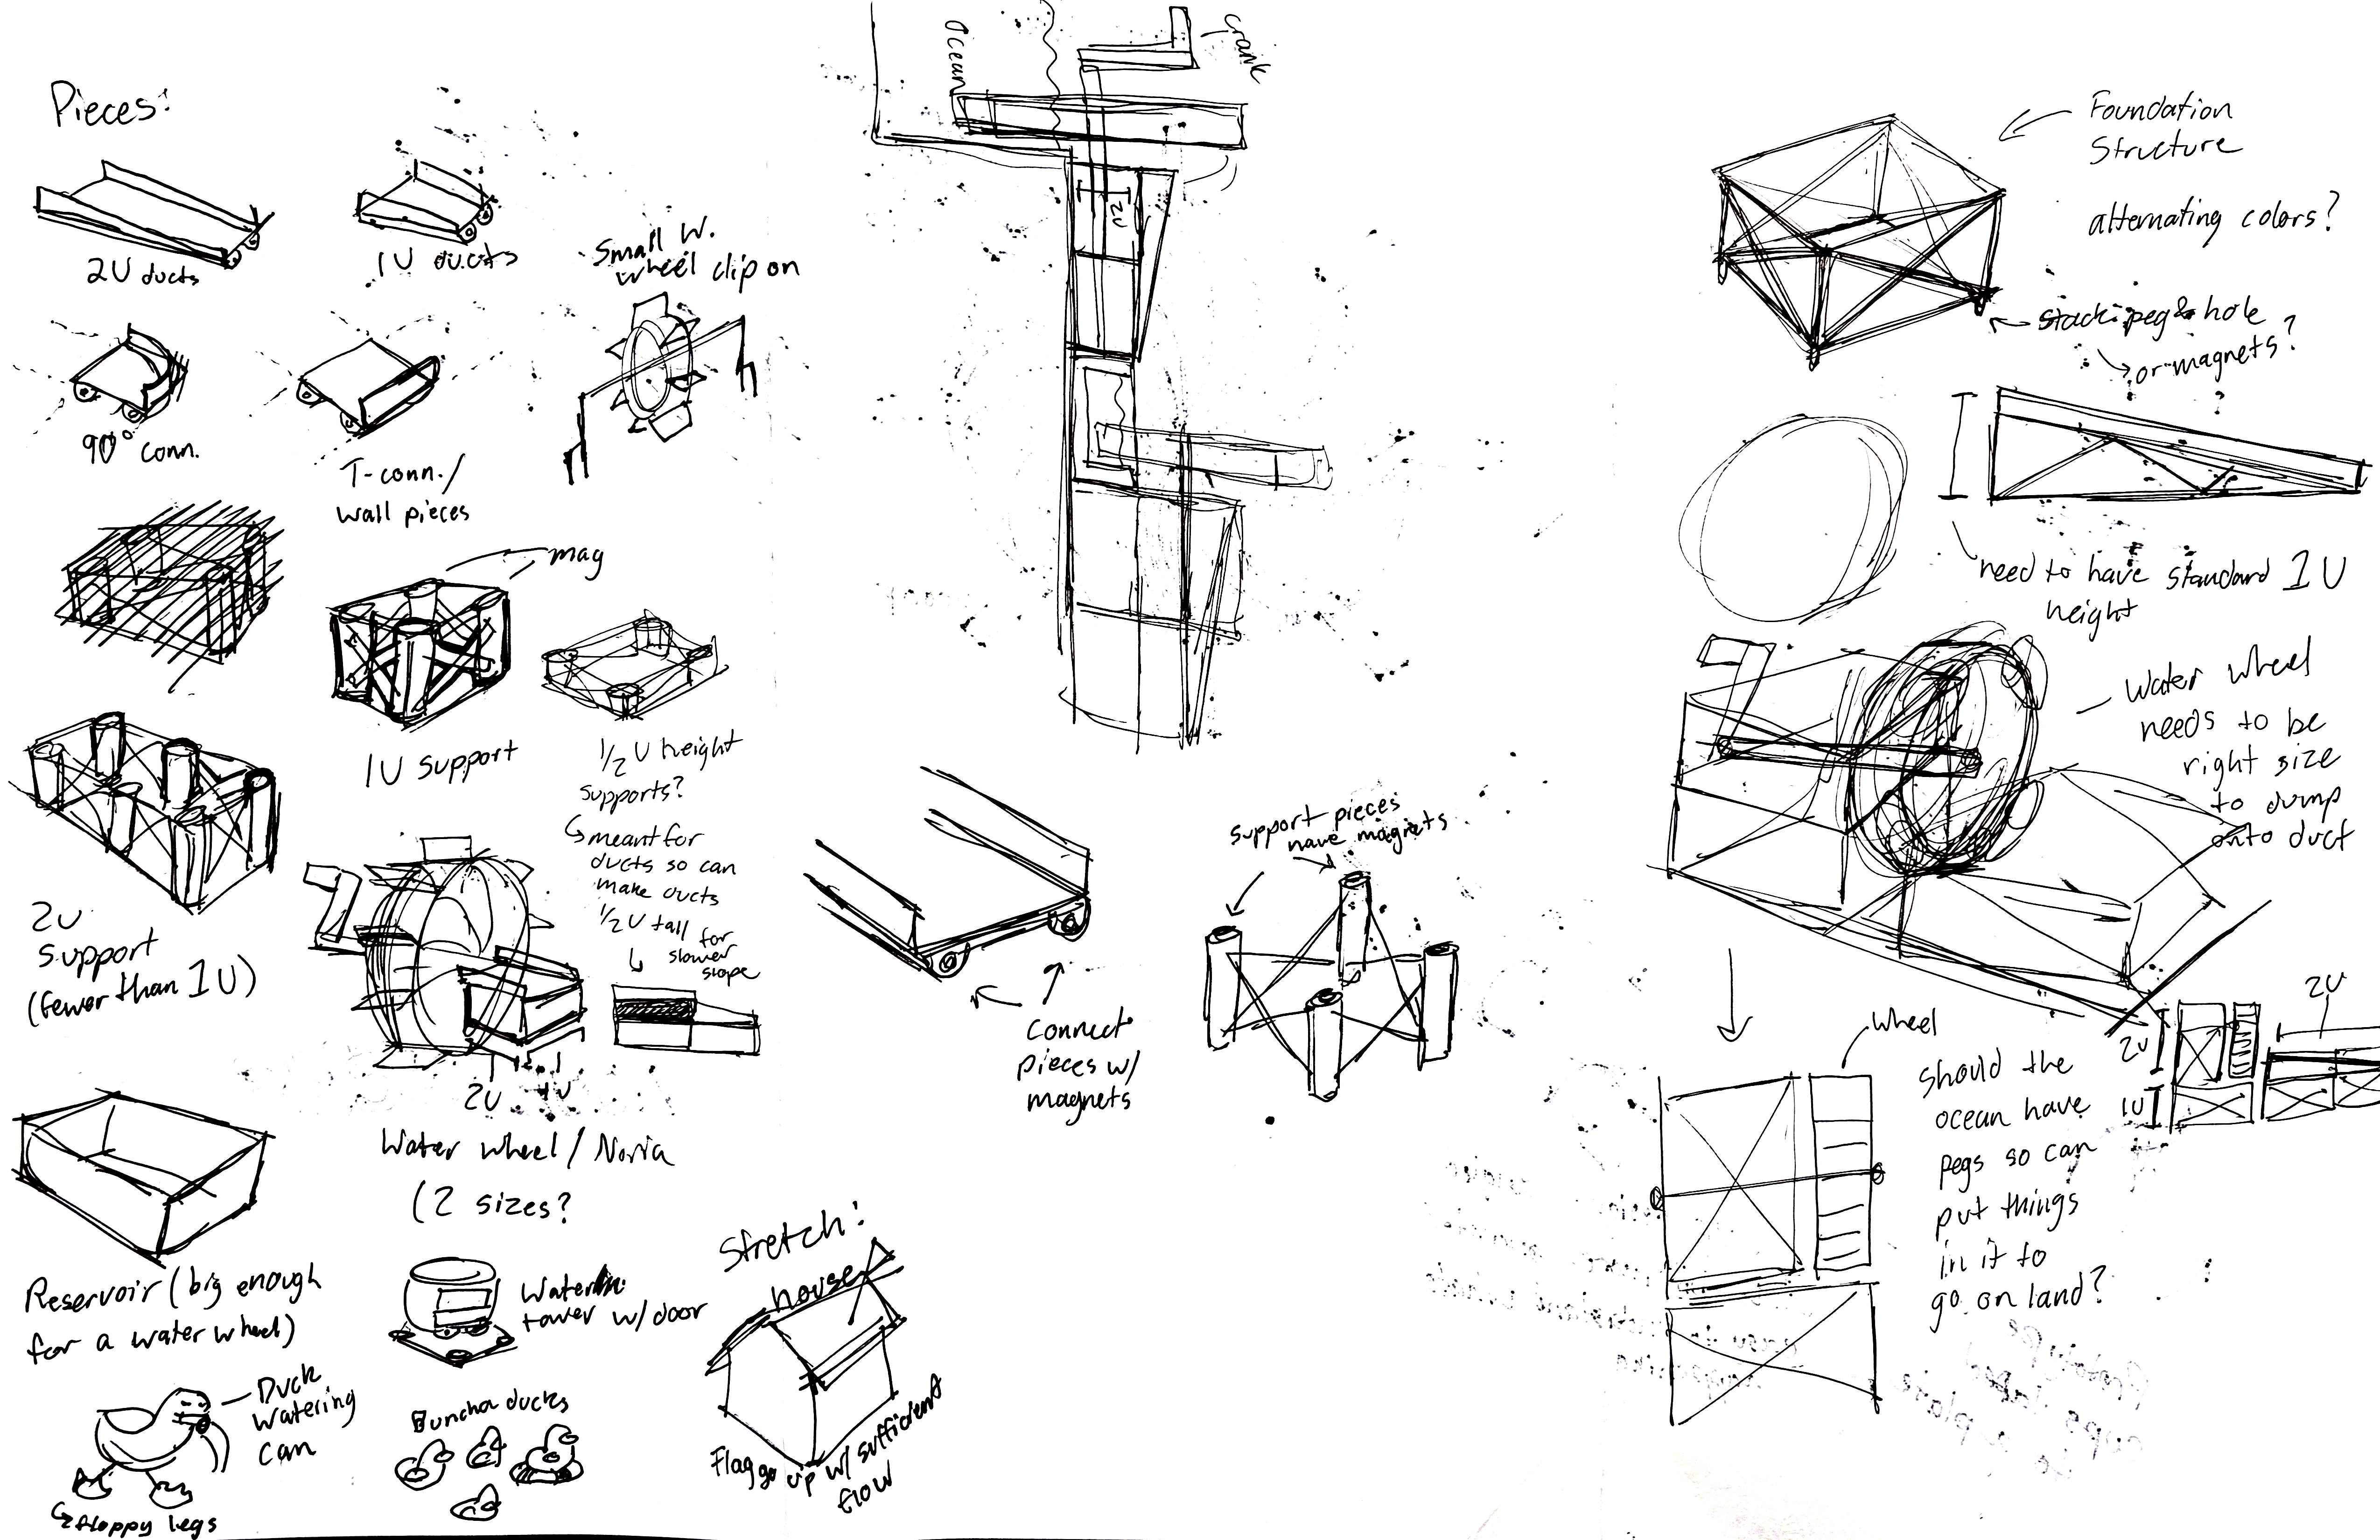
Prototyping
In my quest to get this project as far as possible as fast as possible, I jumped right in to developing the simplest versions of the basic components and making tweaks to improve them.
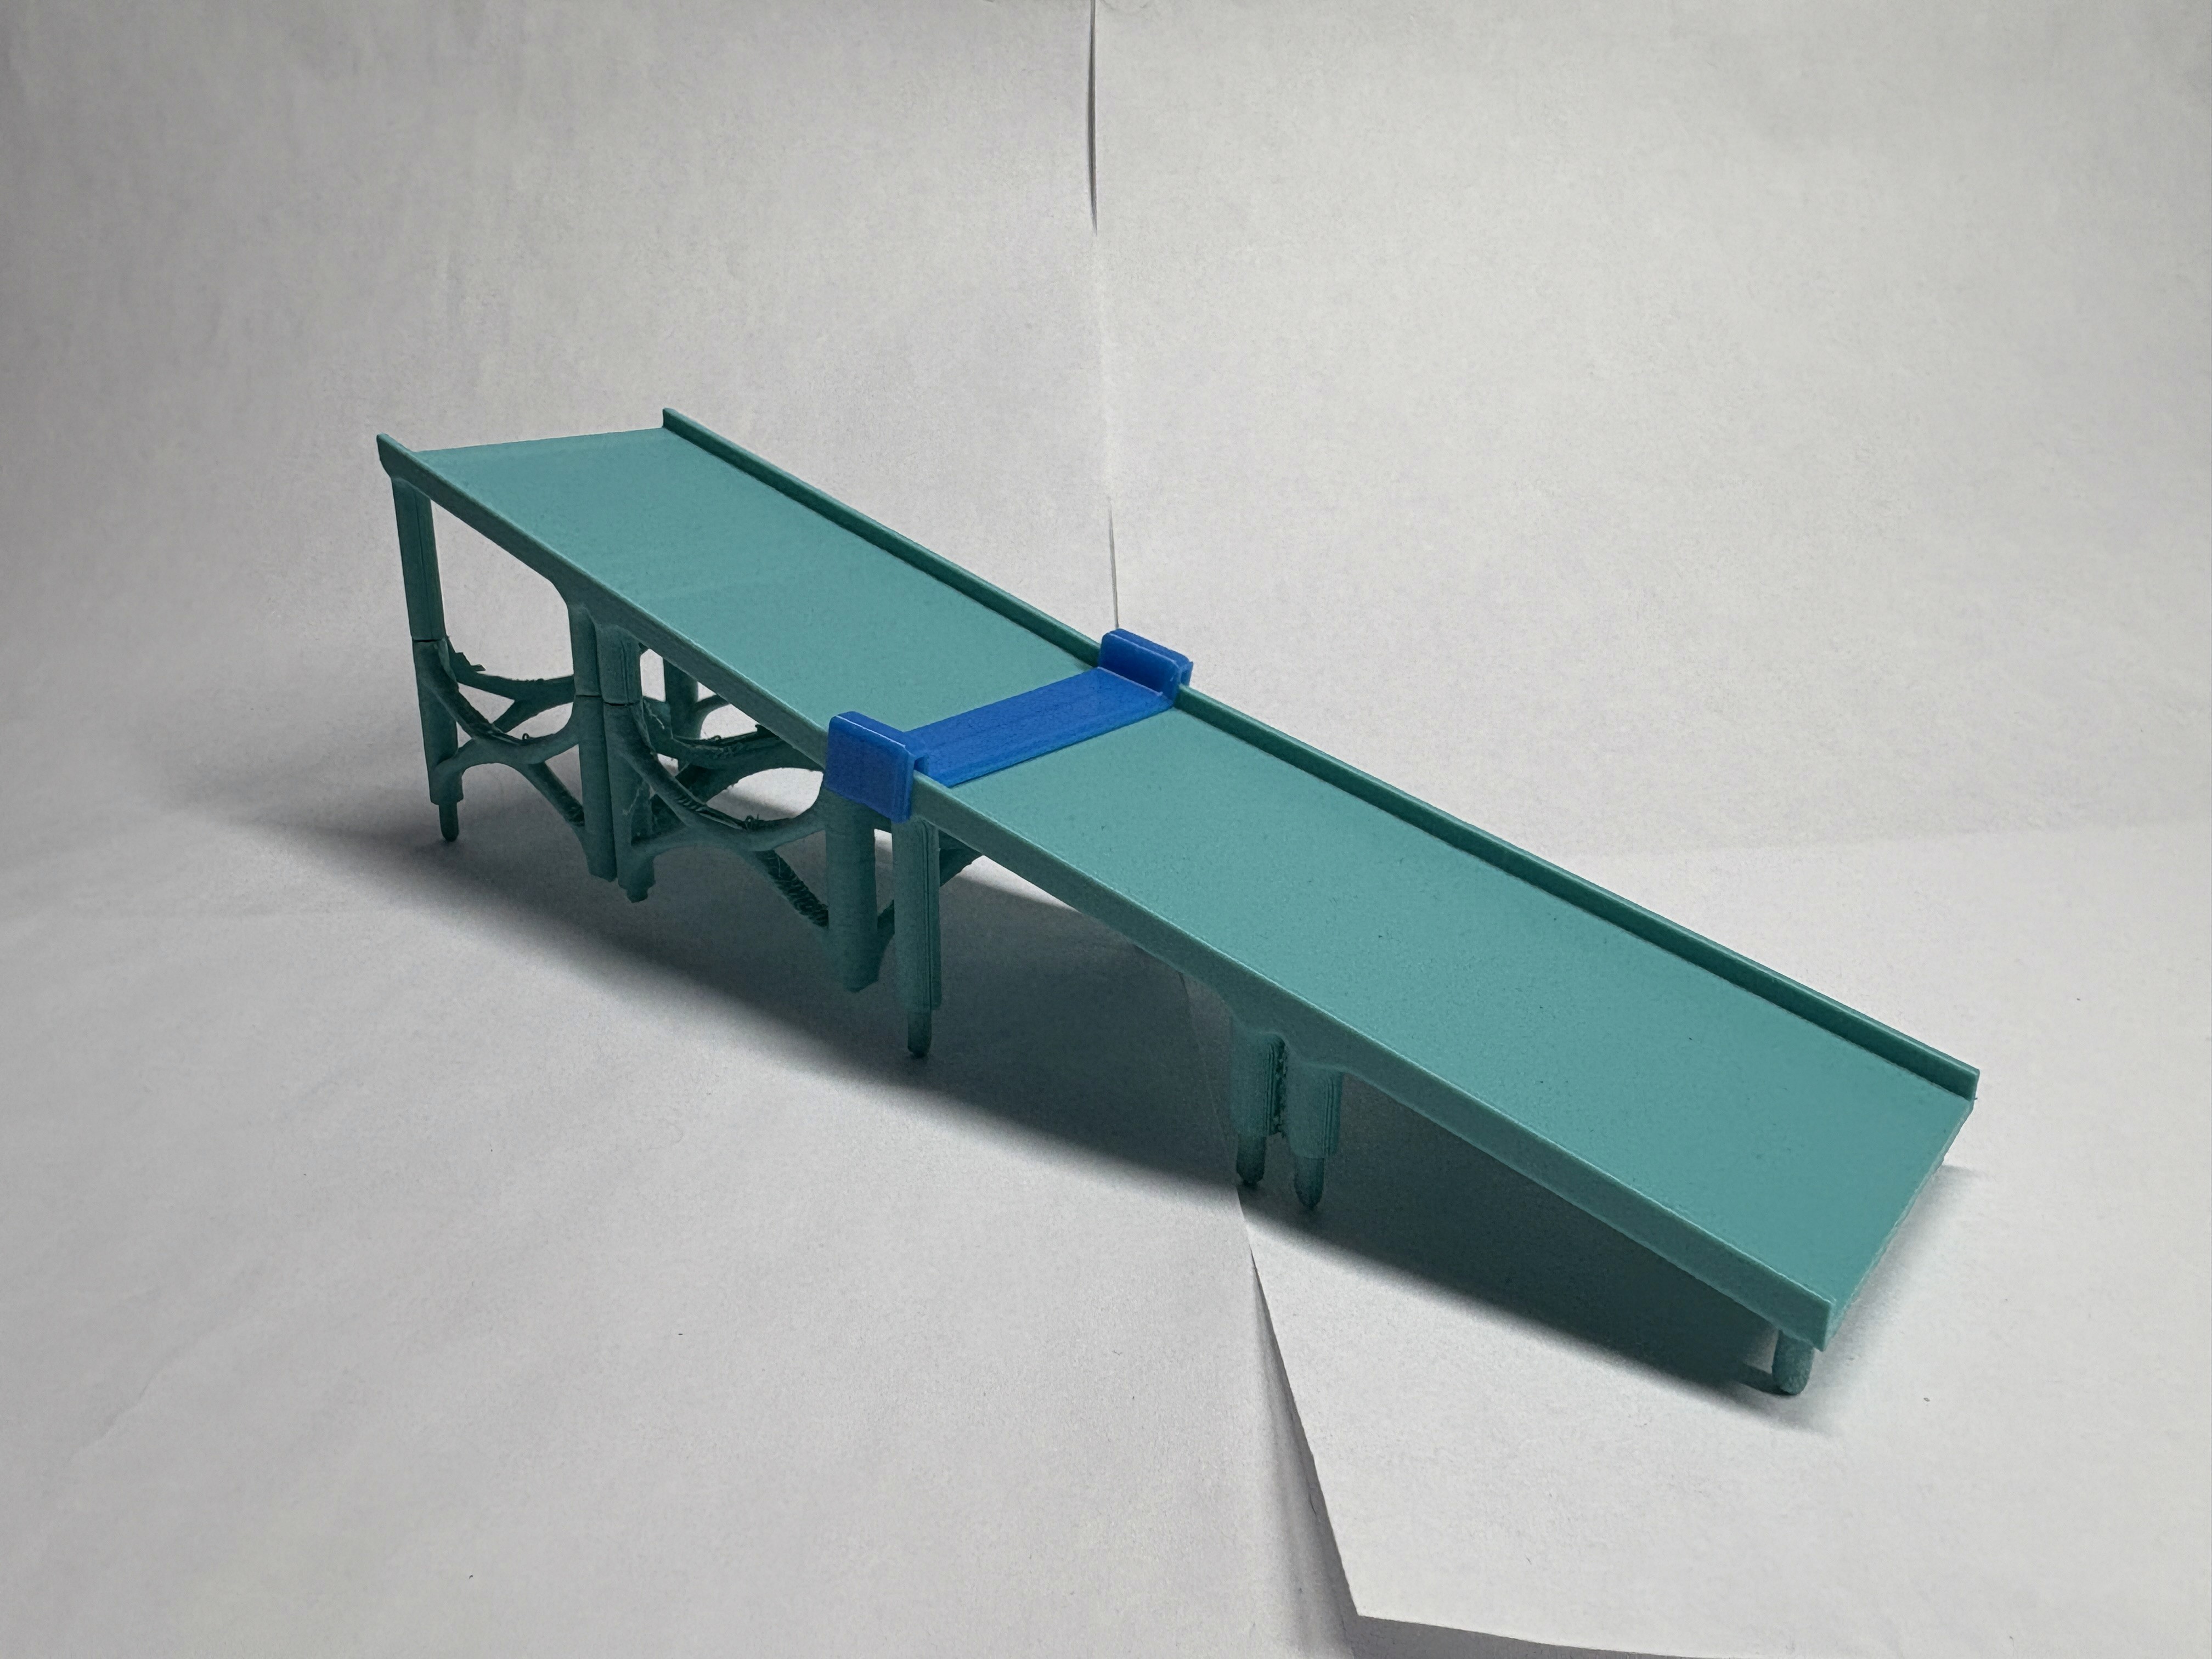
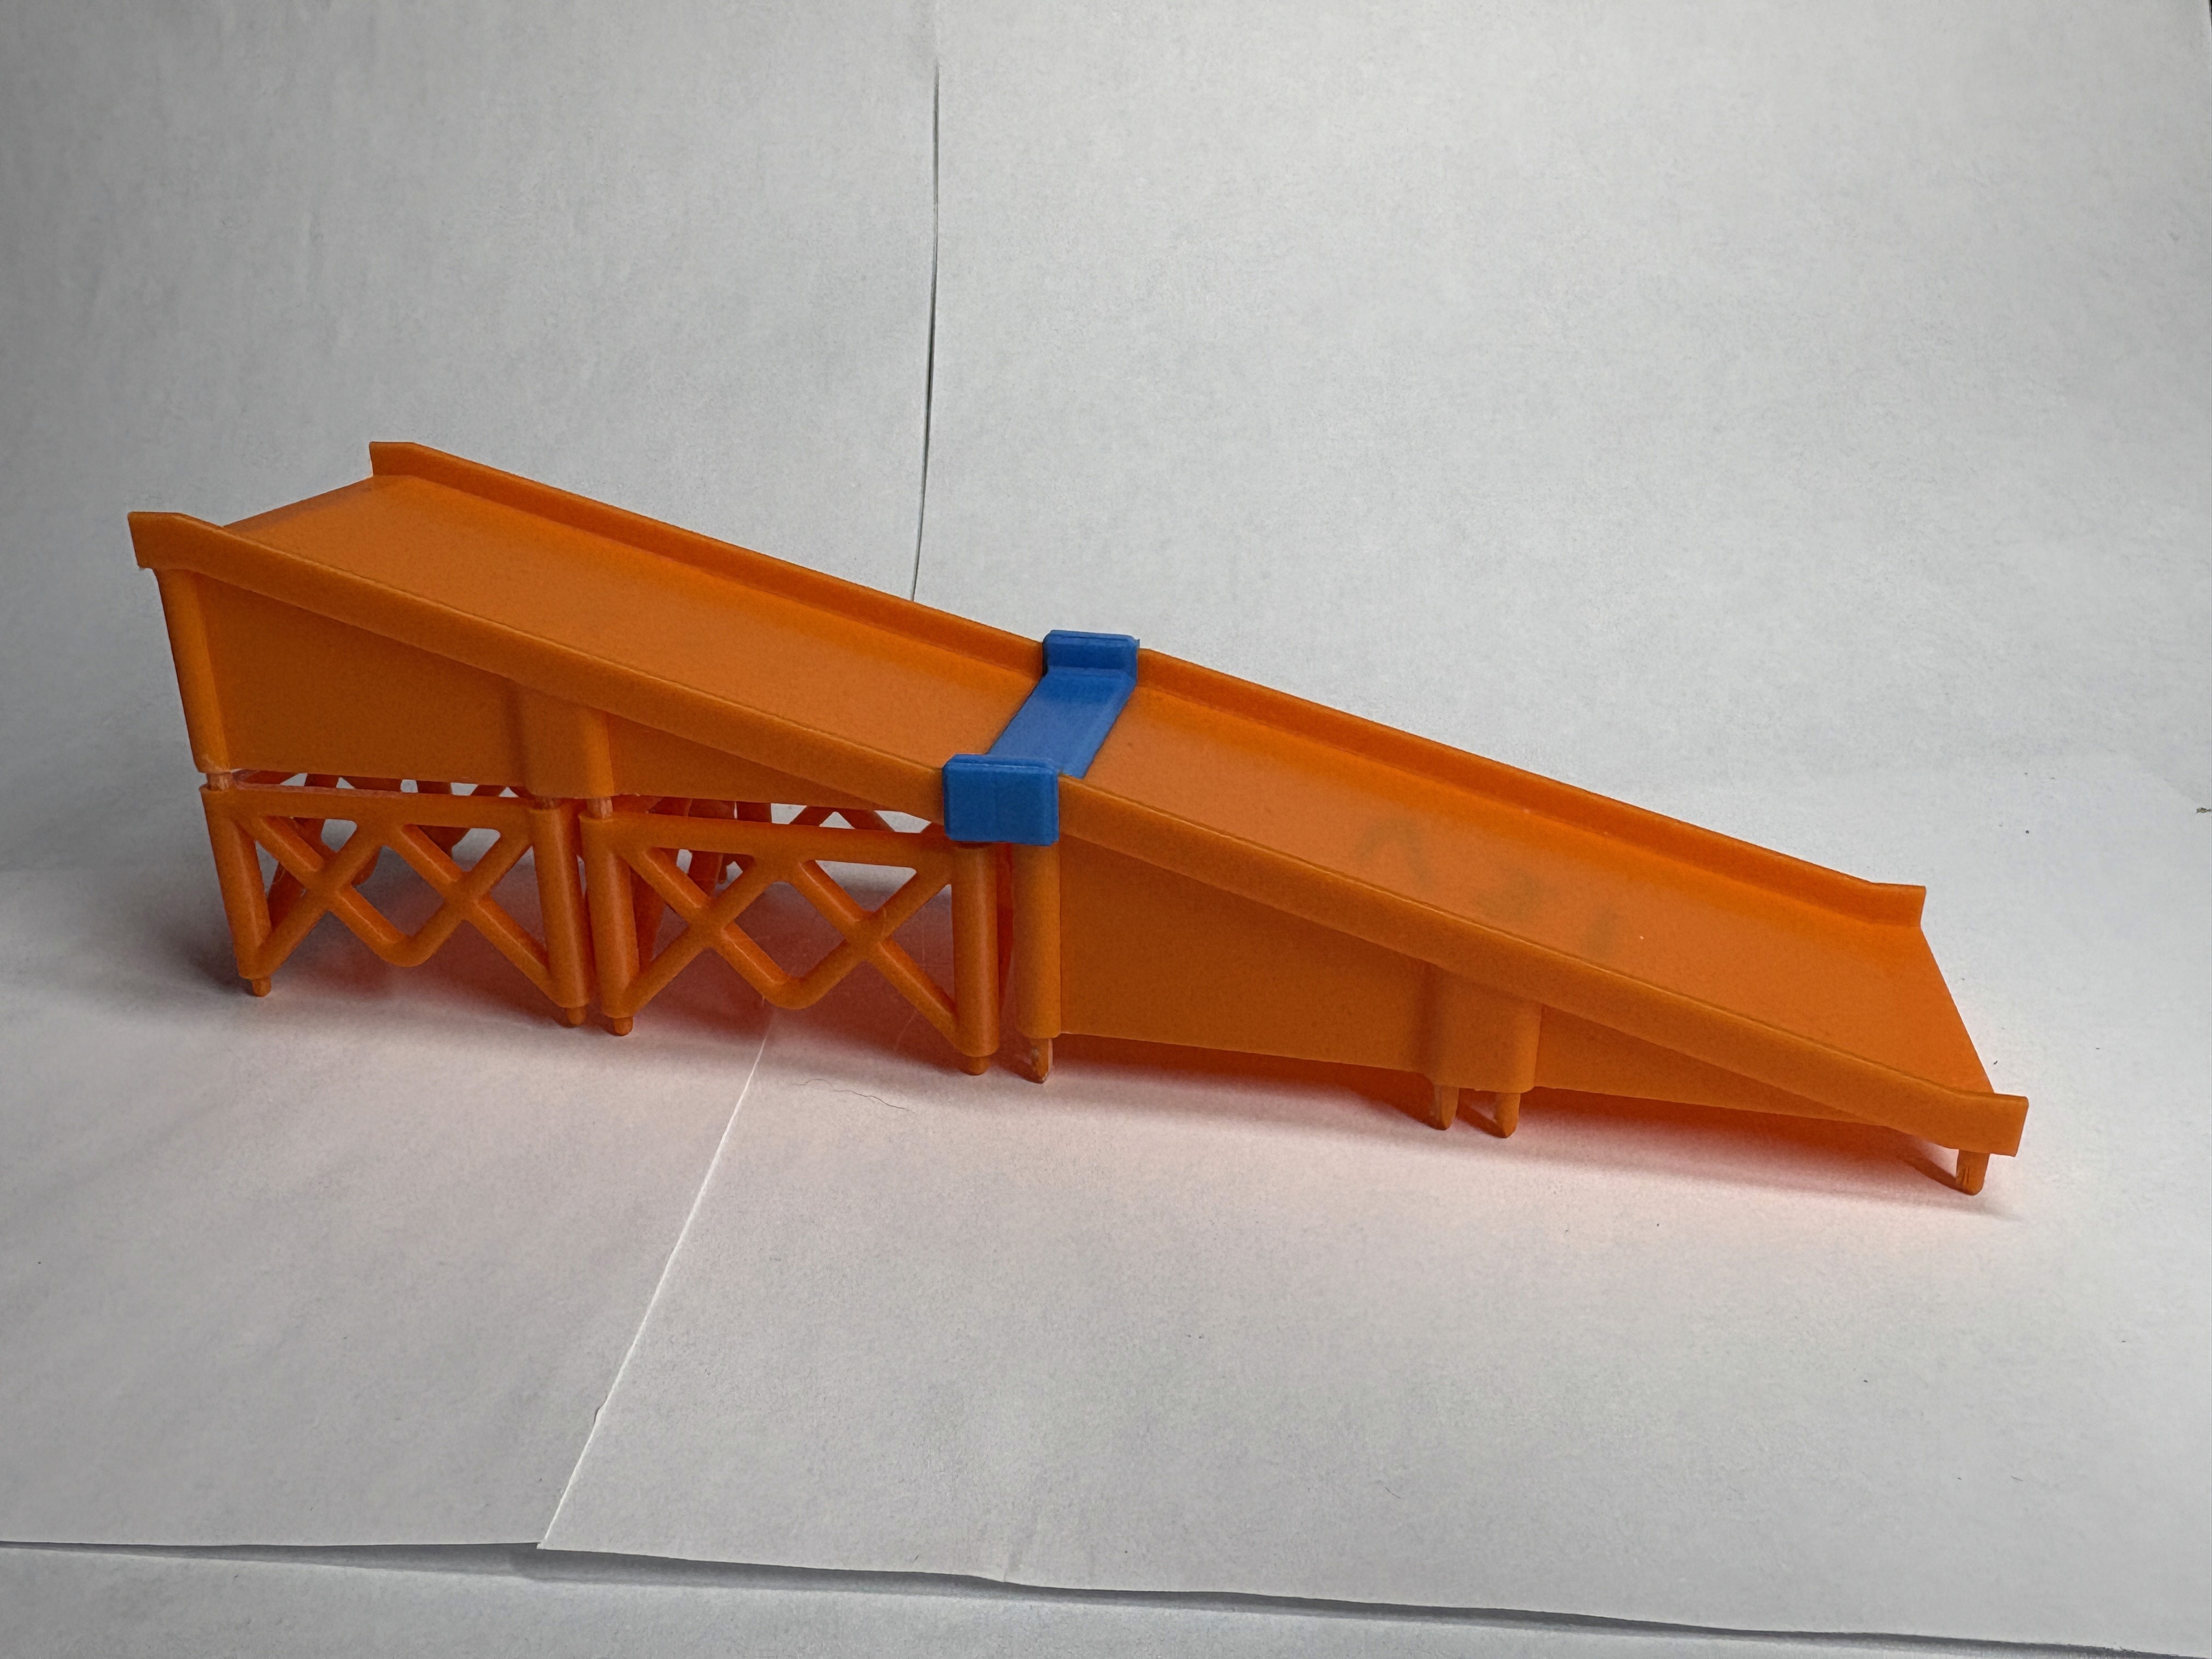
The concept I pursued was simply parts that connect via peg & hole and stack up to support slanted duct pieces to carry the water downhill.
I started with a TPU gasket in attempt to seal two duct parts together. It was extremely difficult to connect.
To try and solve that issue, I added flat sections where the connector part would go, but it was still difficult to connect.
Worse, water would pool up at the TPU gasket. Seen here is a test with the 90 degree turn part with its own weird TPU gasket, which caused water to pool even more because it wasn't sloped down.
Eventually, I chose to scrap the gasket in favor of a substantially simpler overlapping design. There's room for improvement, but since the base catches spilled water, it worked for my purpose.
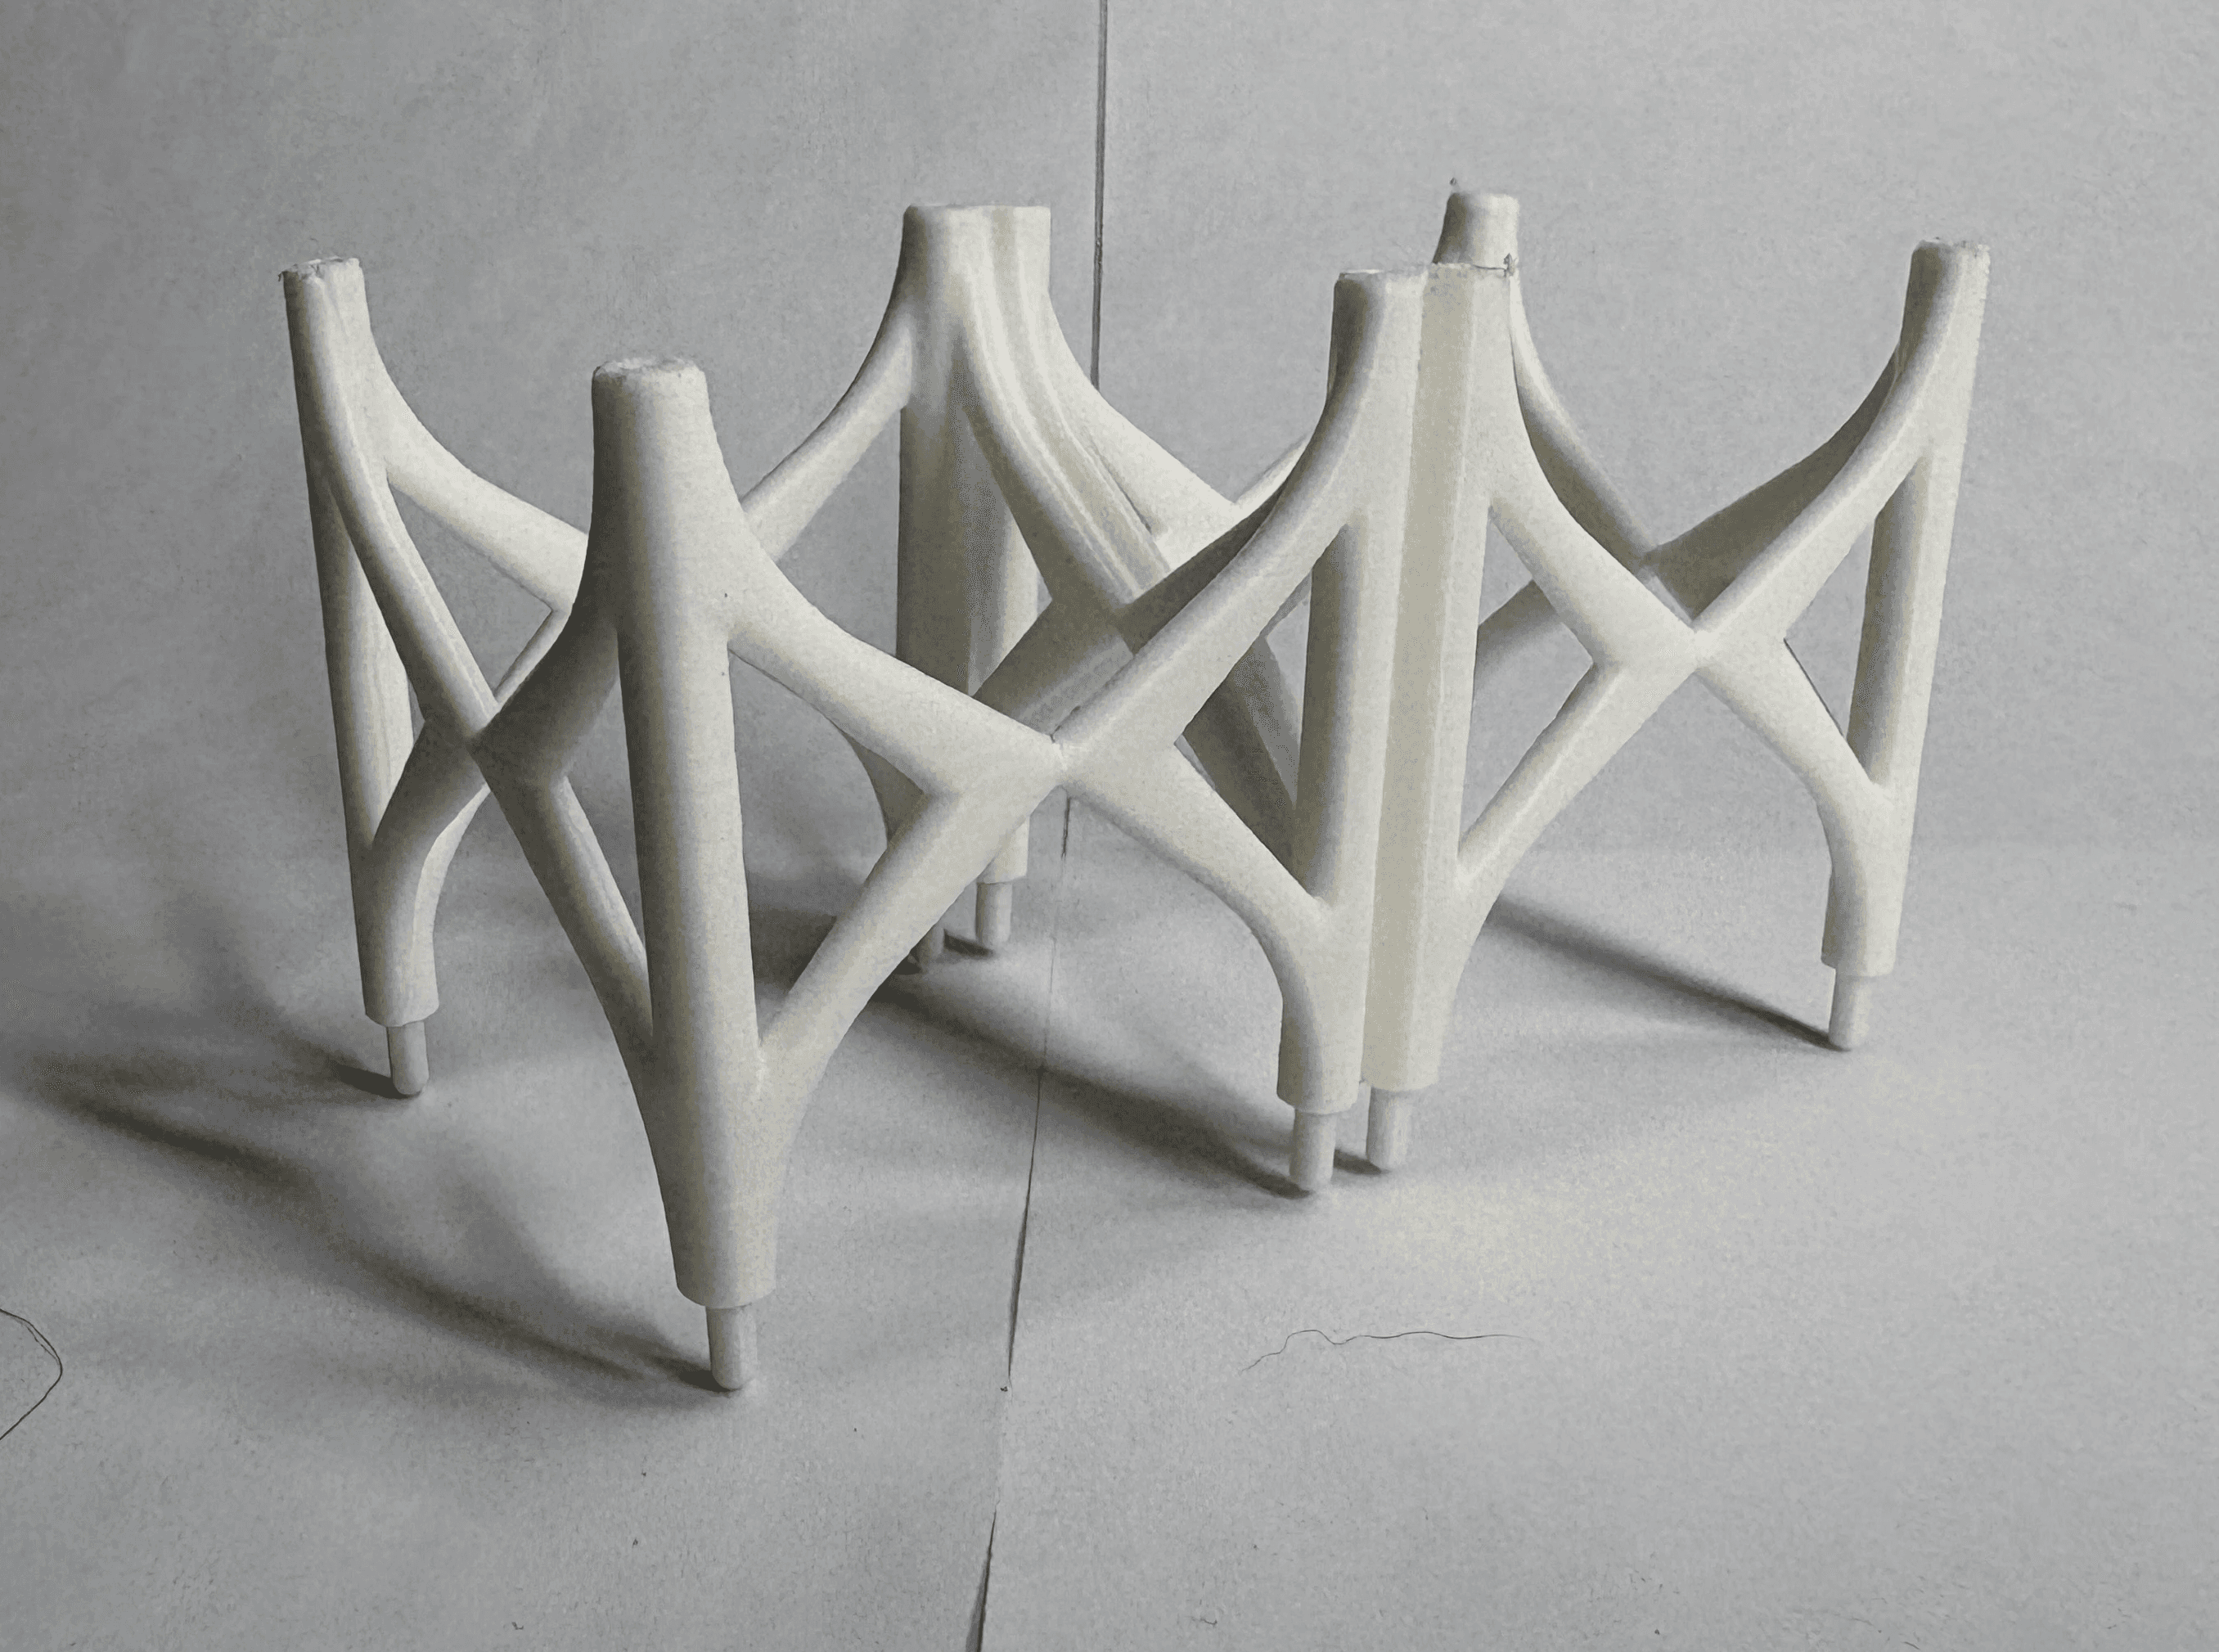
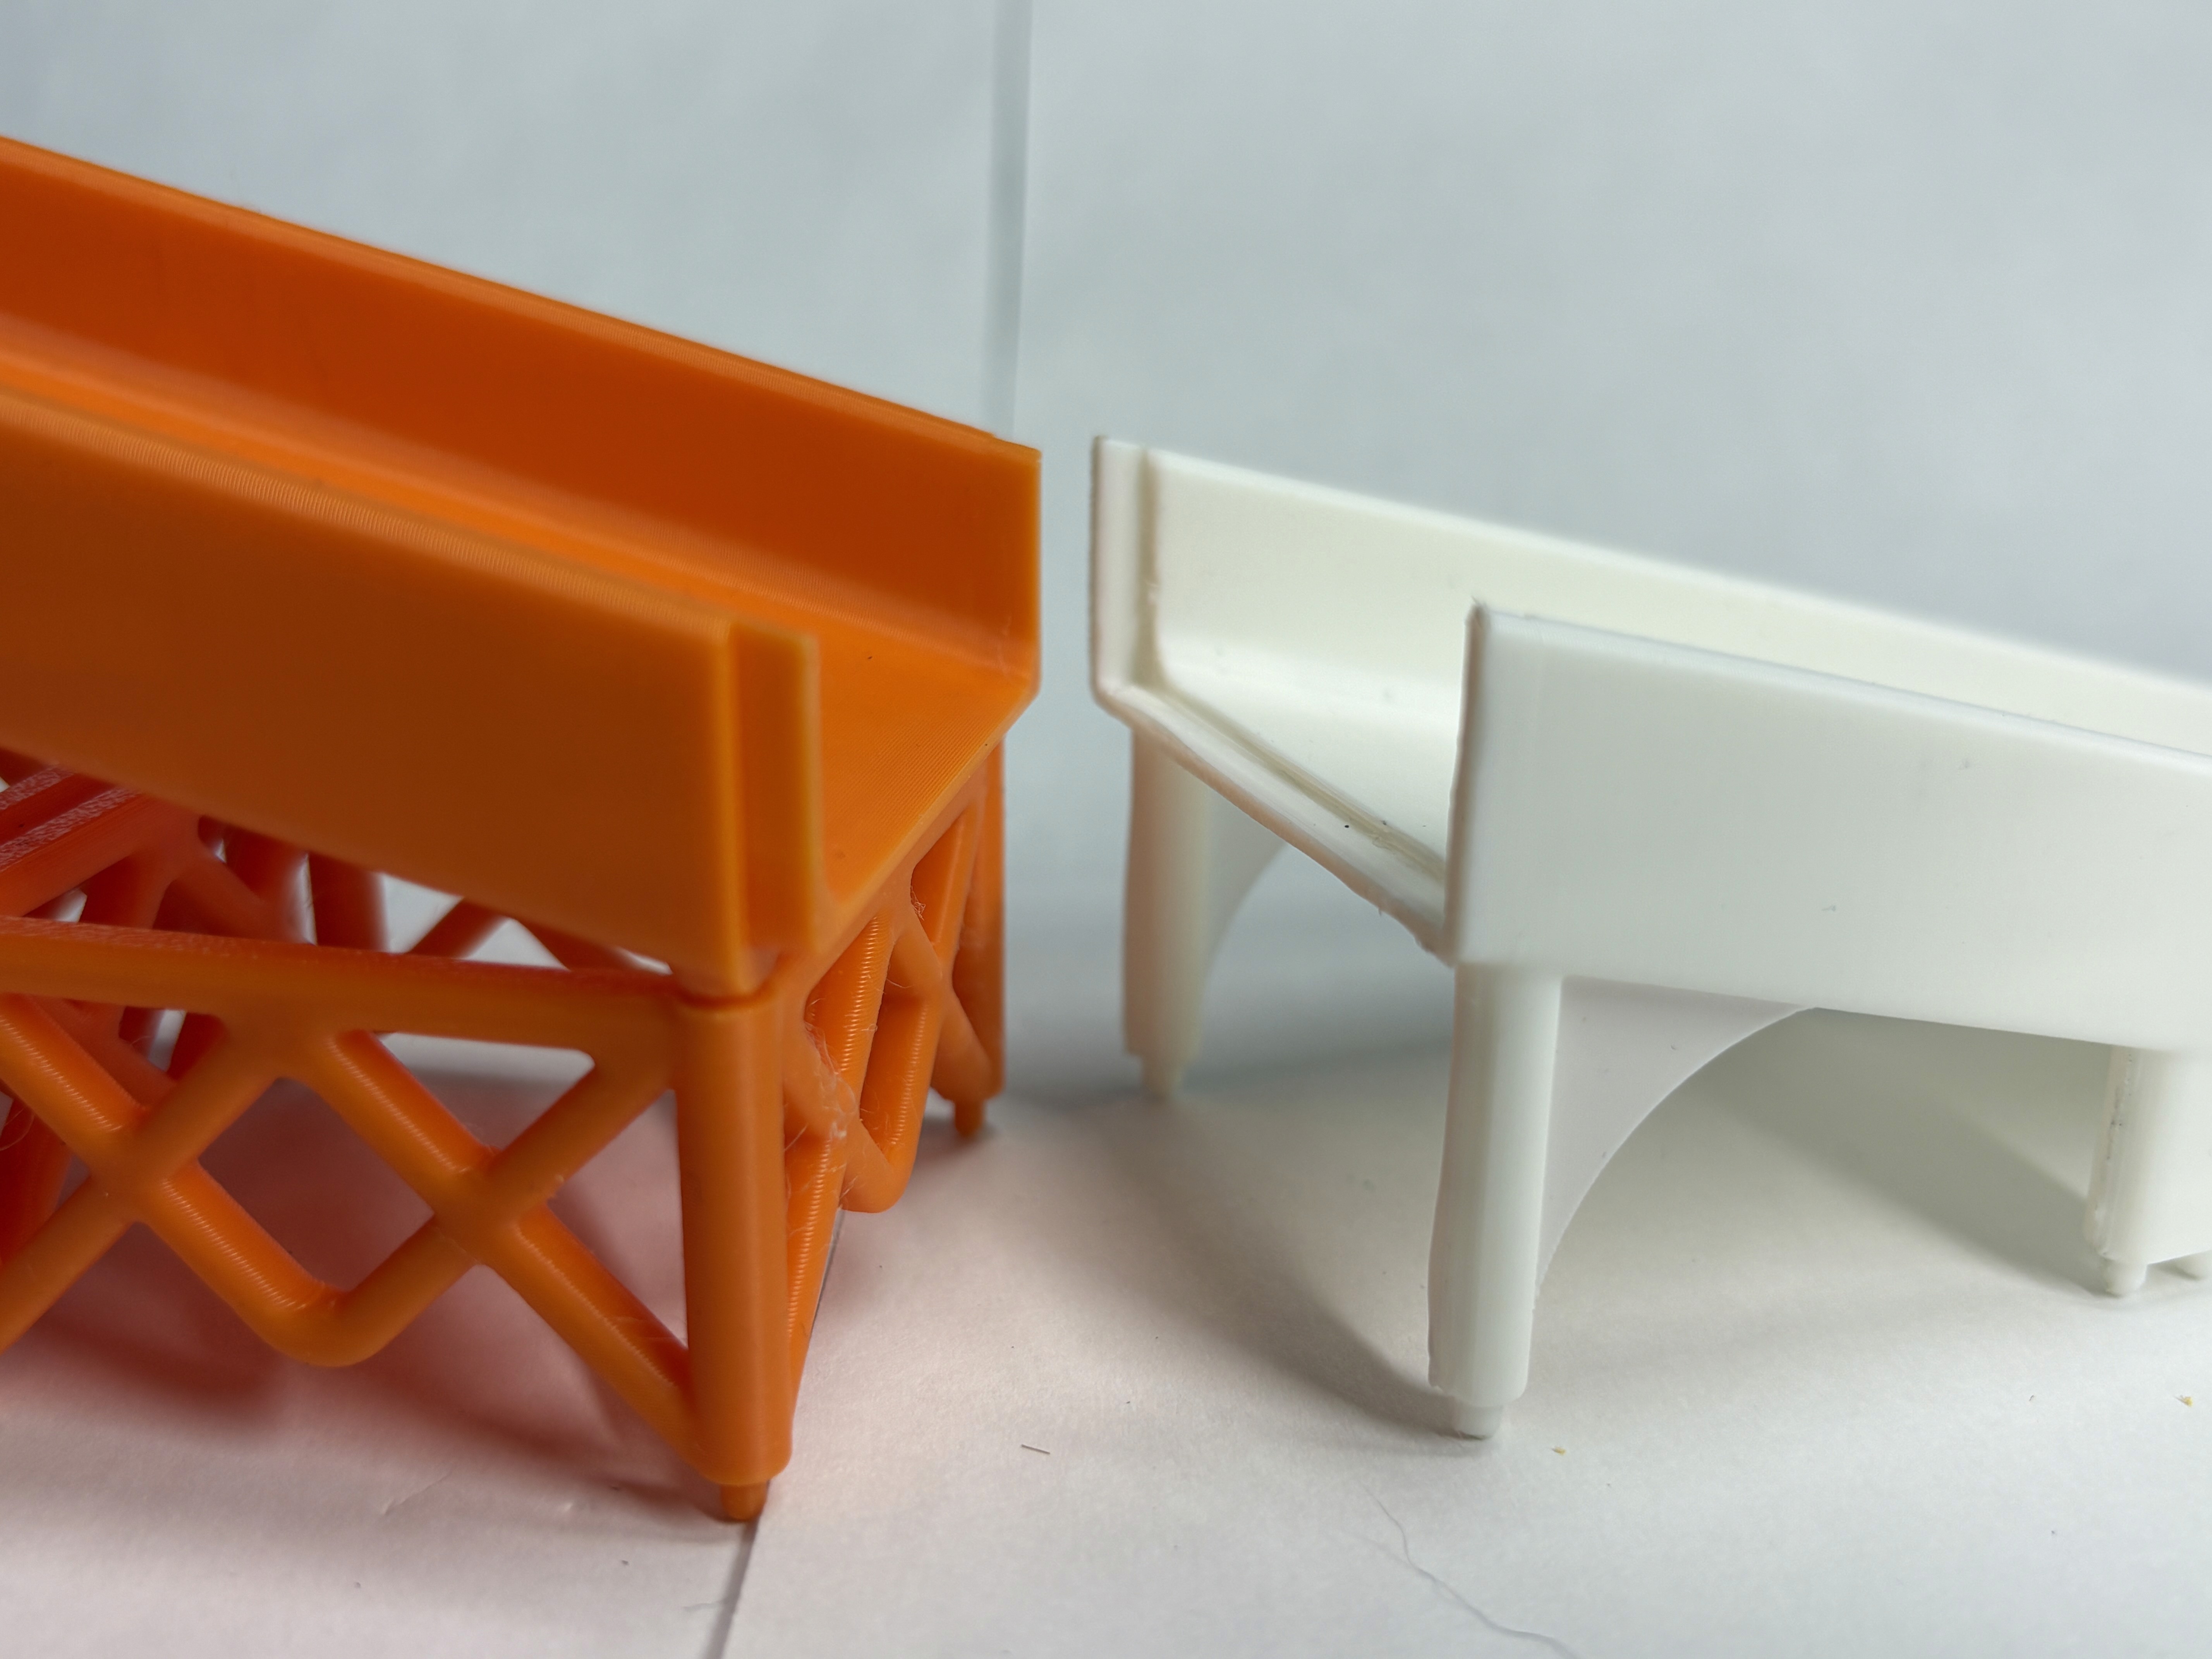
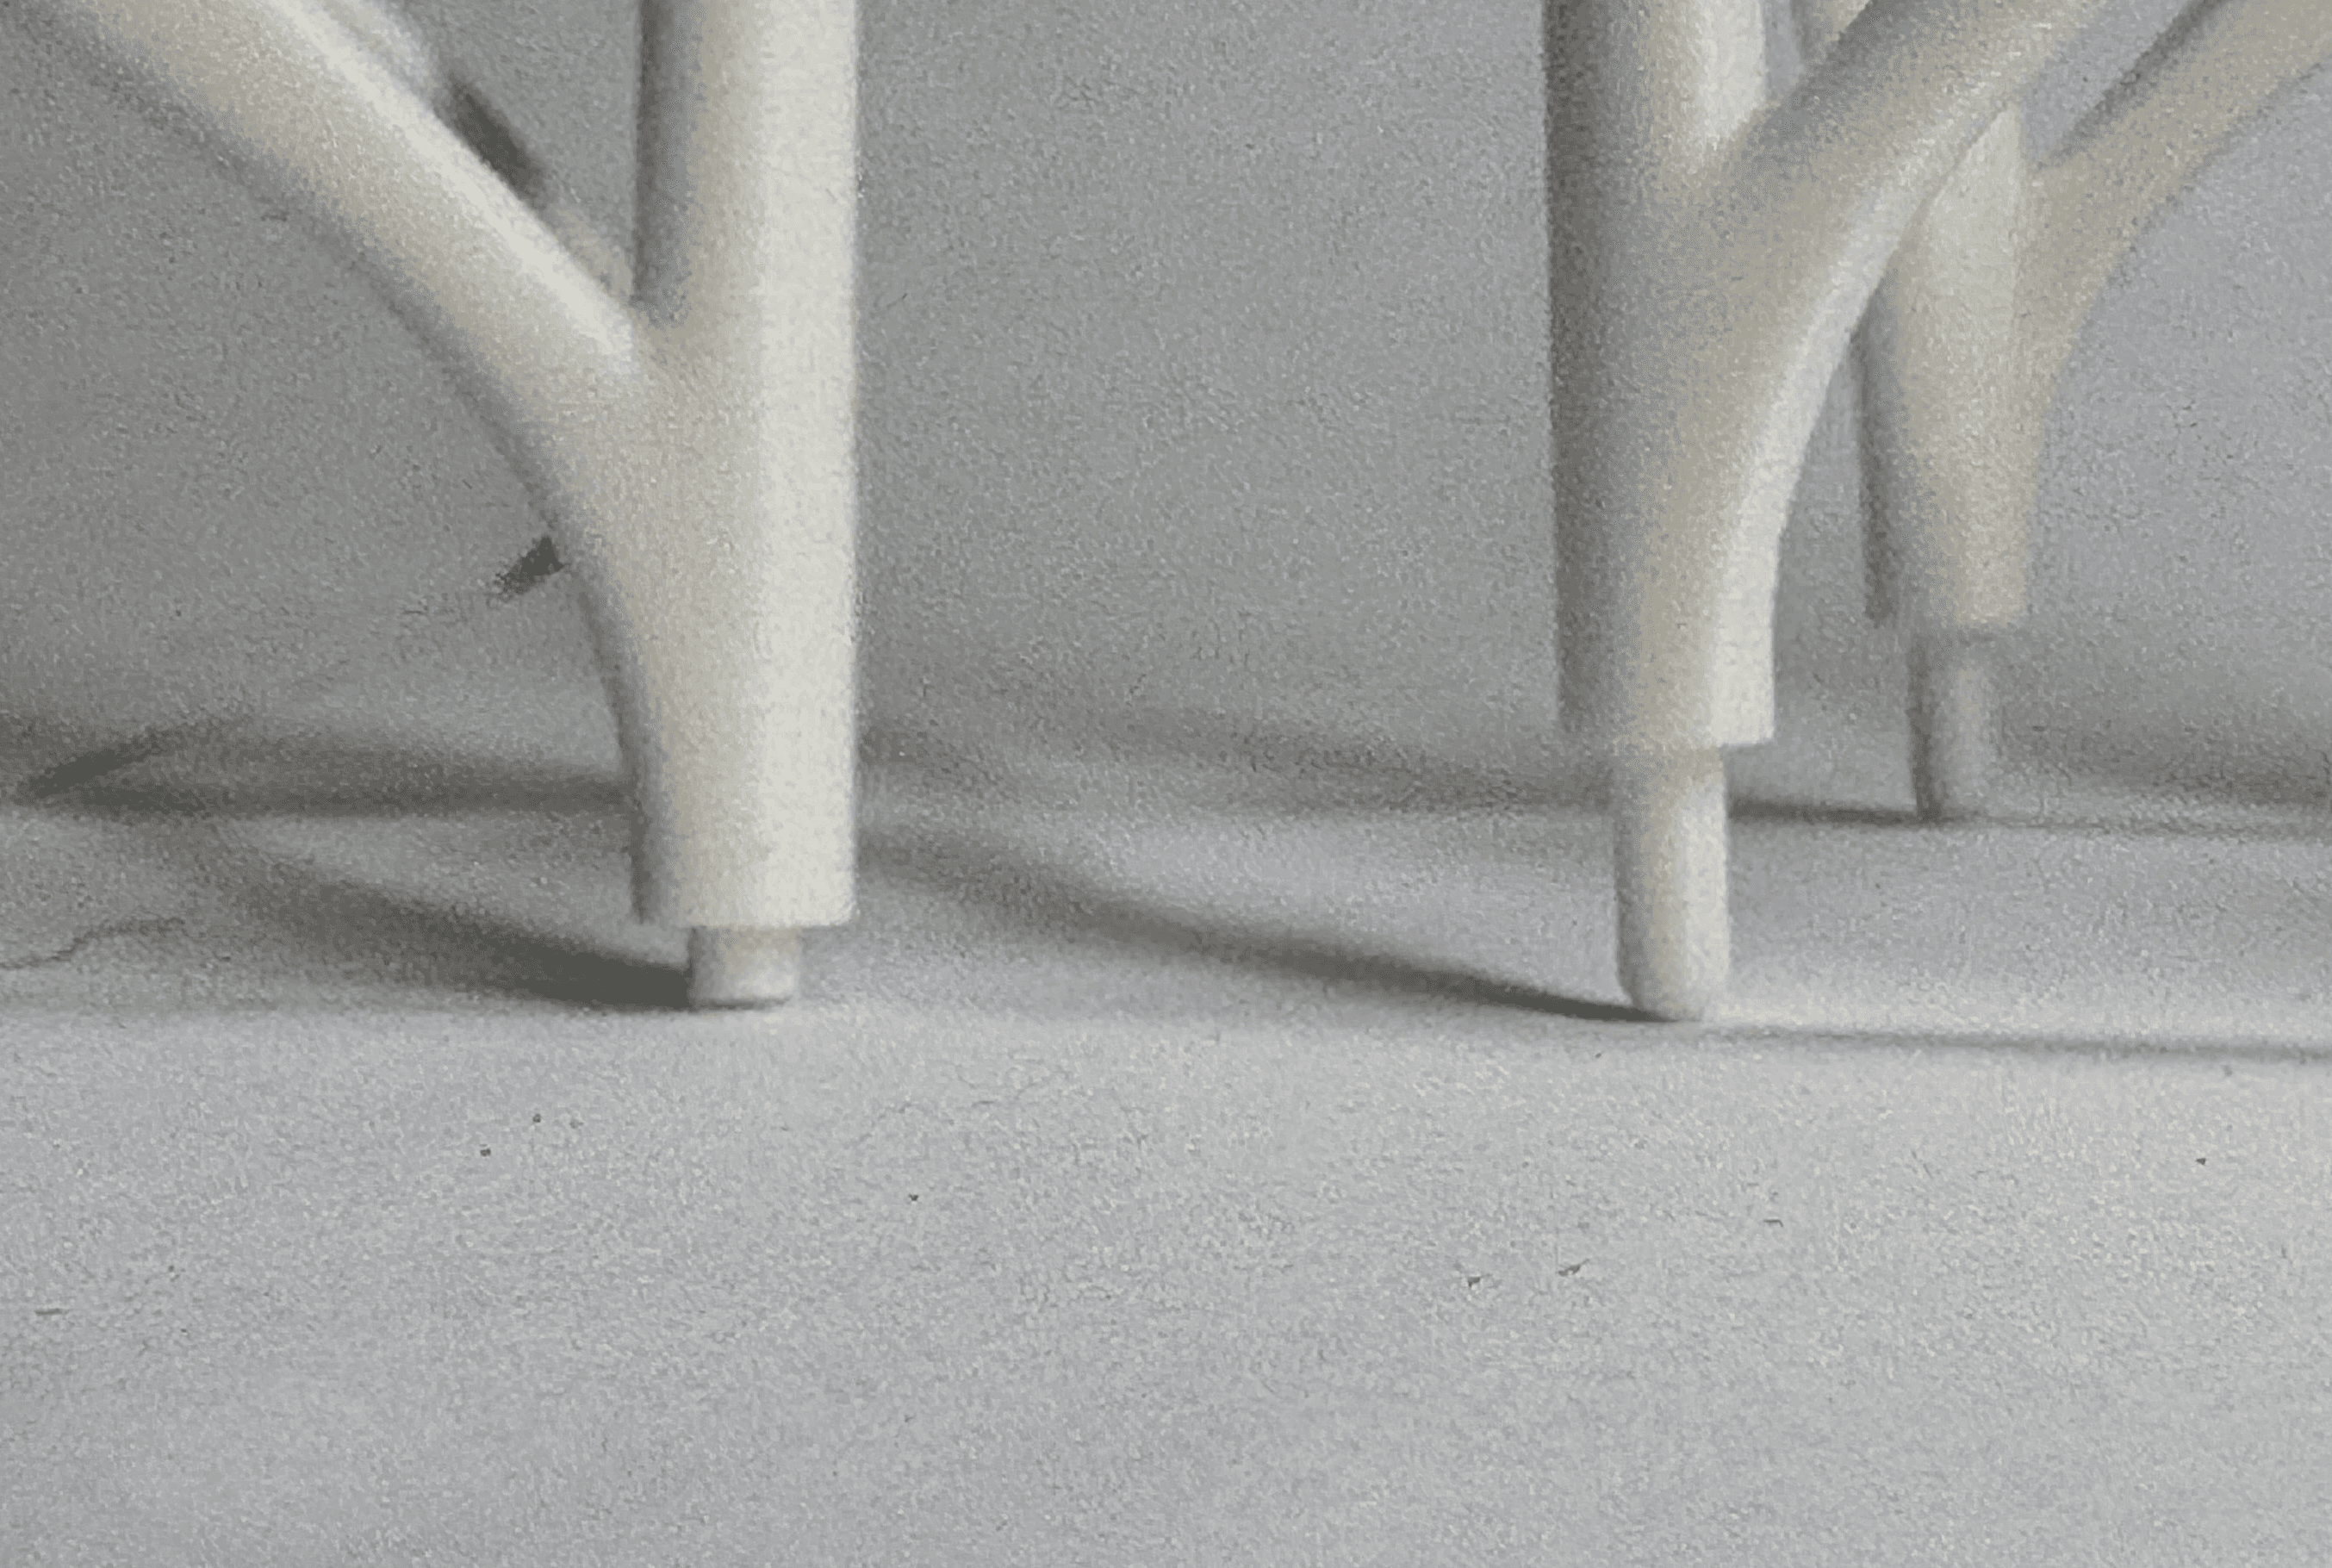
For the support pieces, I started with this design because it printed well with no overhangs over 45 degrees…
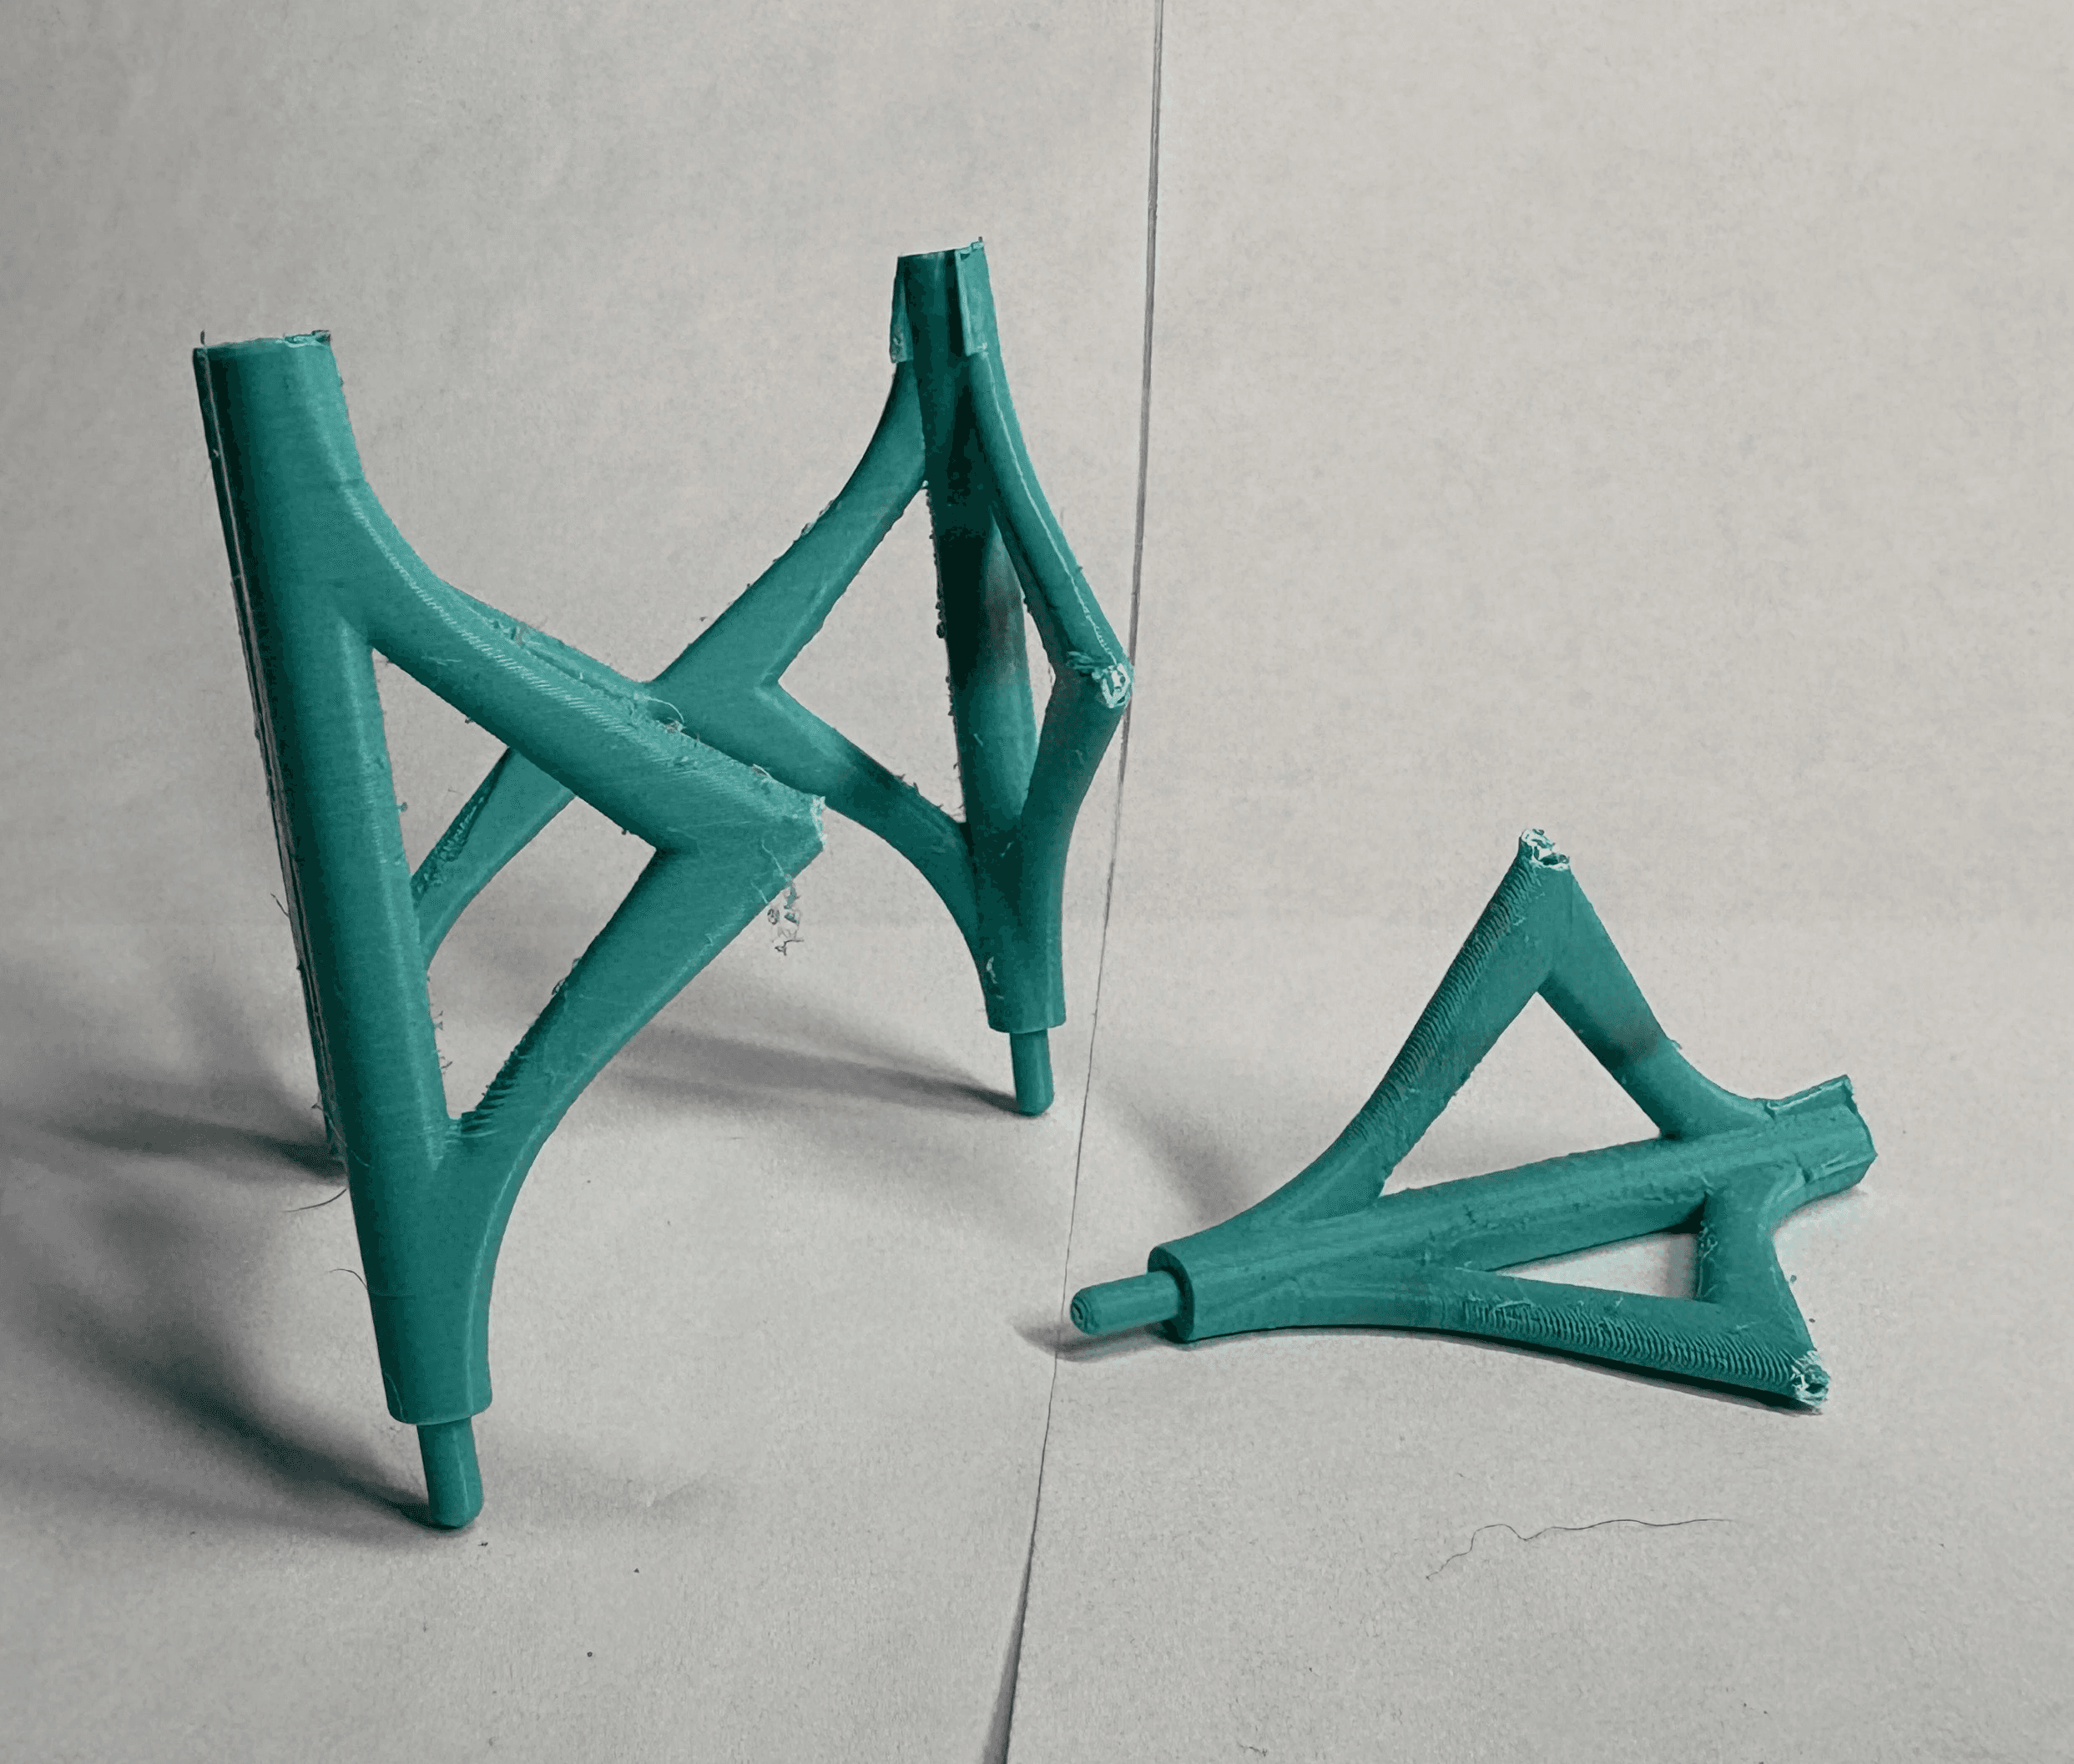
However, it was (obviously) extremely fragile.
I switched to this design, which is a bit more utilitarian looking, but prints with no overhangs…

And looks decent when flipped over! This is definitely an area I would want to improve if I revisited this project.
This is another view of the original 90 degree connector. The advantage was that one part could face either right or left…
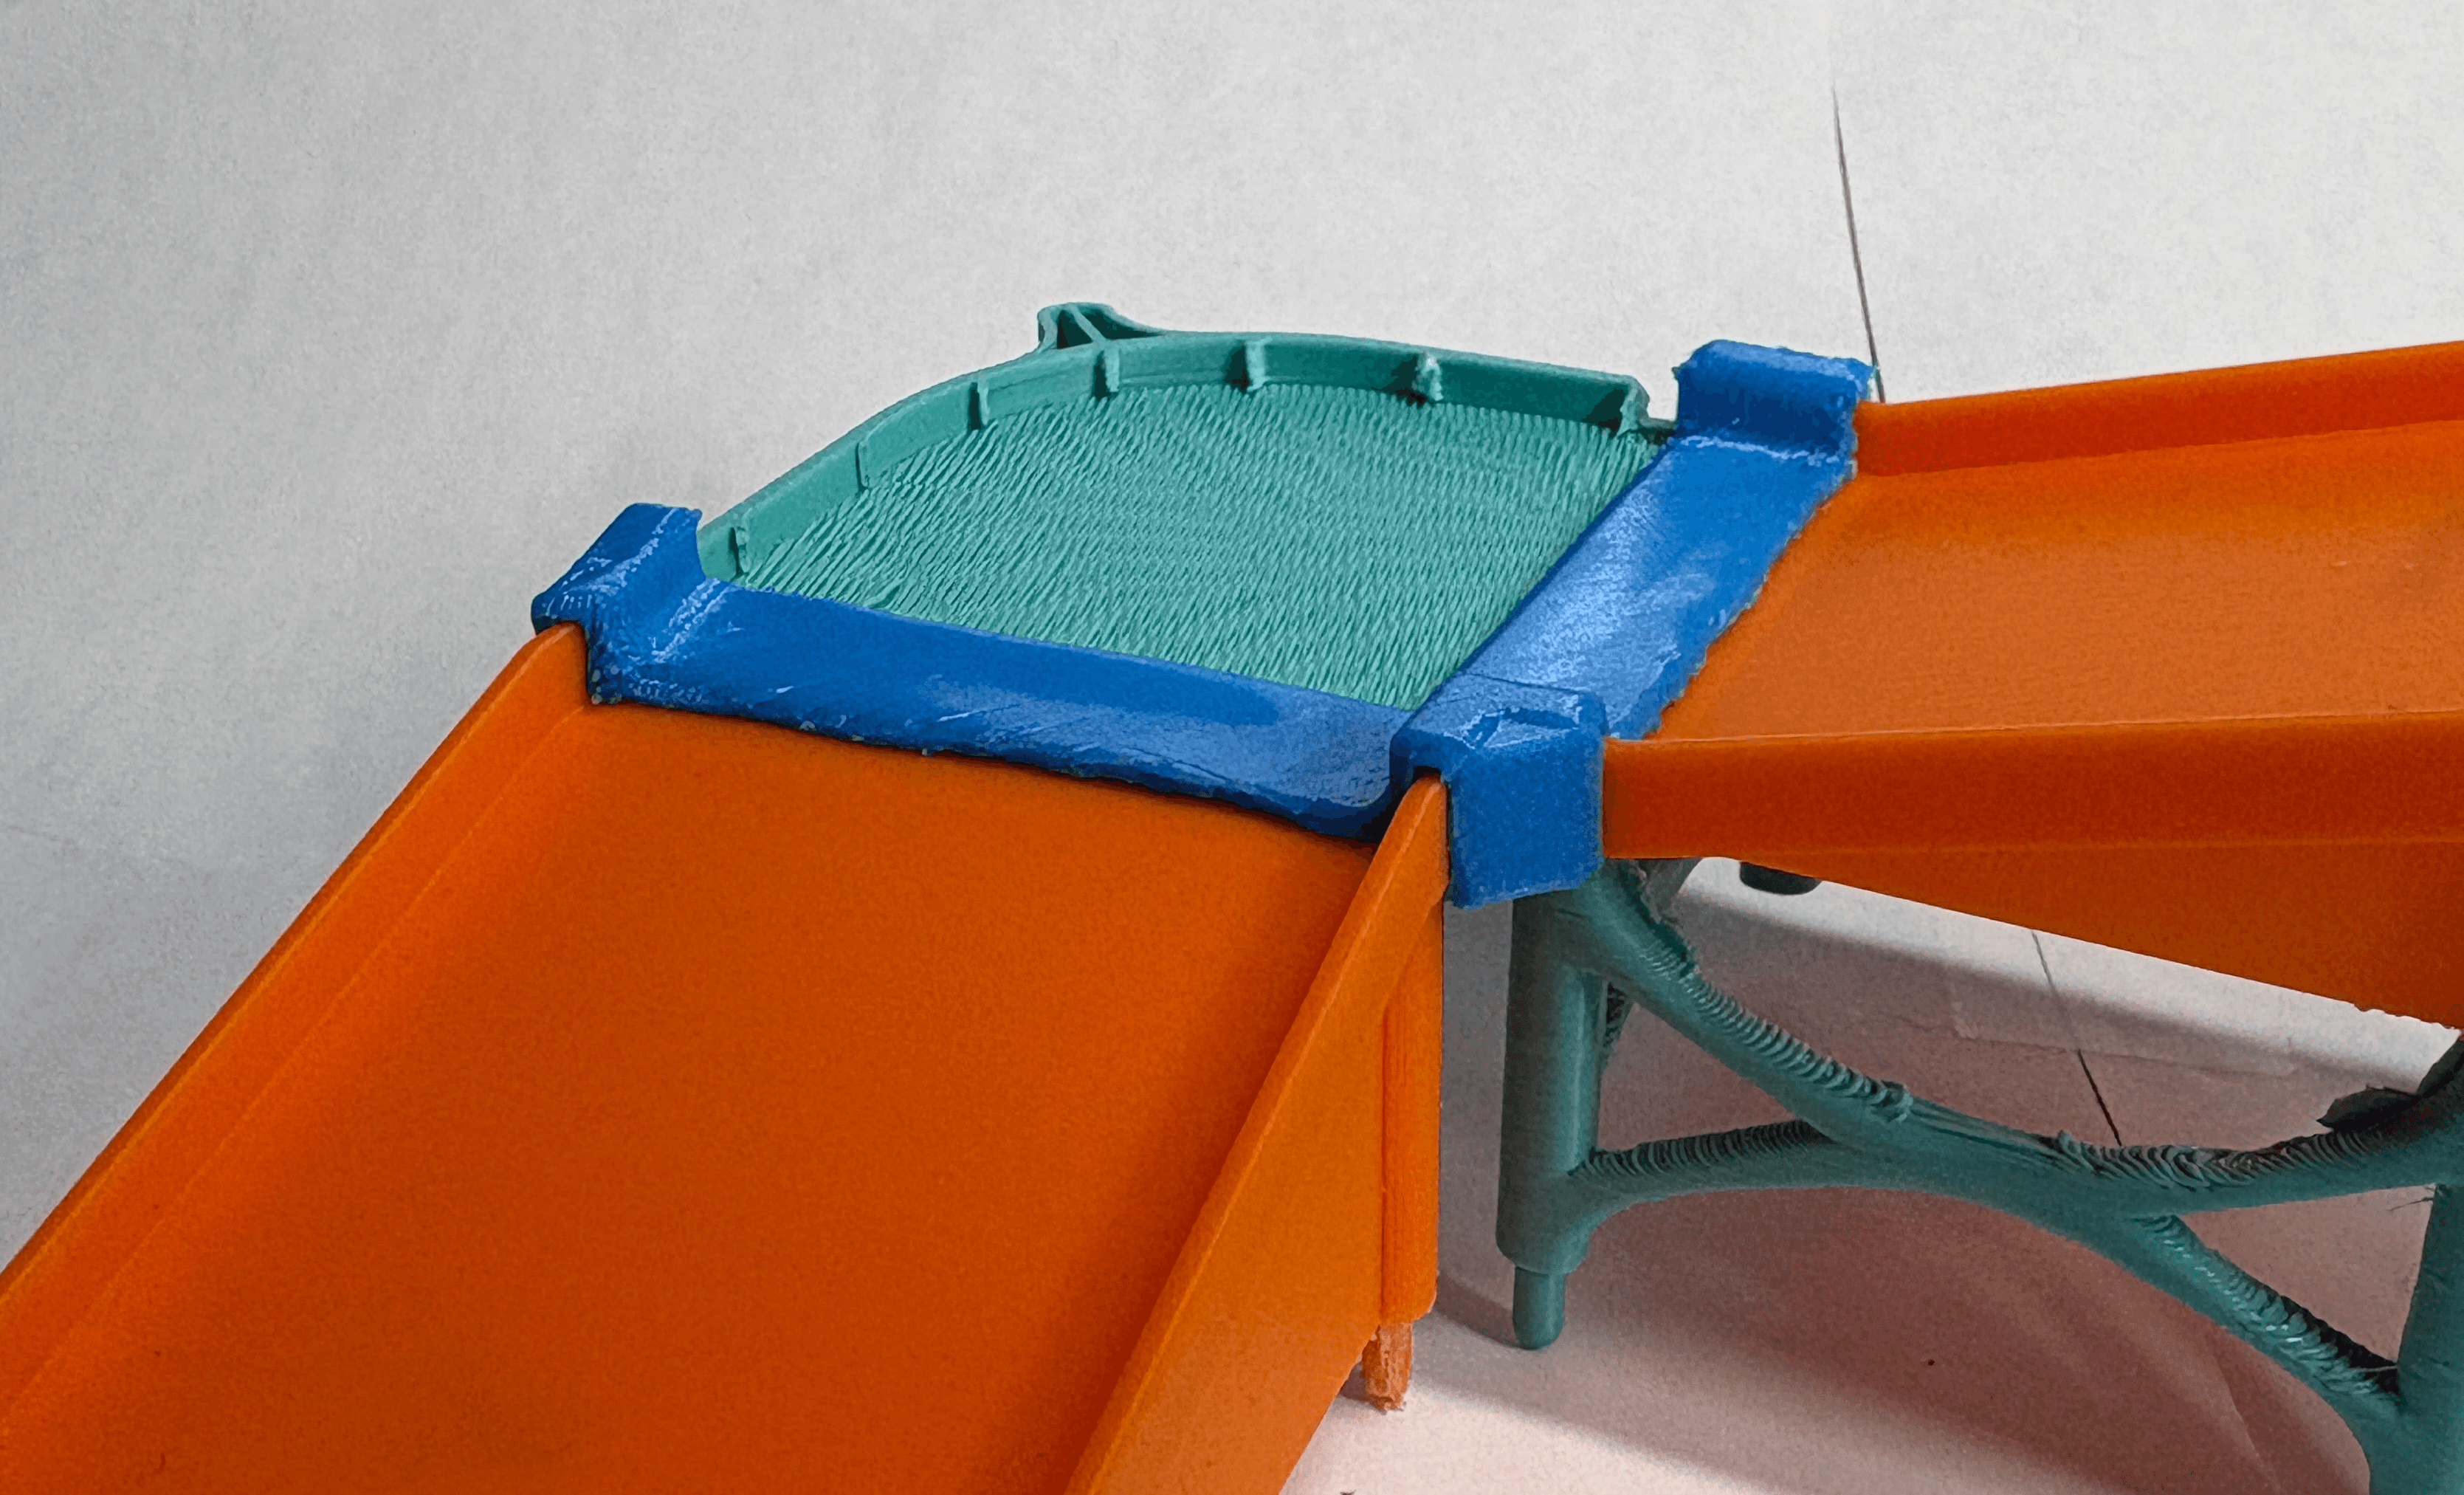
But, like previously mentioned, it was extremely difficult to get it connected to the gasket and it pooled water.
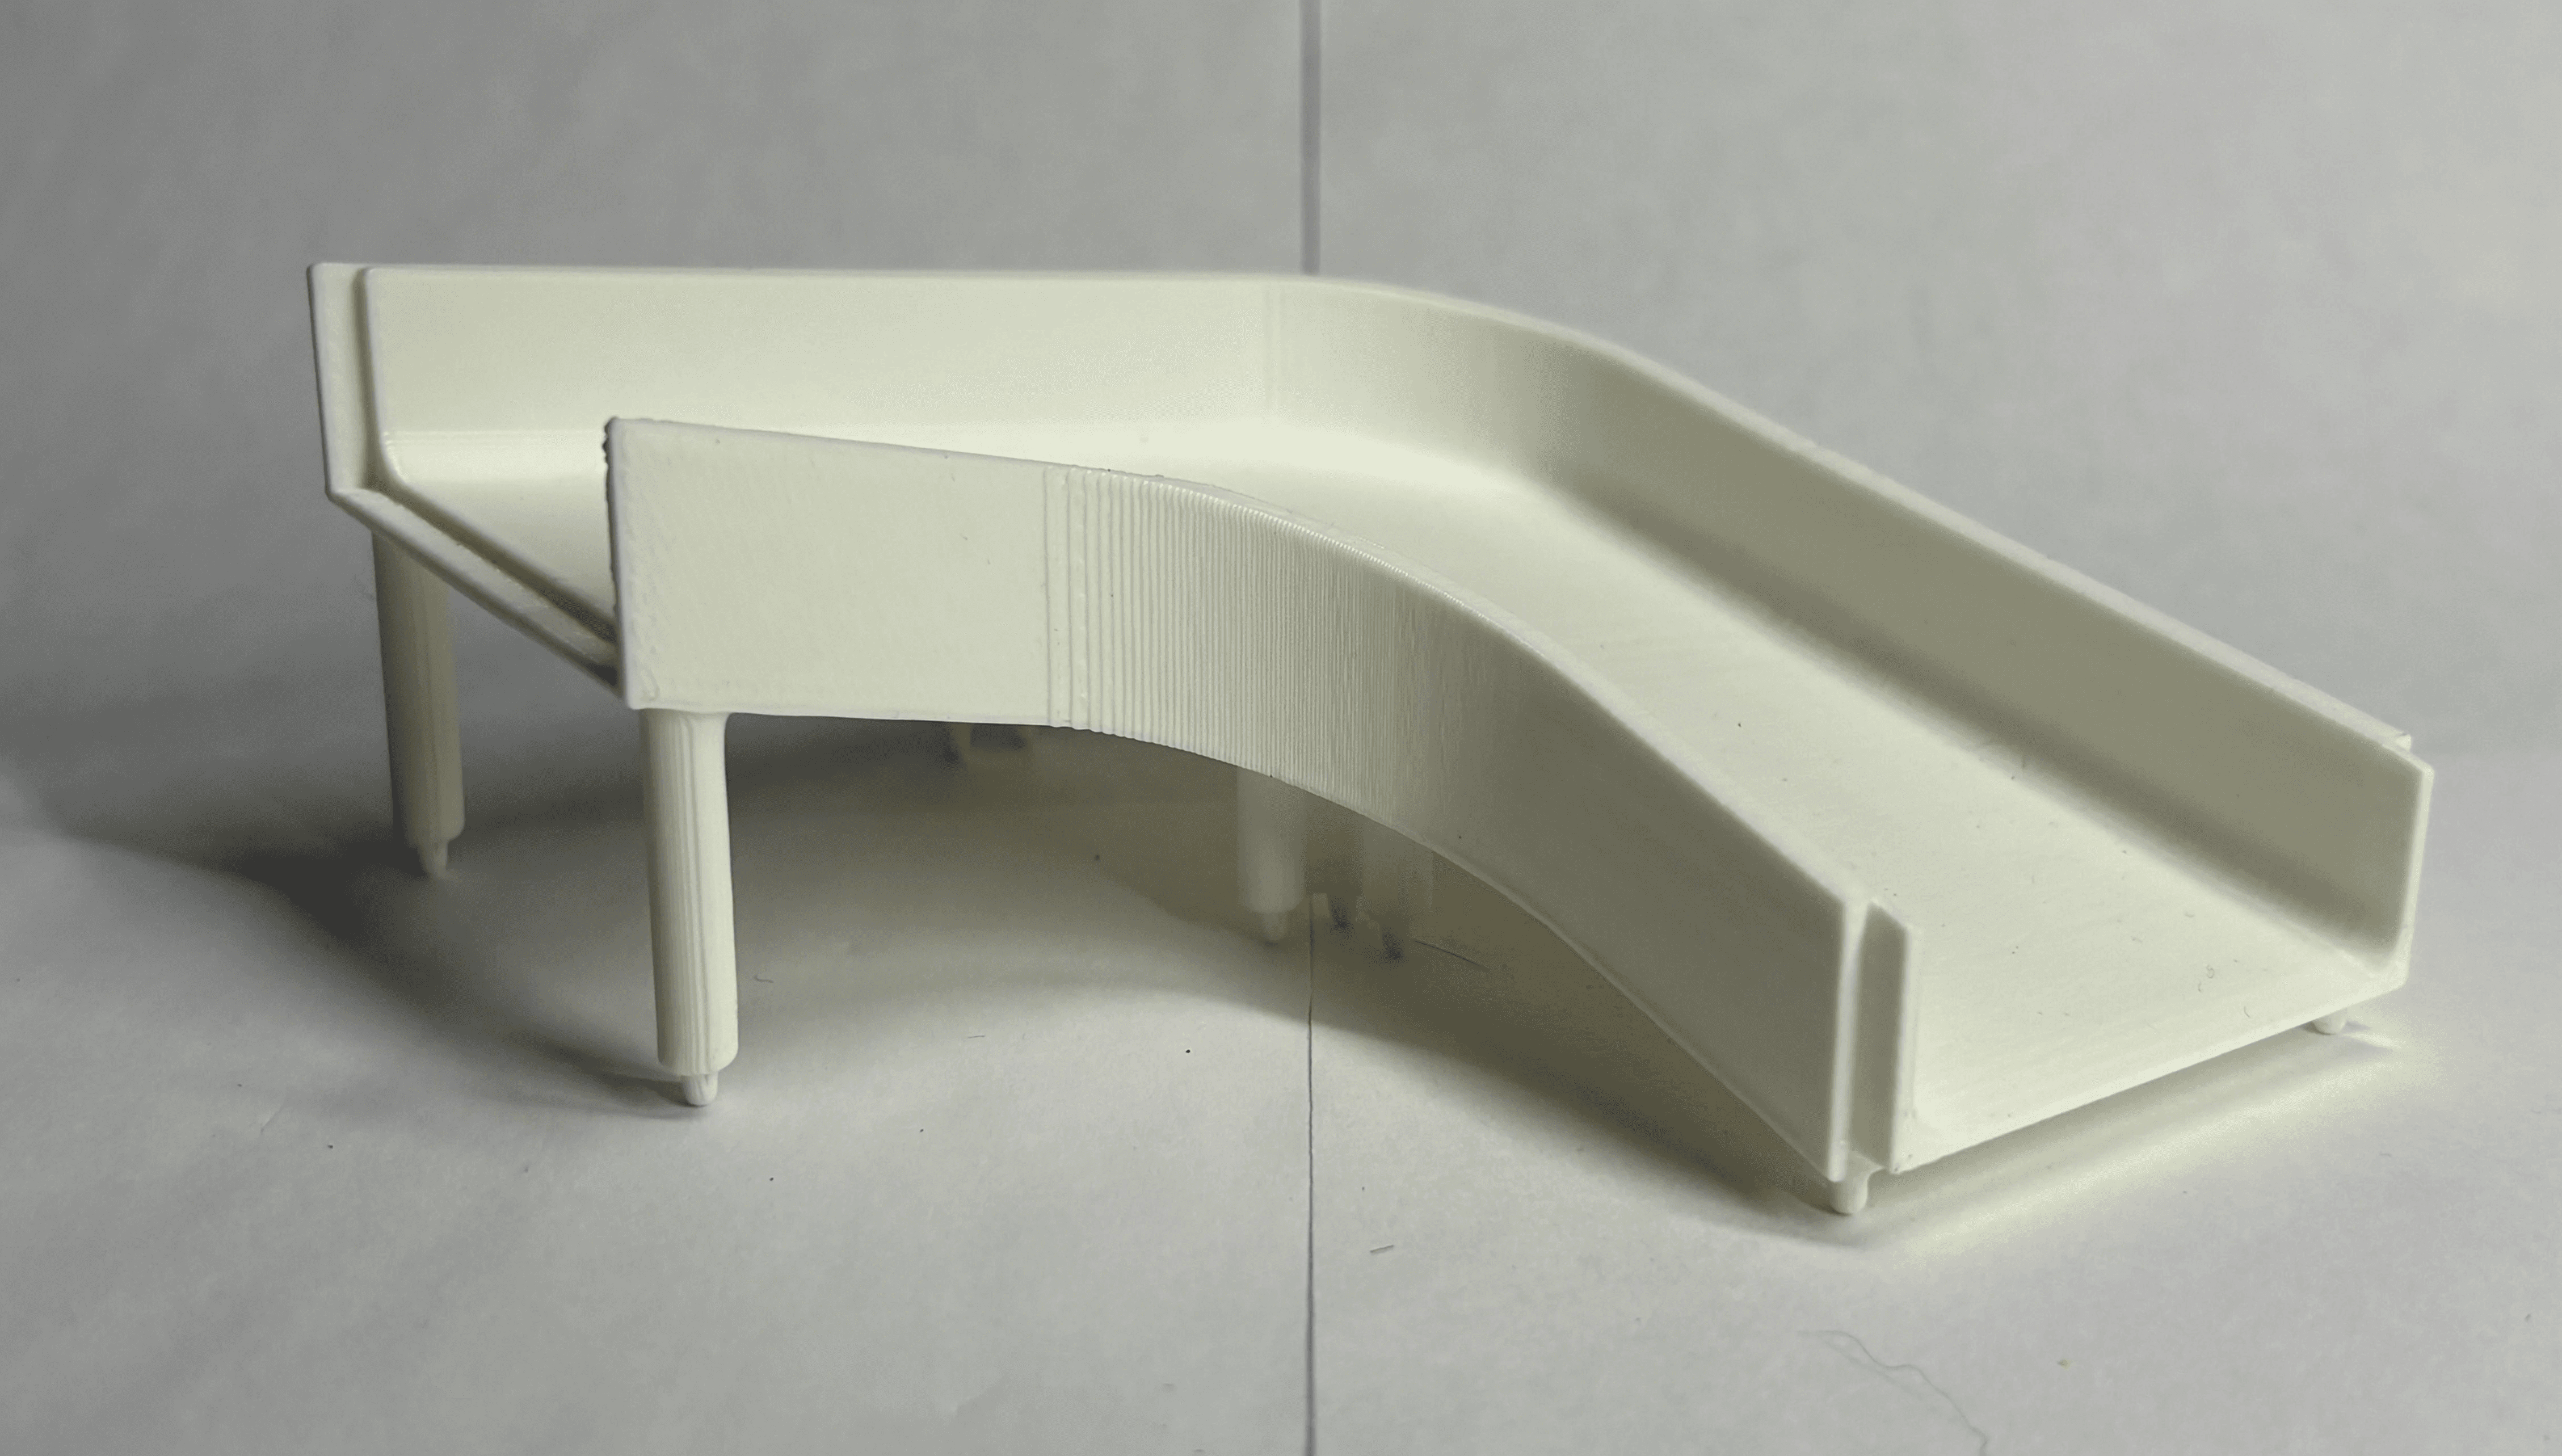
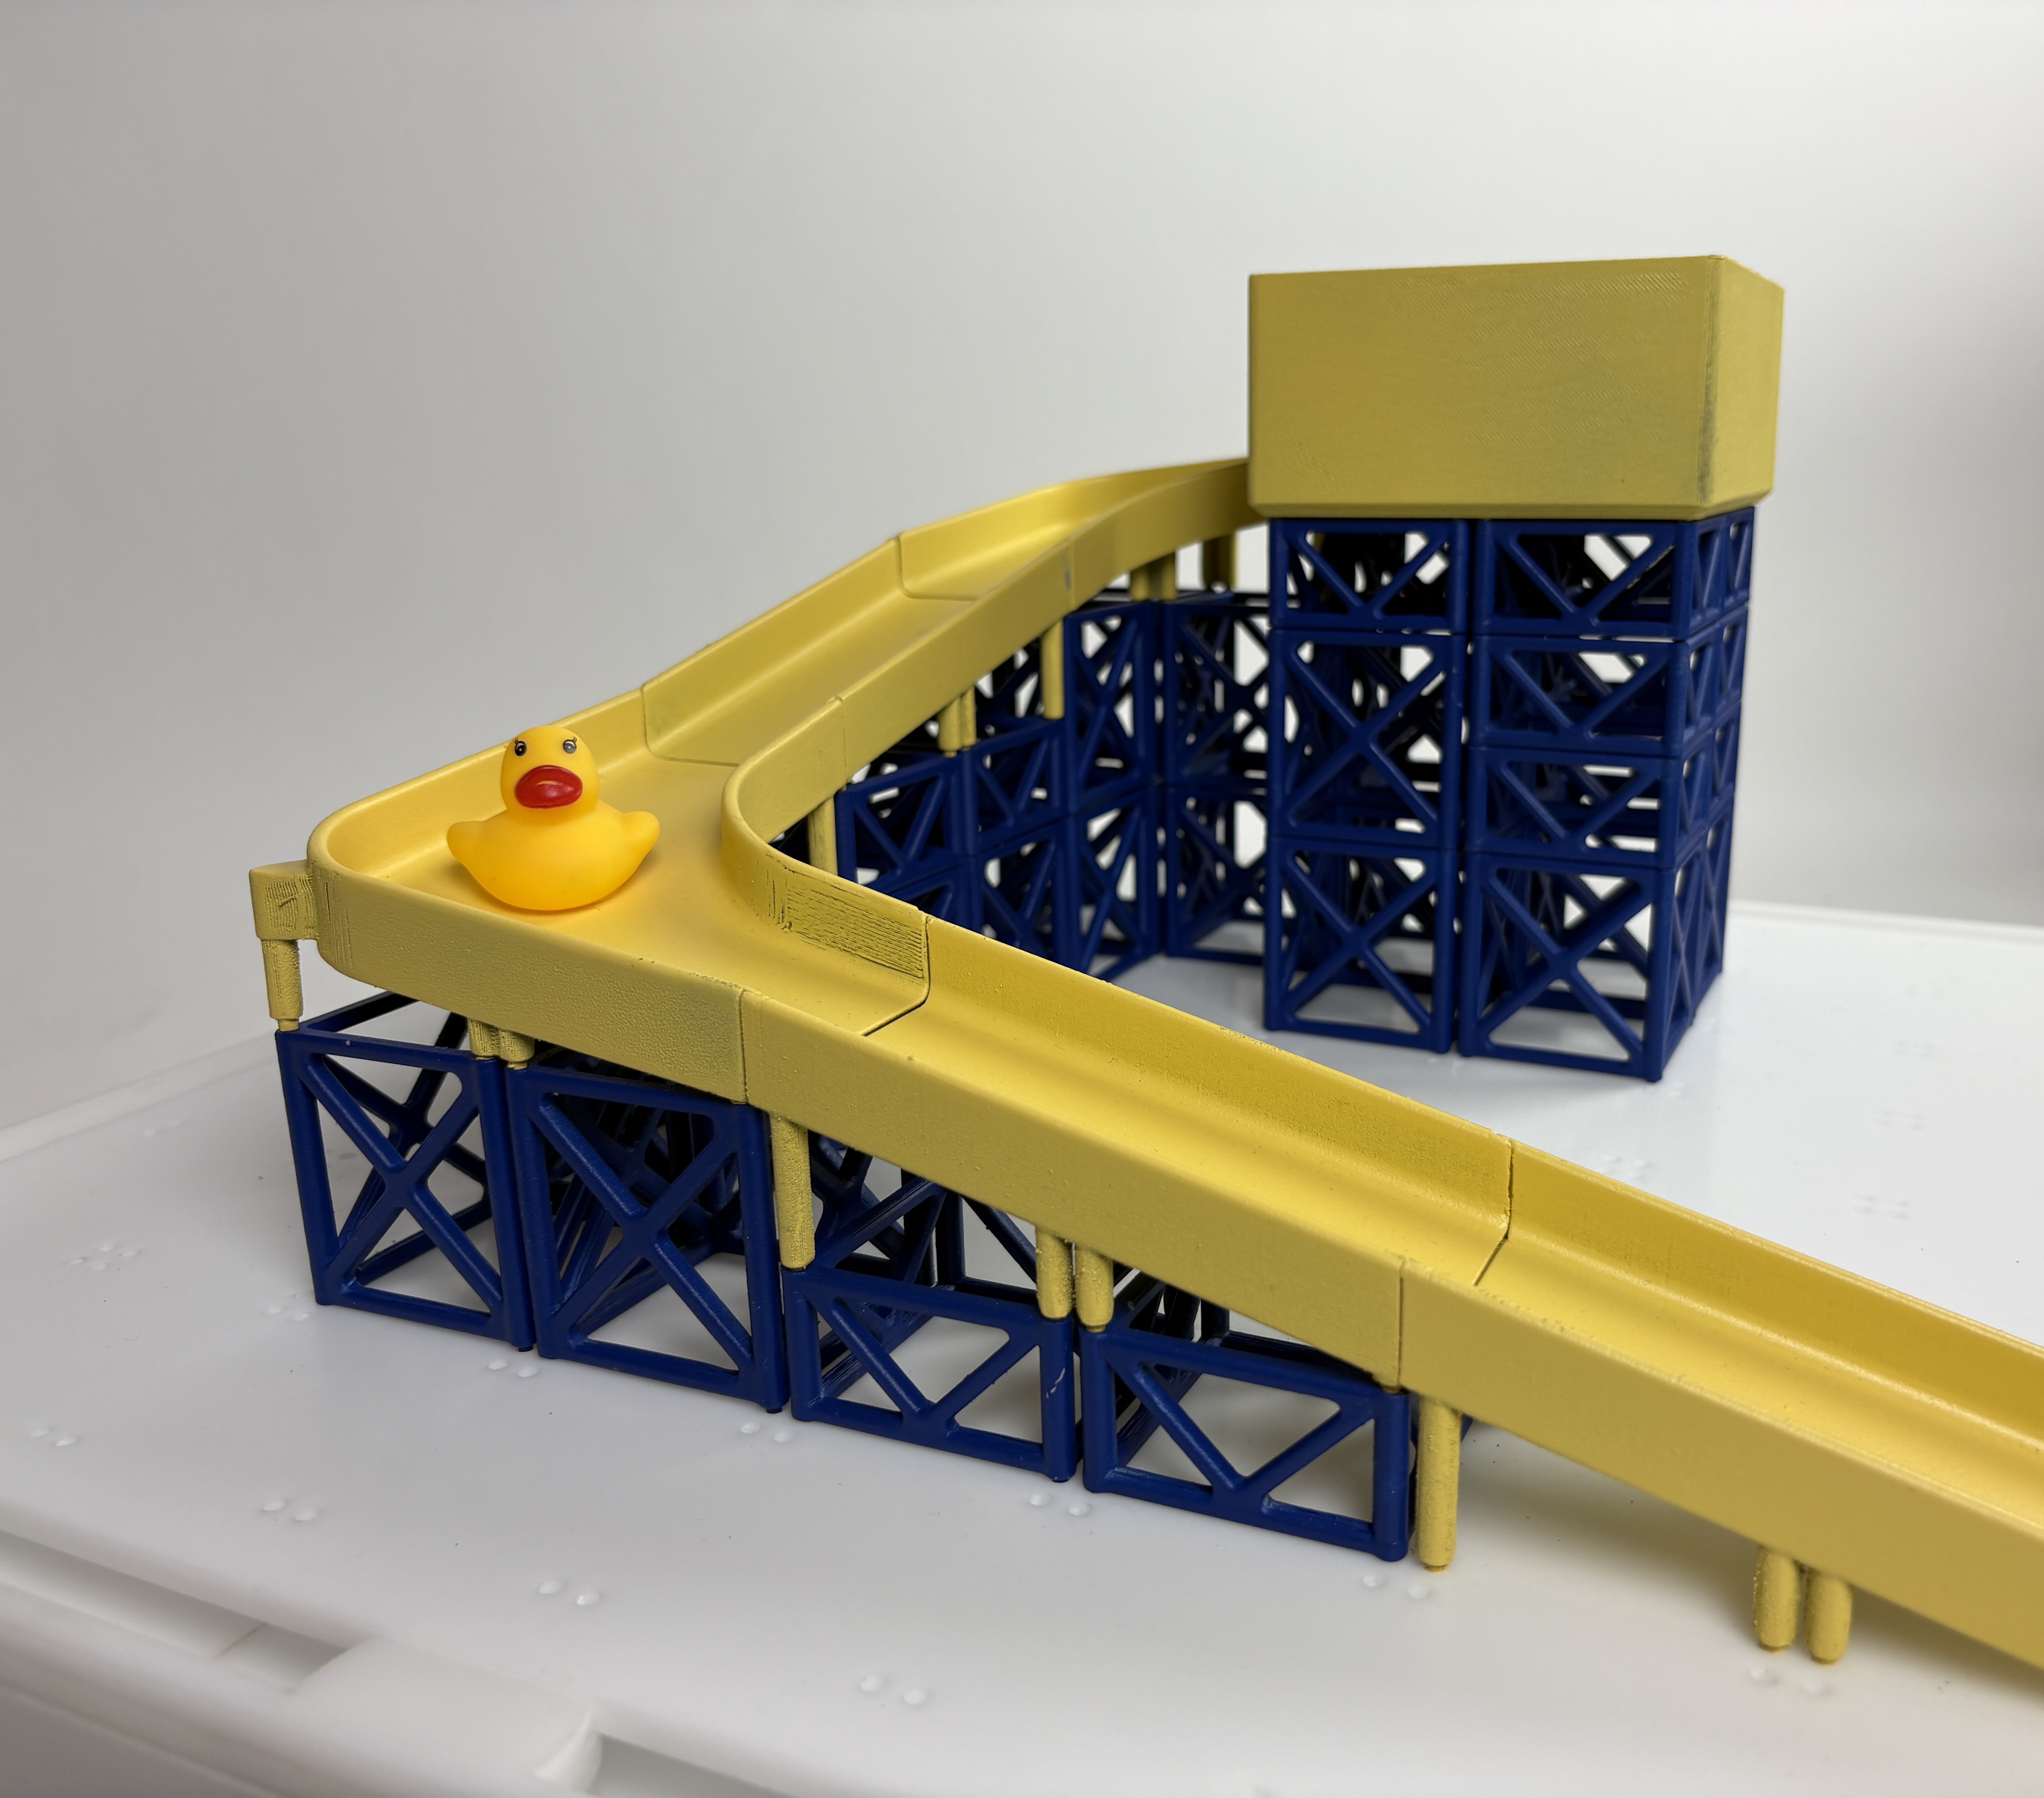
I switched to a larger part that allowed the entire part to be sloped downwards to avoid water pooling.
Another change I made from my original test parts is I made the pegs much shorter, which made them less fragile and easier to align.
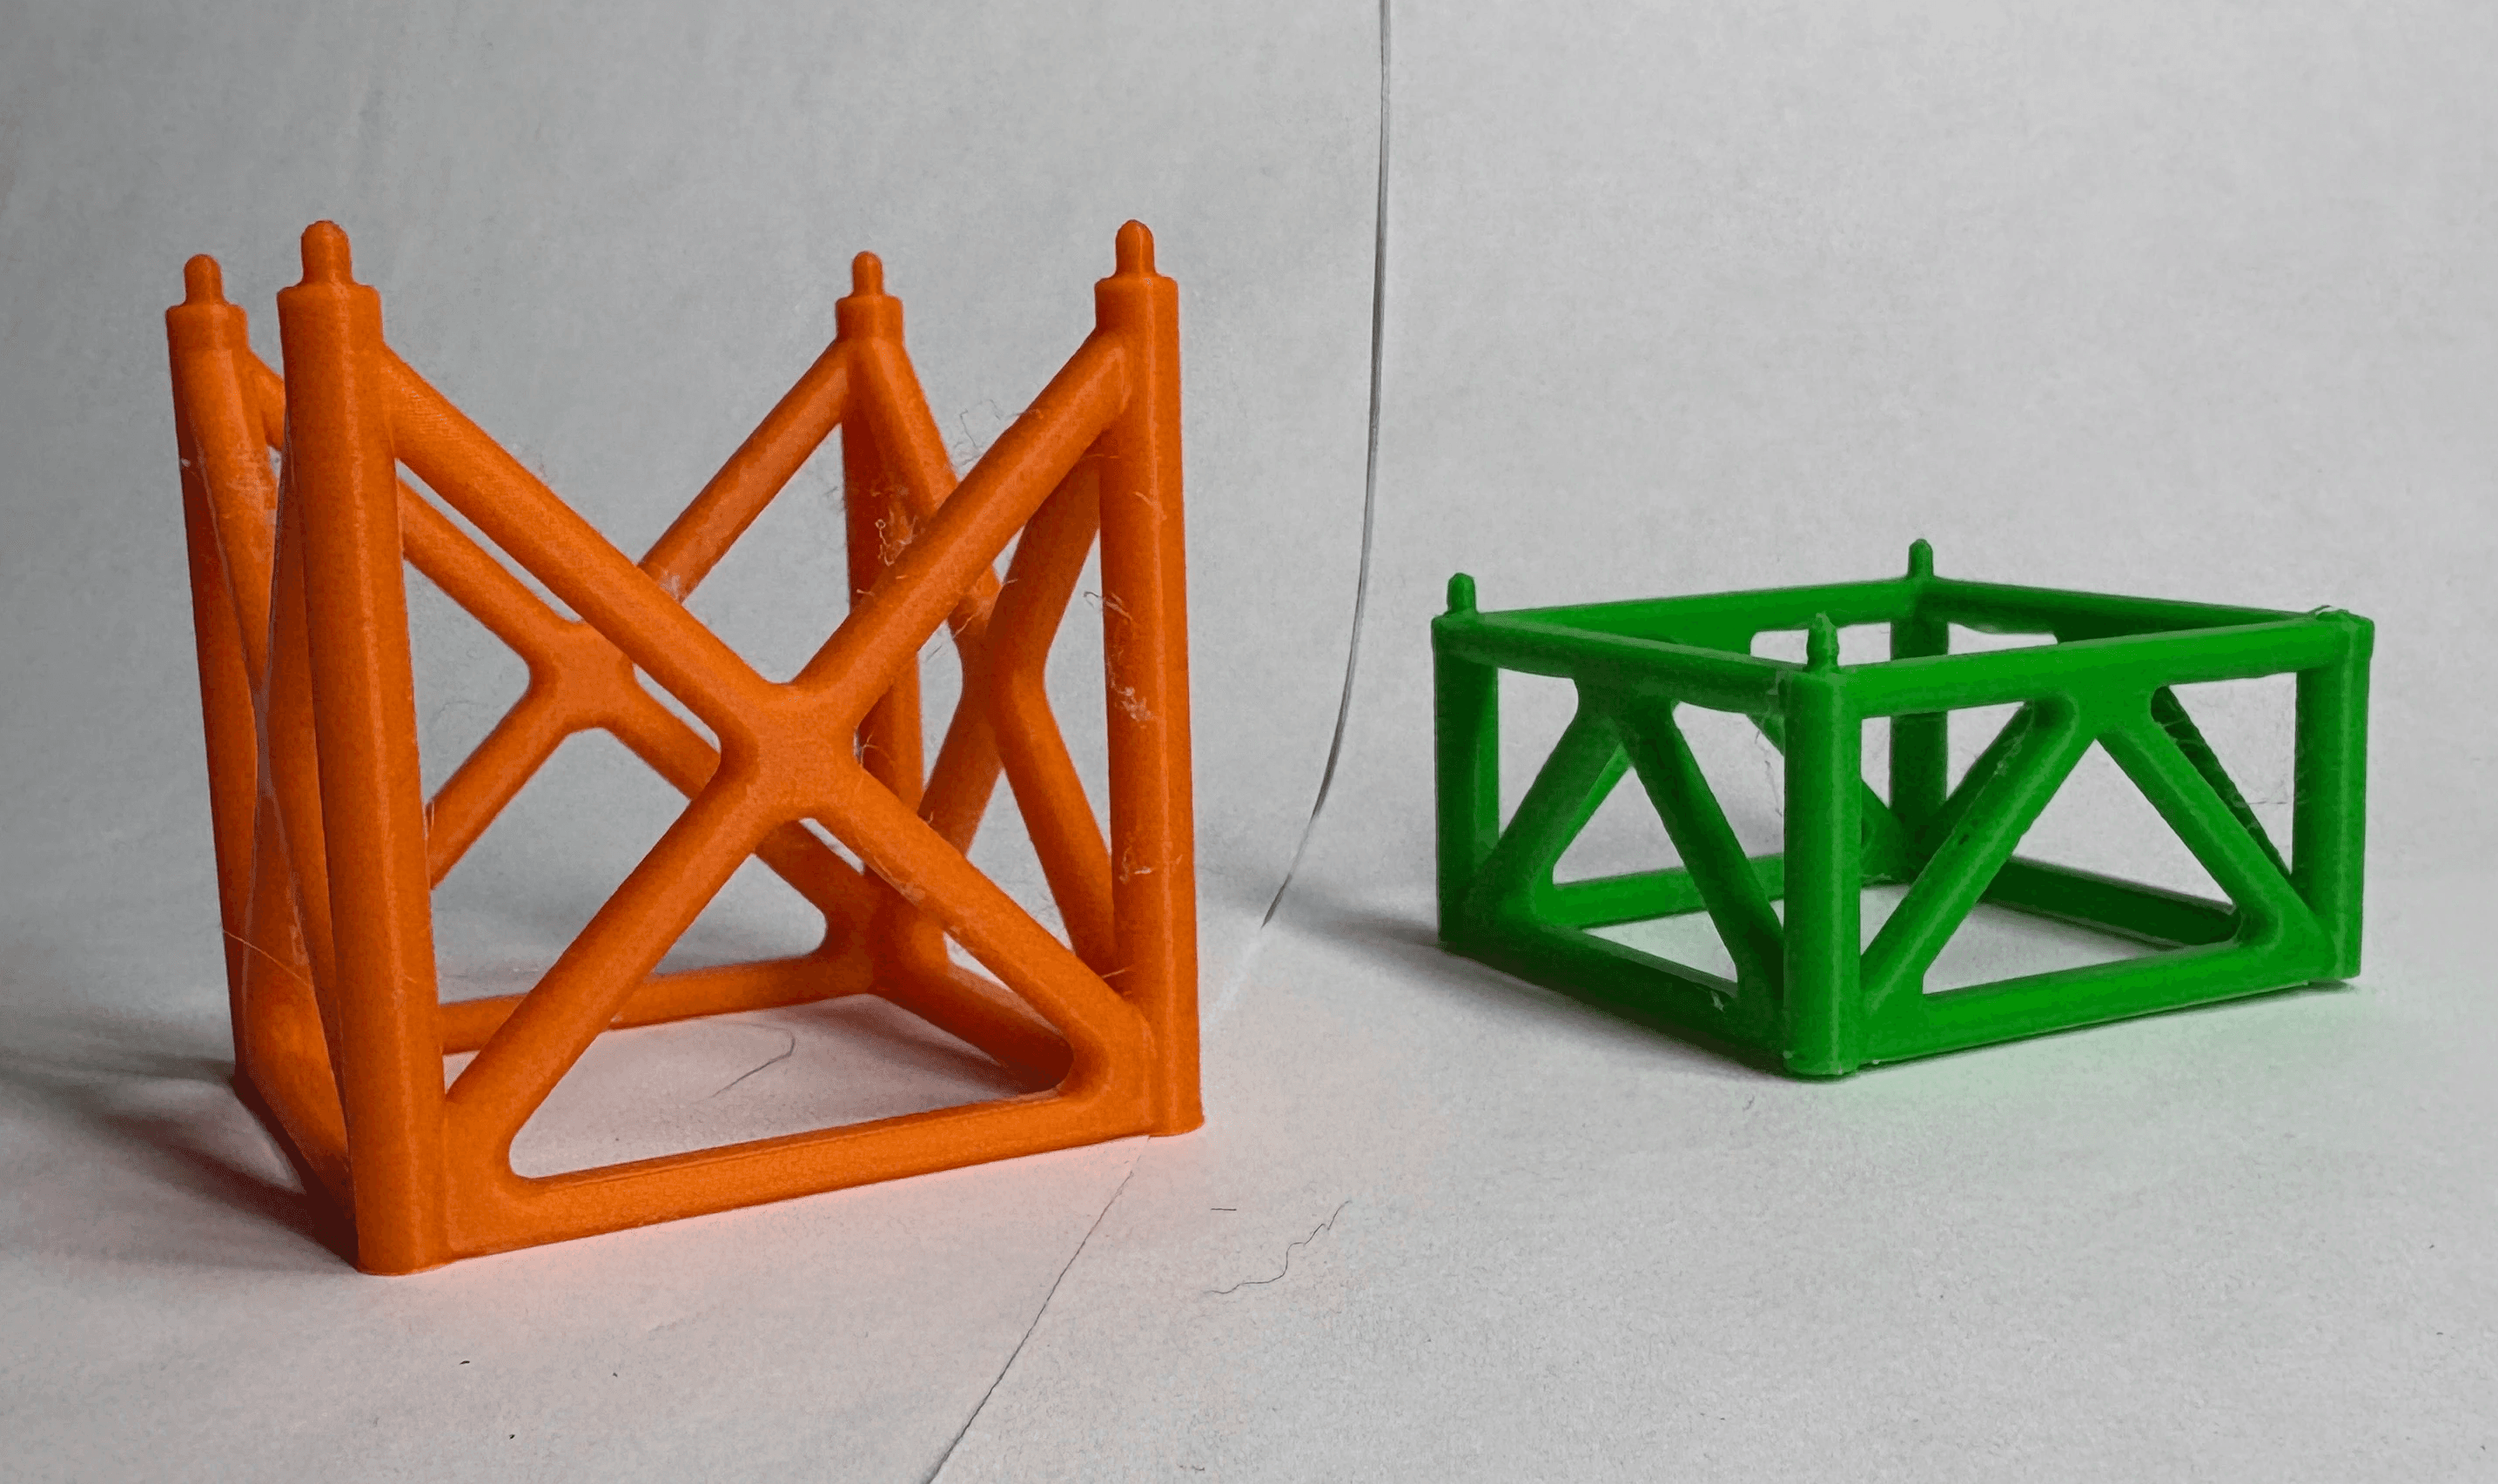
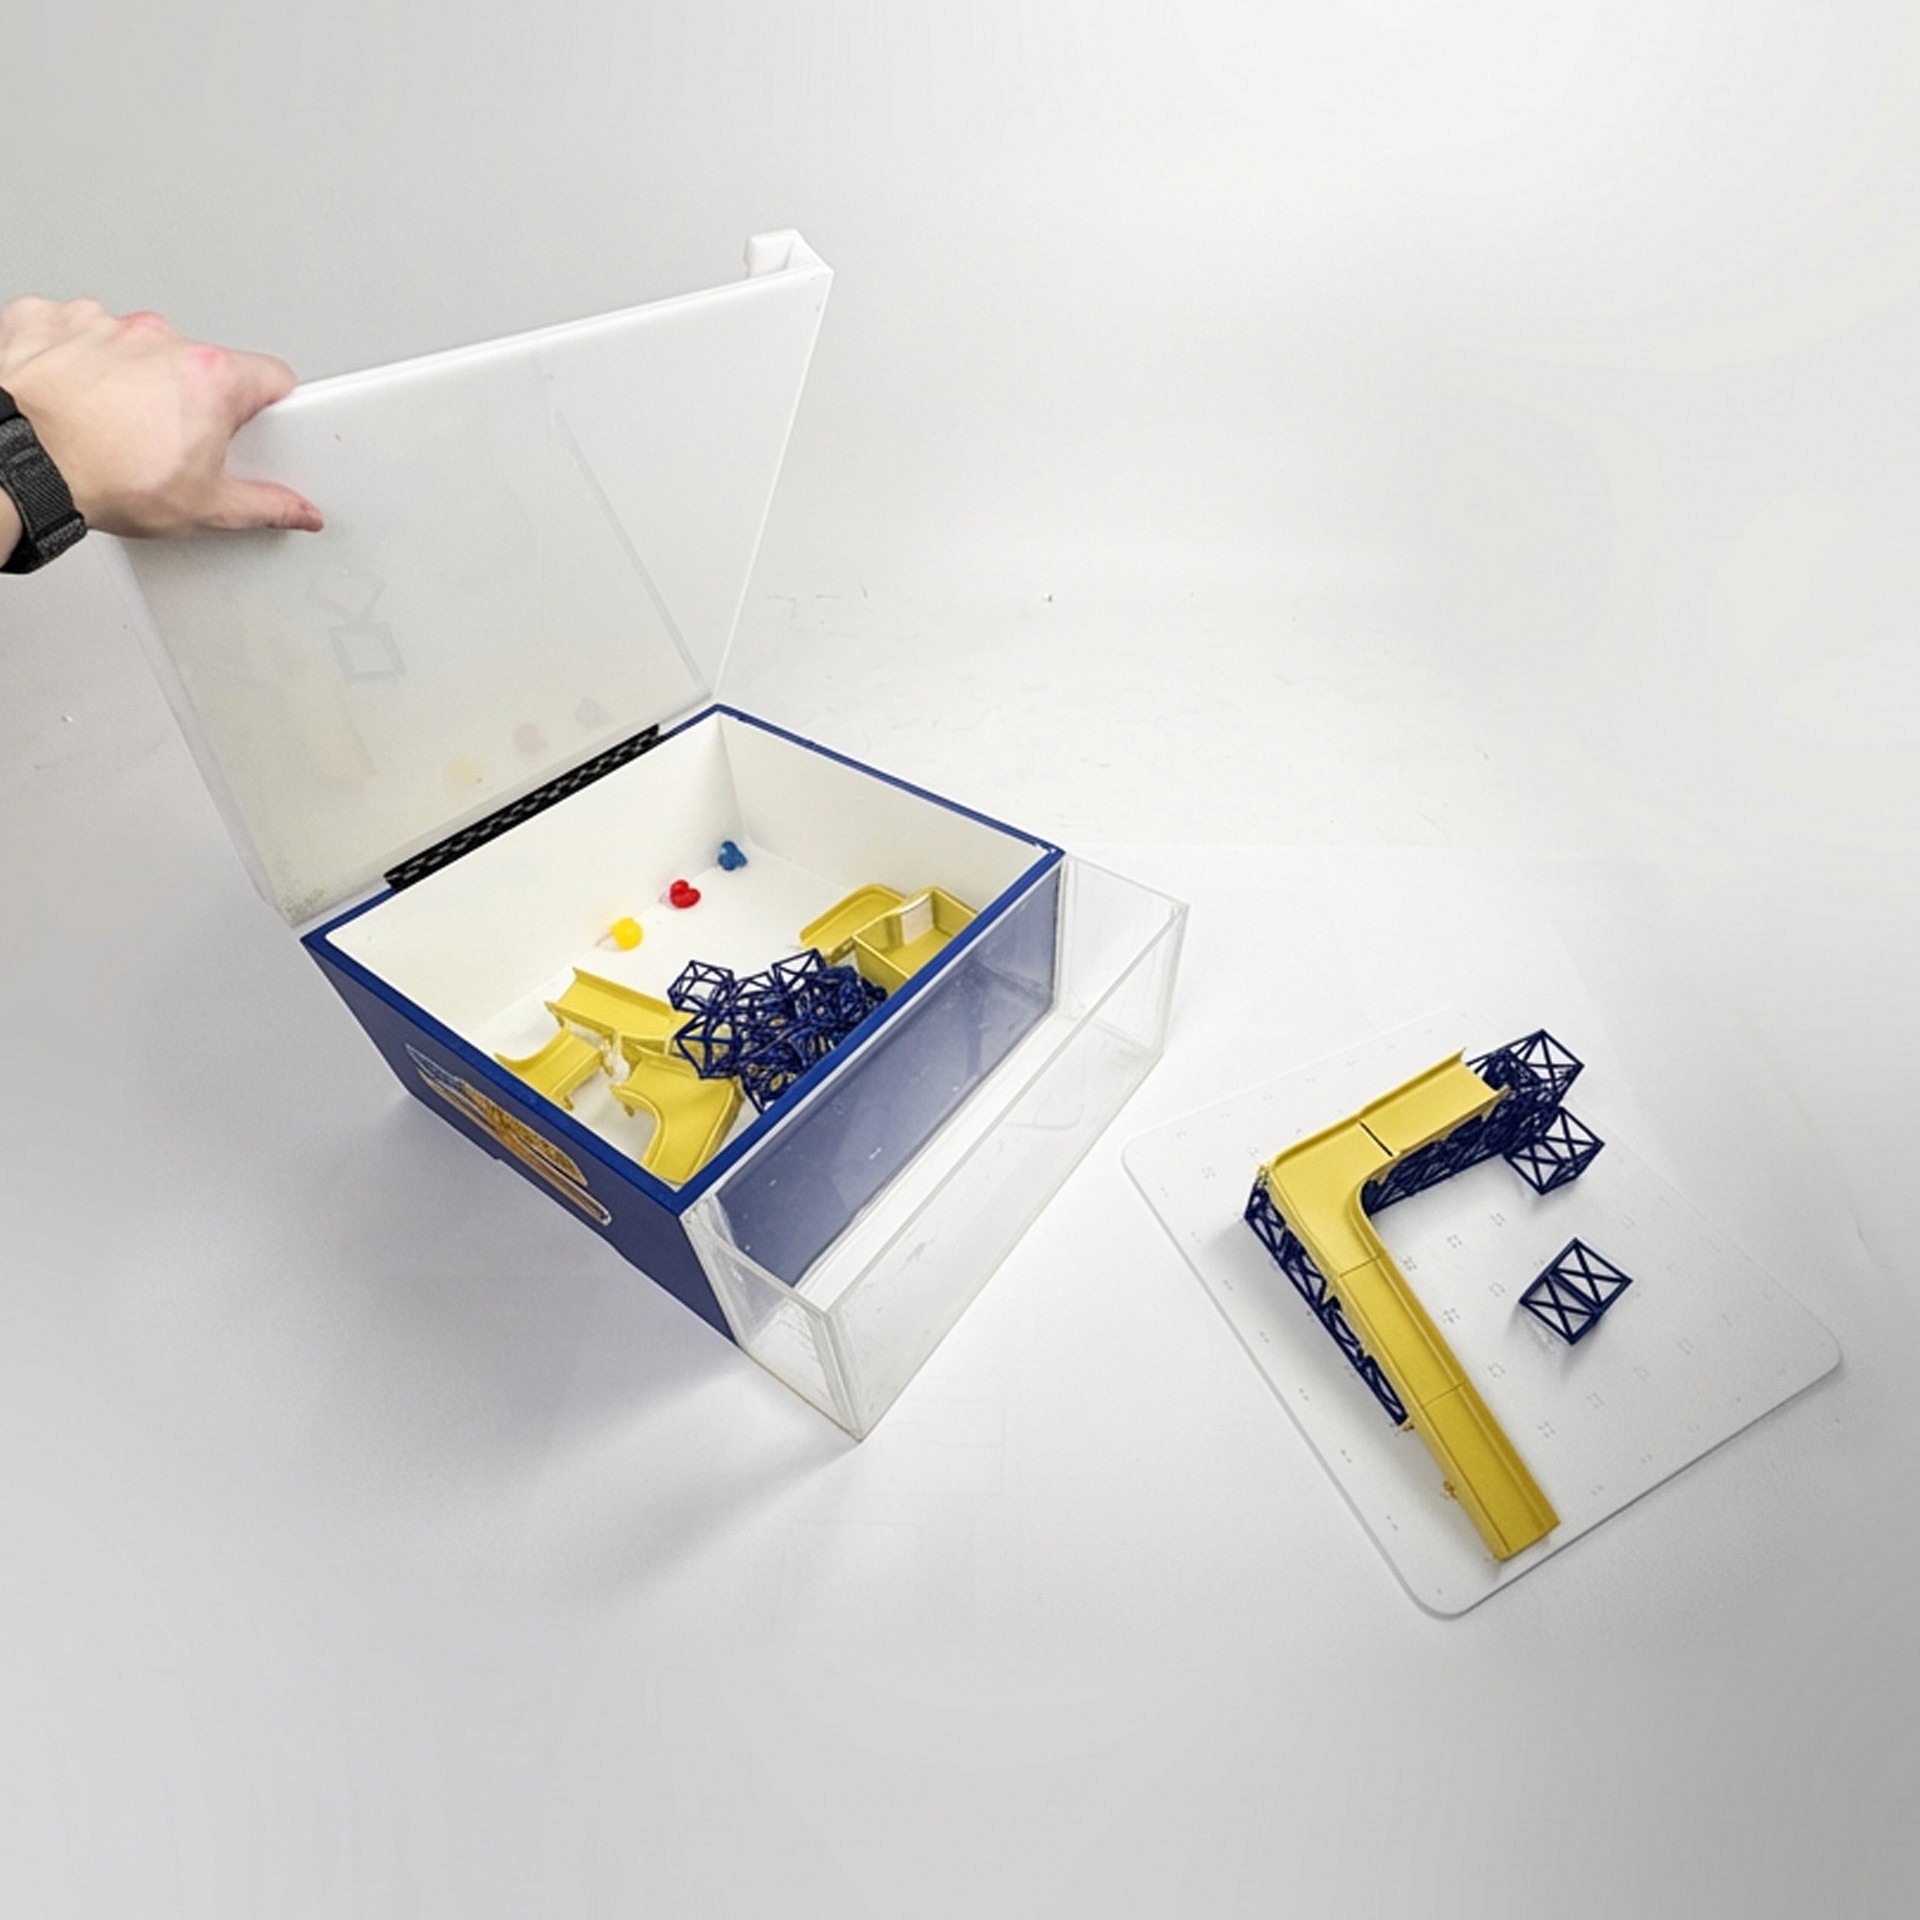
To test parts, I used a laser cut acrylic base that was a small portion of the intended final size. This let me test how support structures fit onto the base and onto each other.
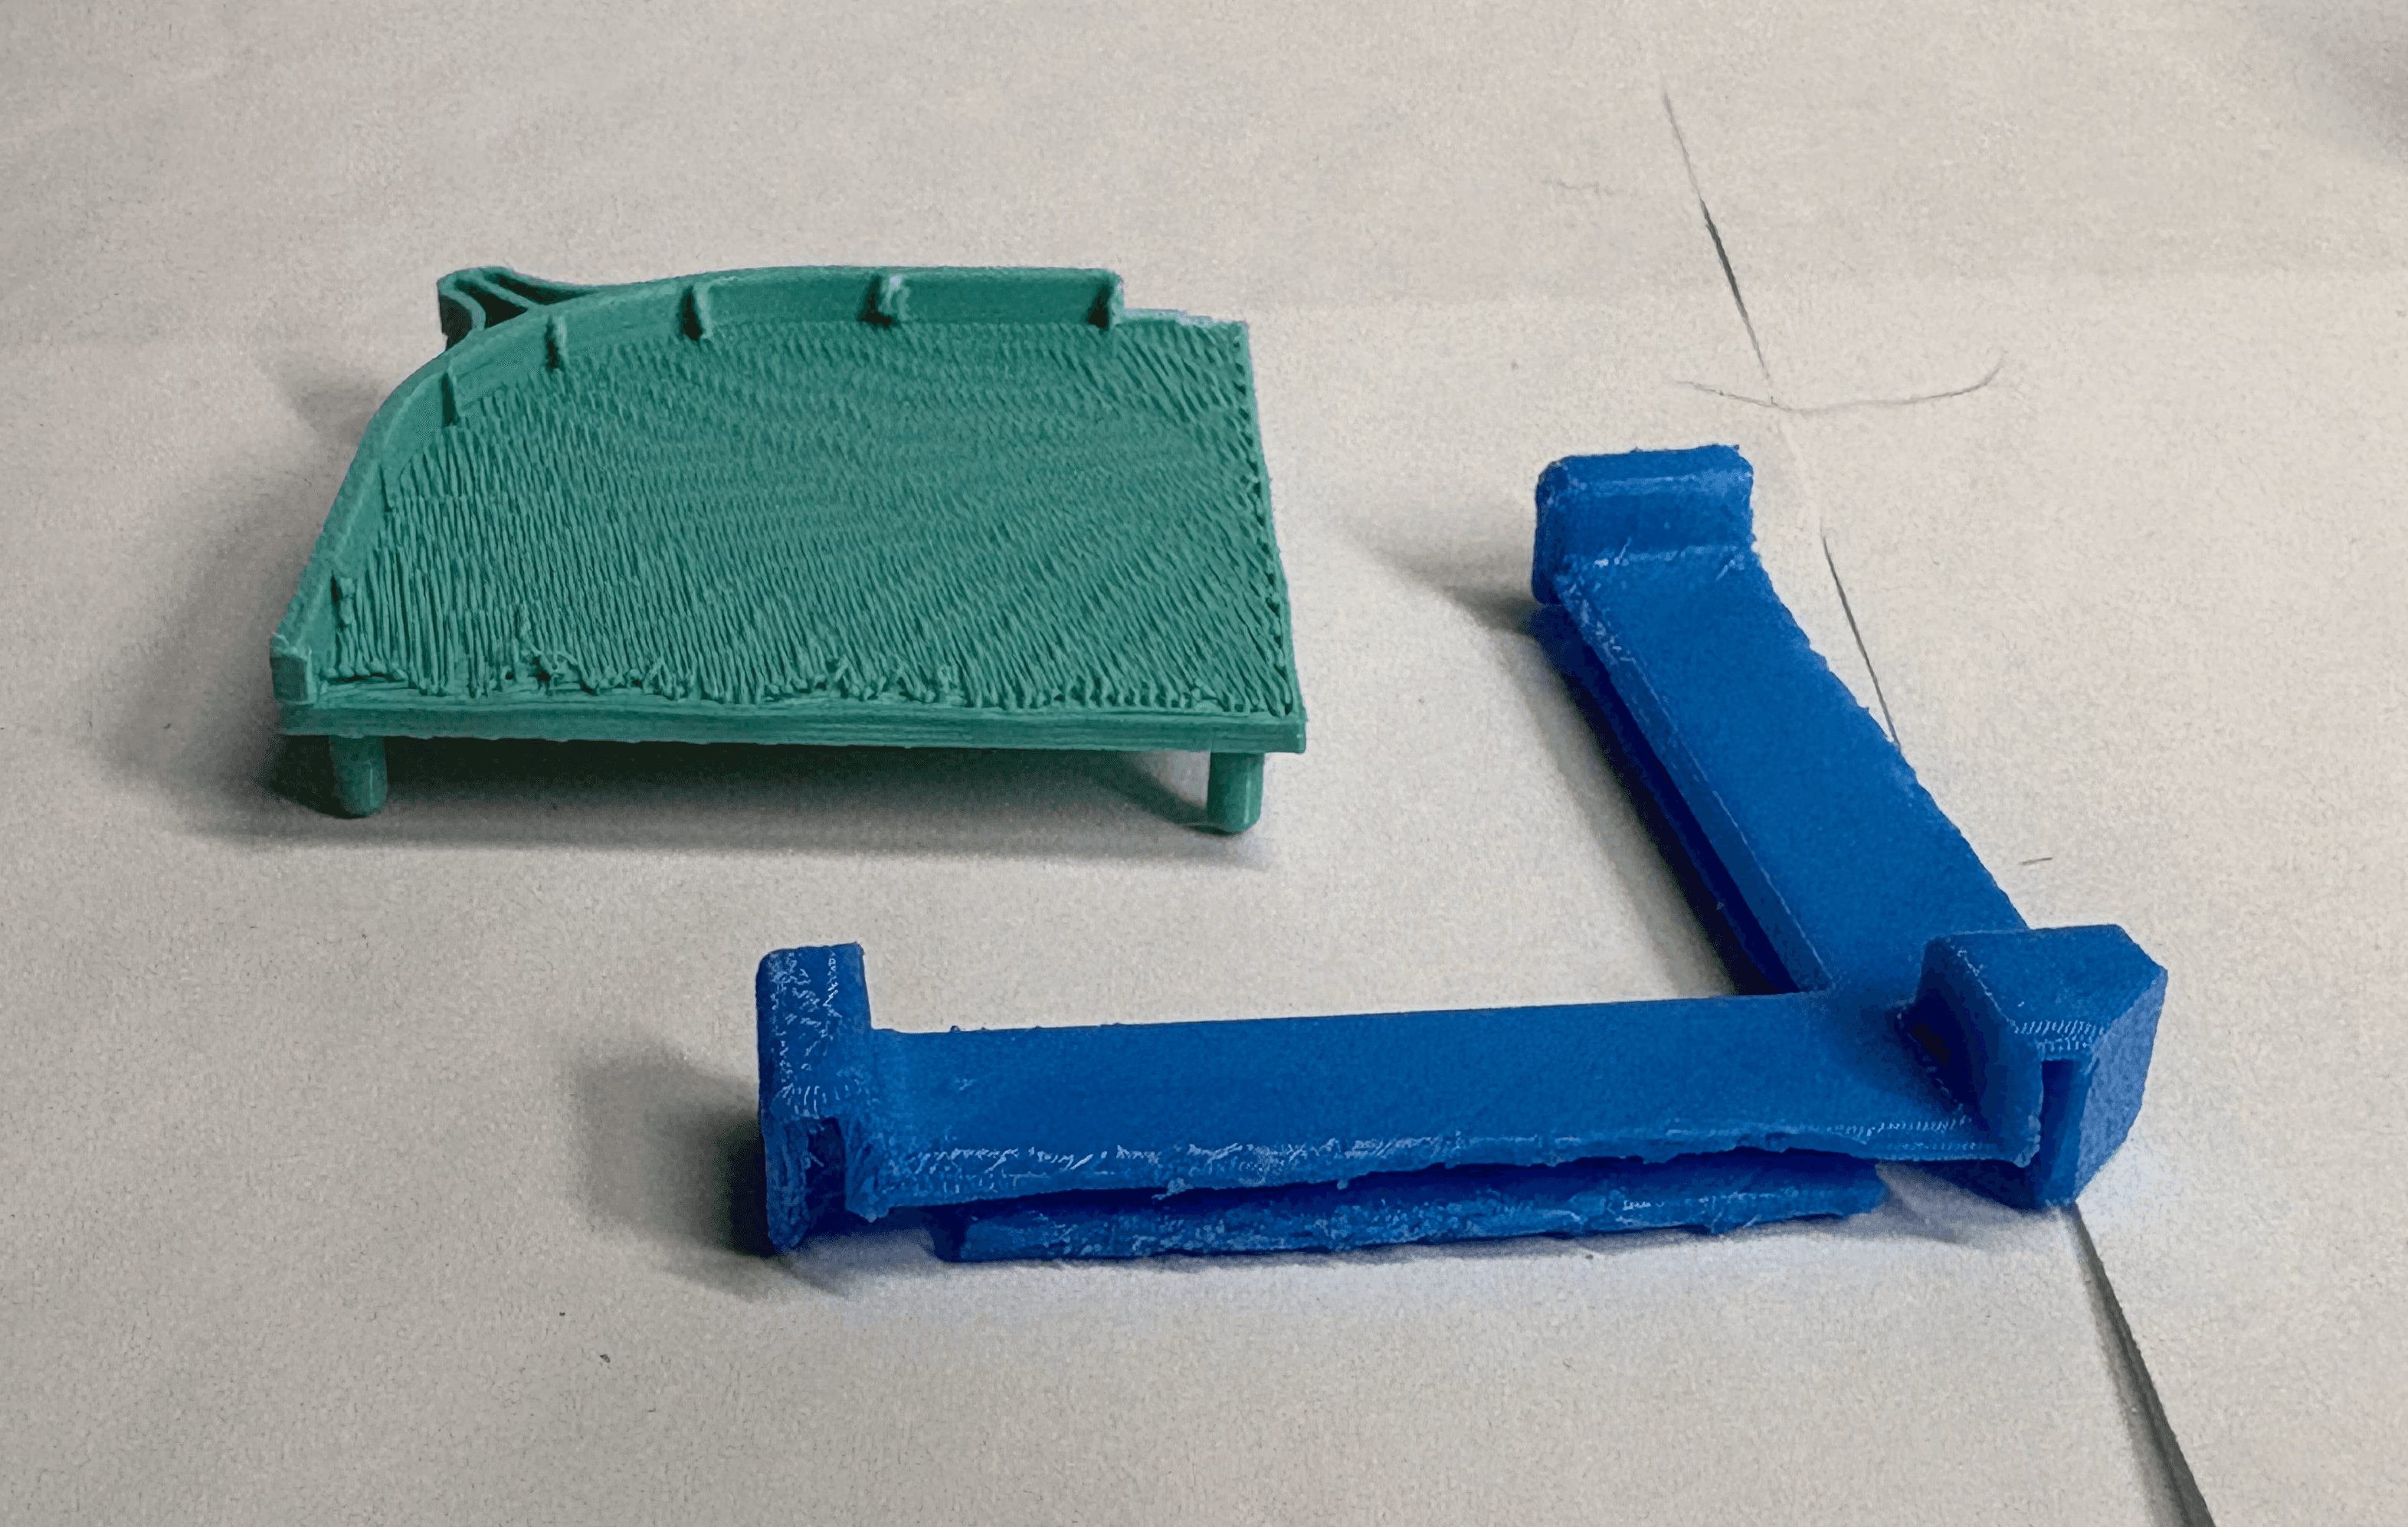
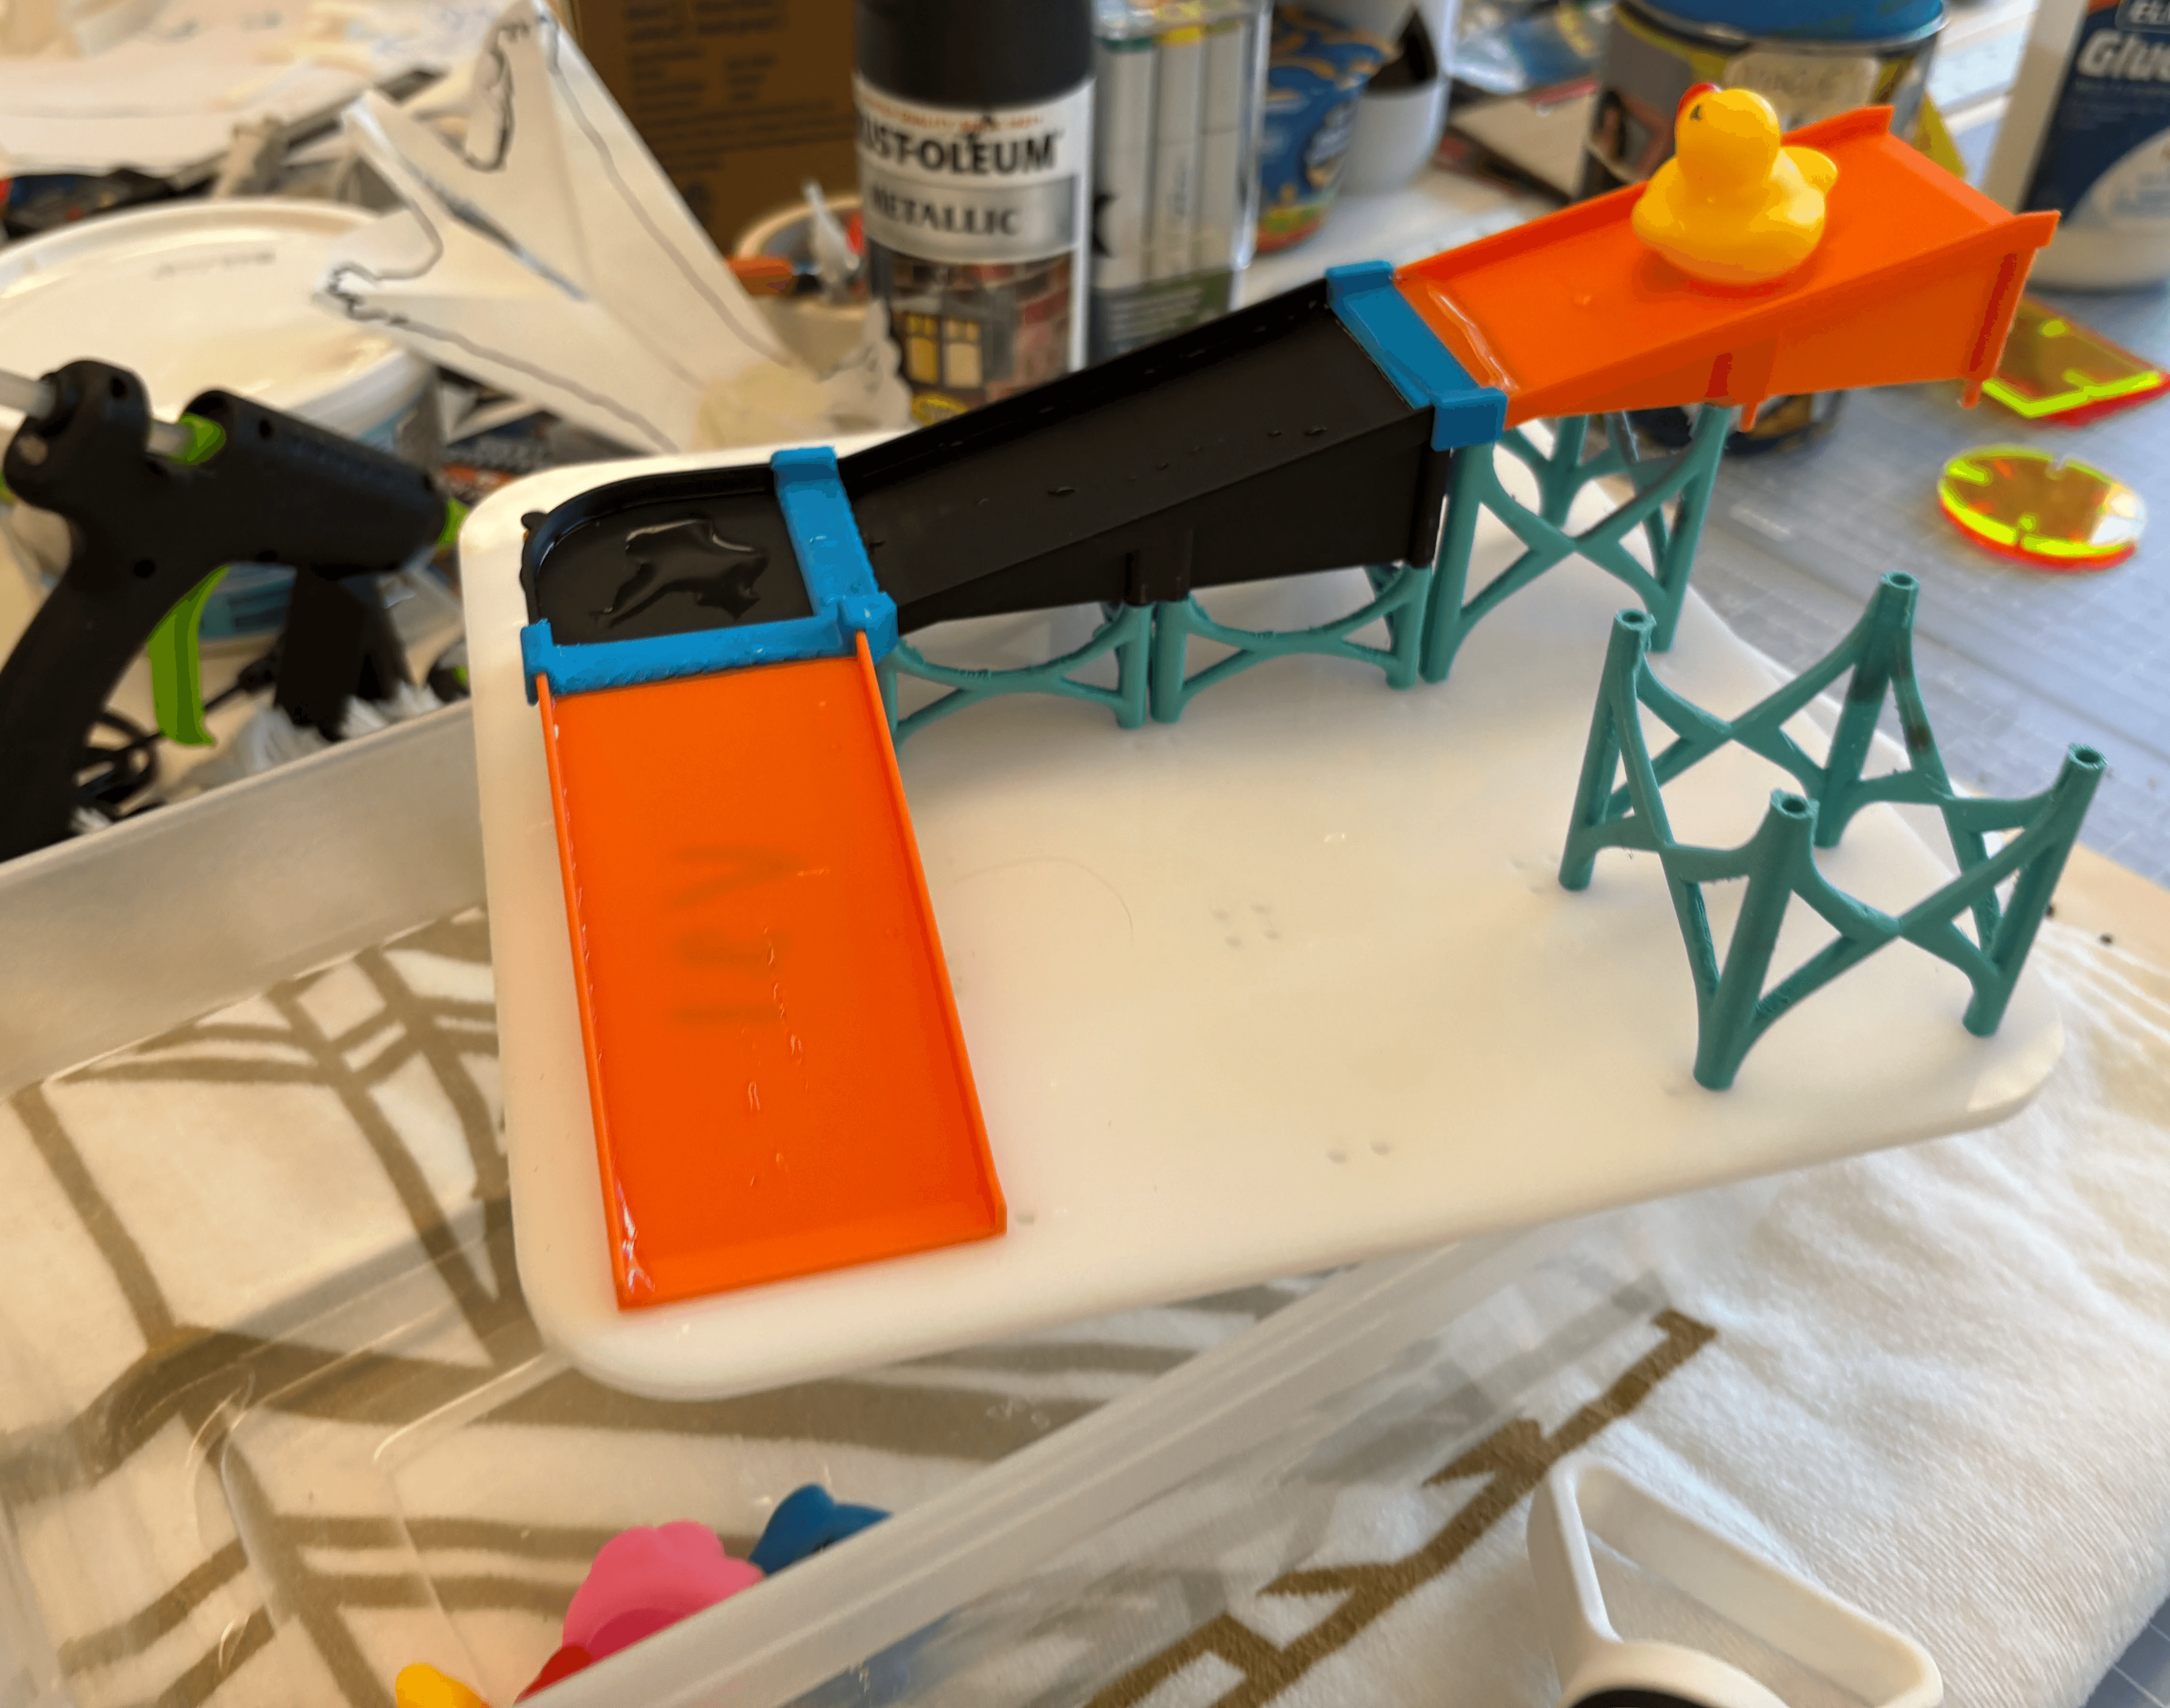
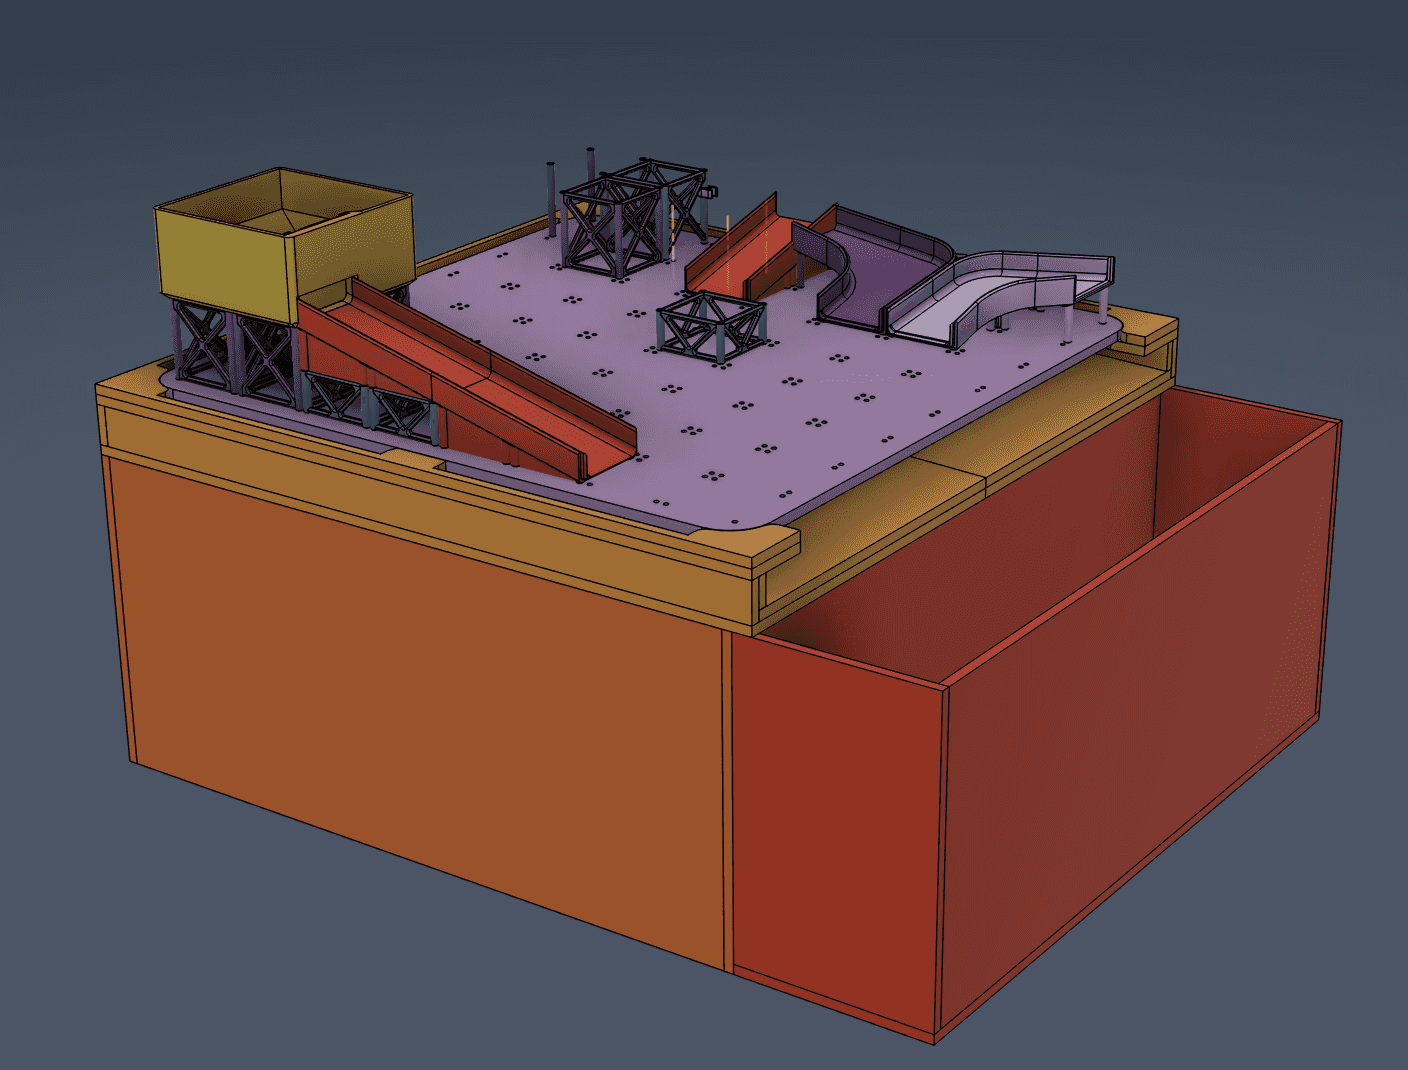
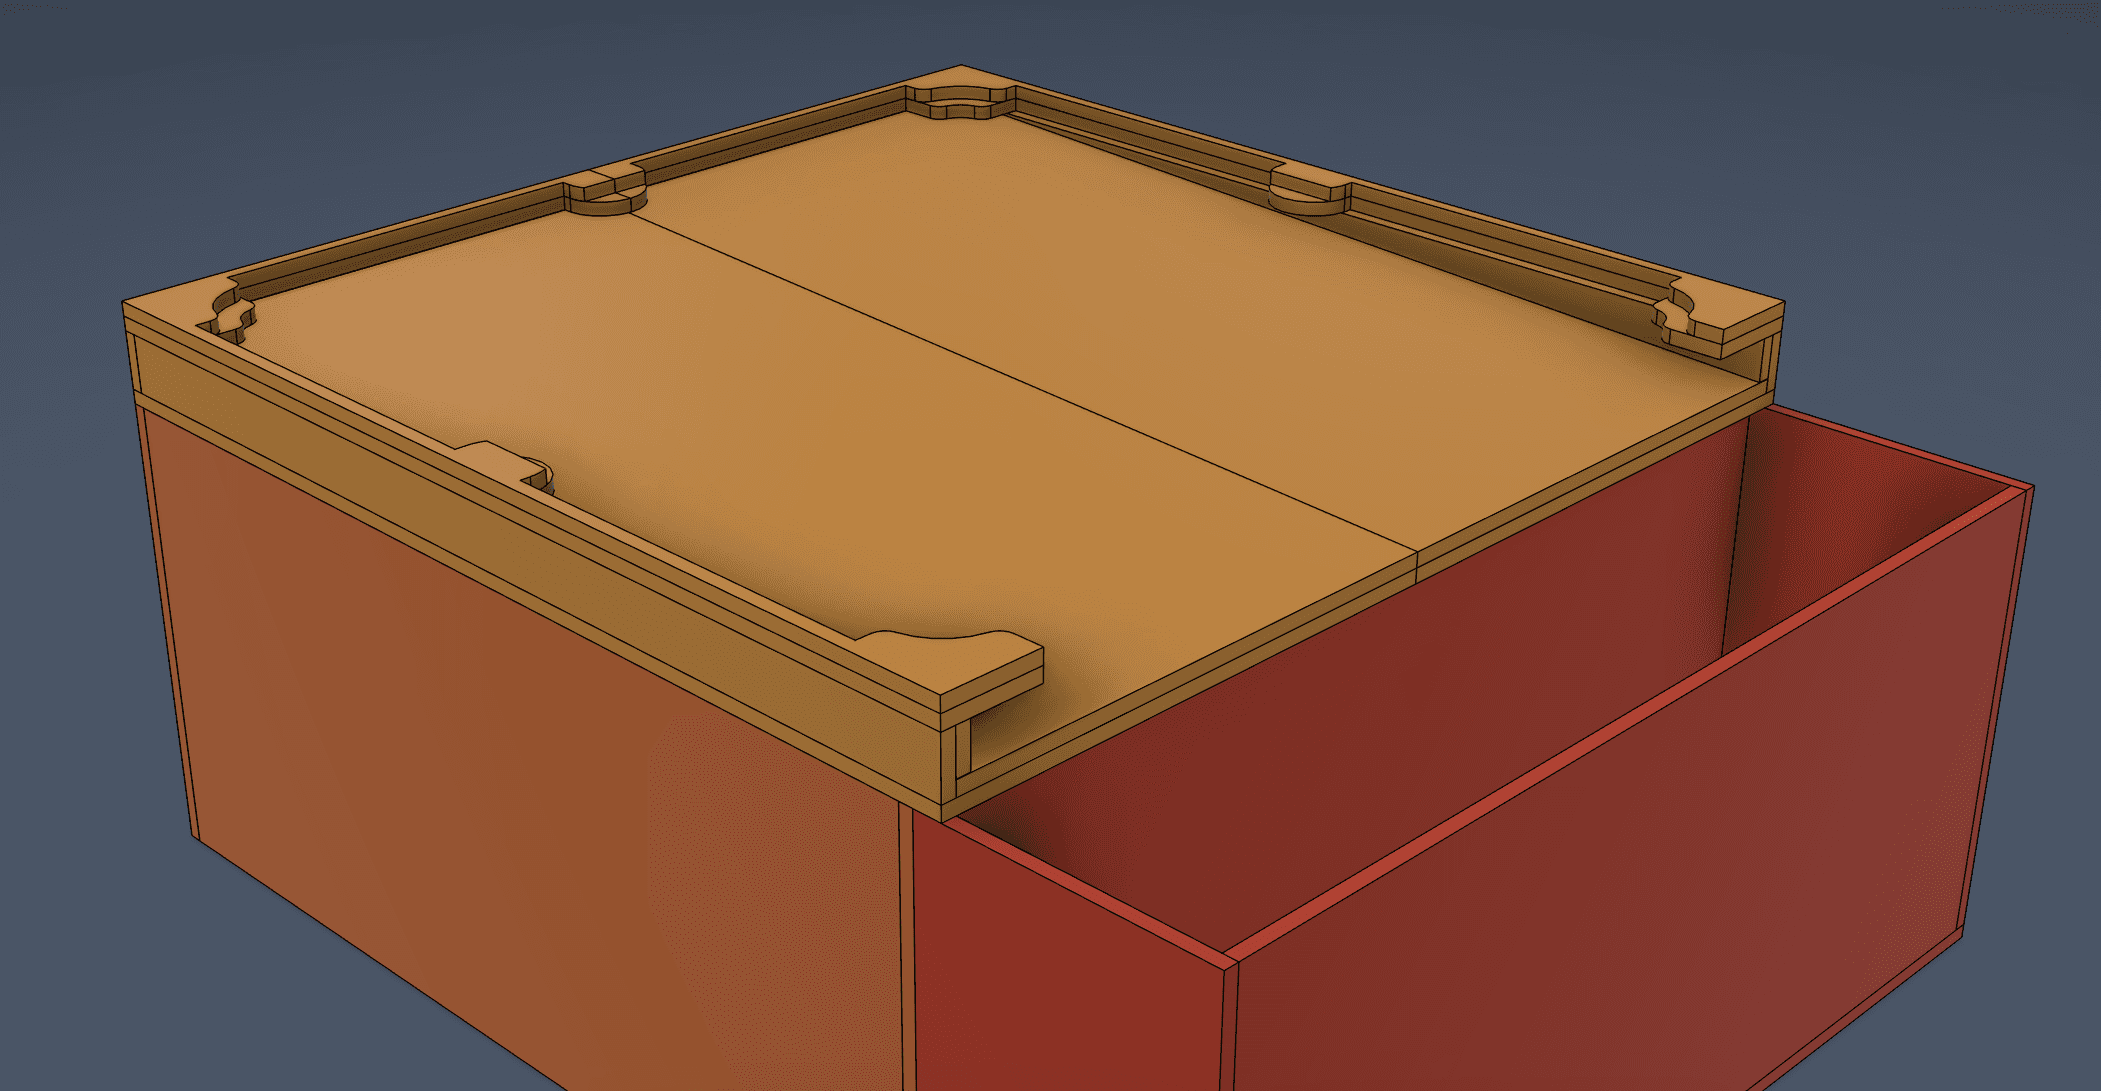
I designed the box / base in CAD using the dimensions of the materials I was going to use. The baseplate (purple) has gutters so spilled water drains onto the lid (light orange) which is sloped, so it flows down into the water tank (red). The box (deep orange) needed to be big enough to fit all of the parts inside.
Final Fabrication
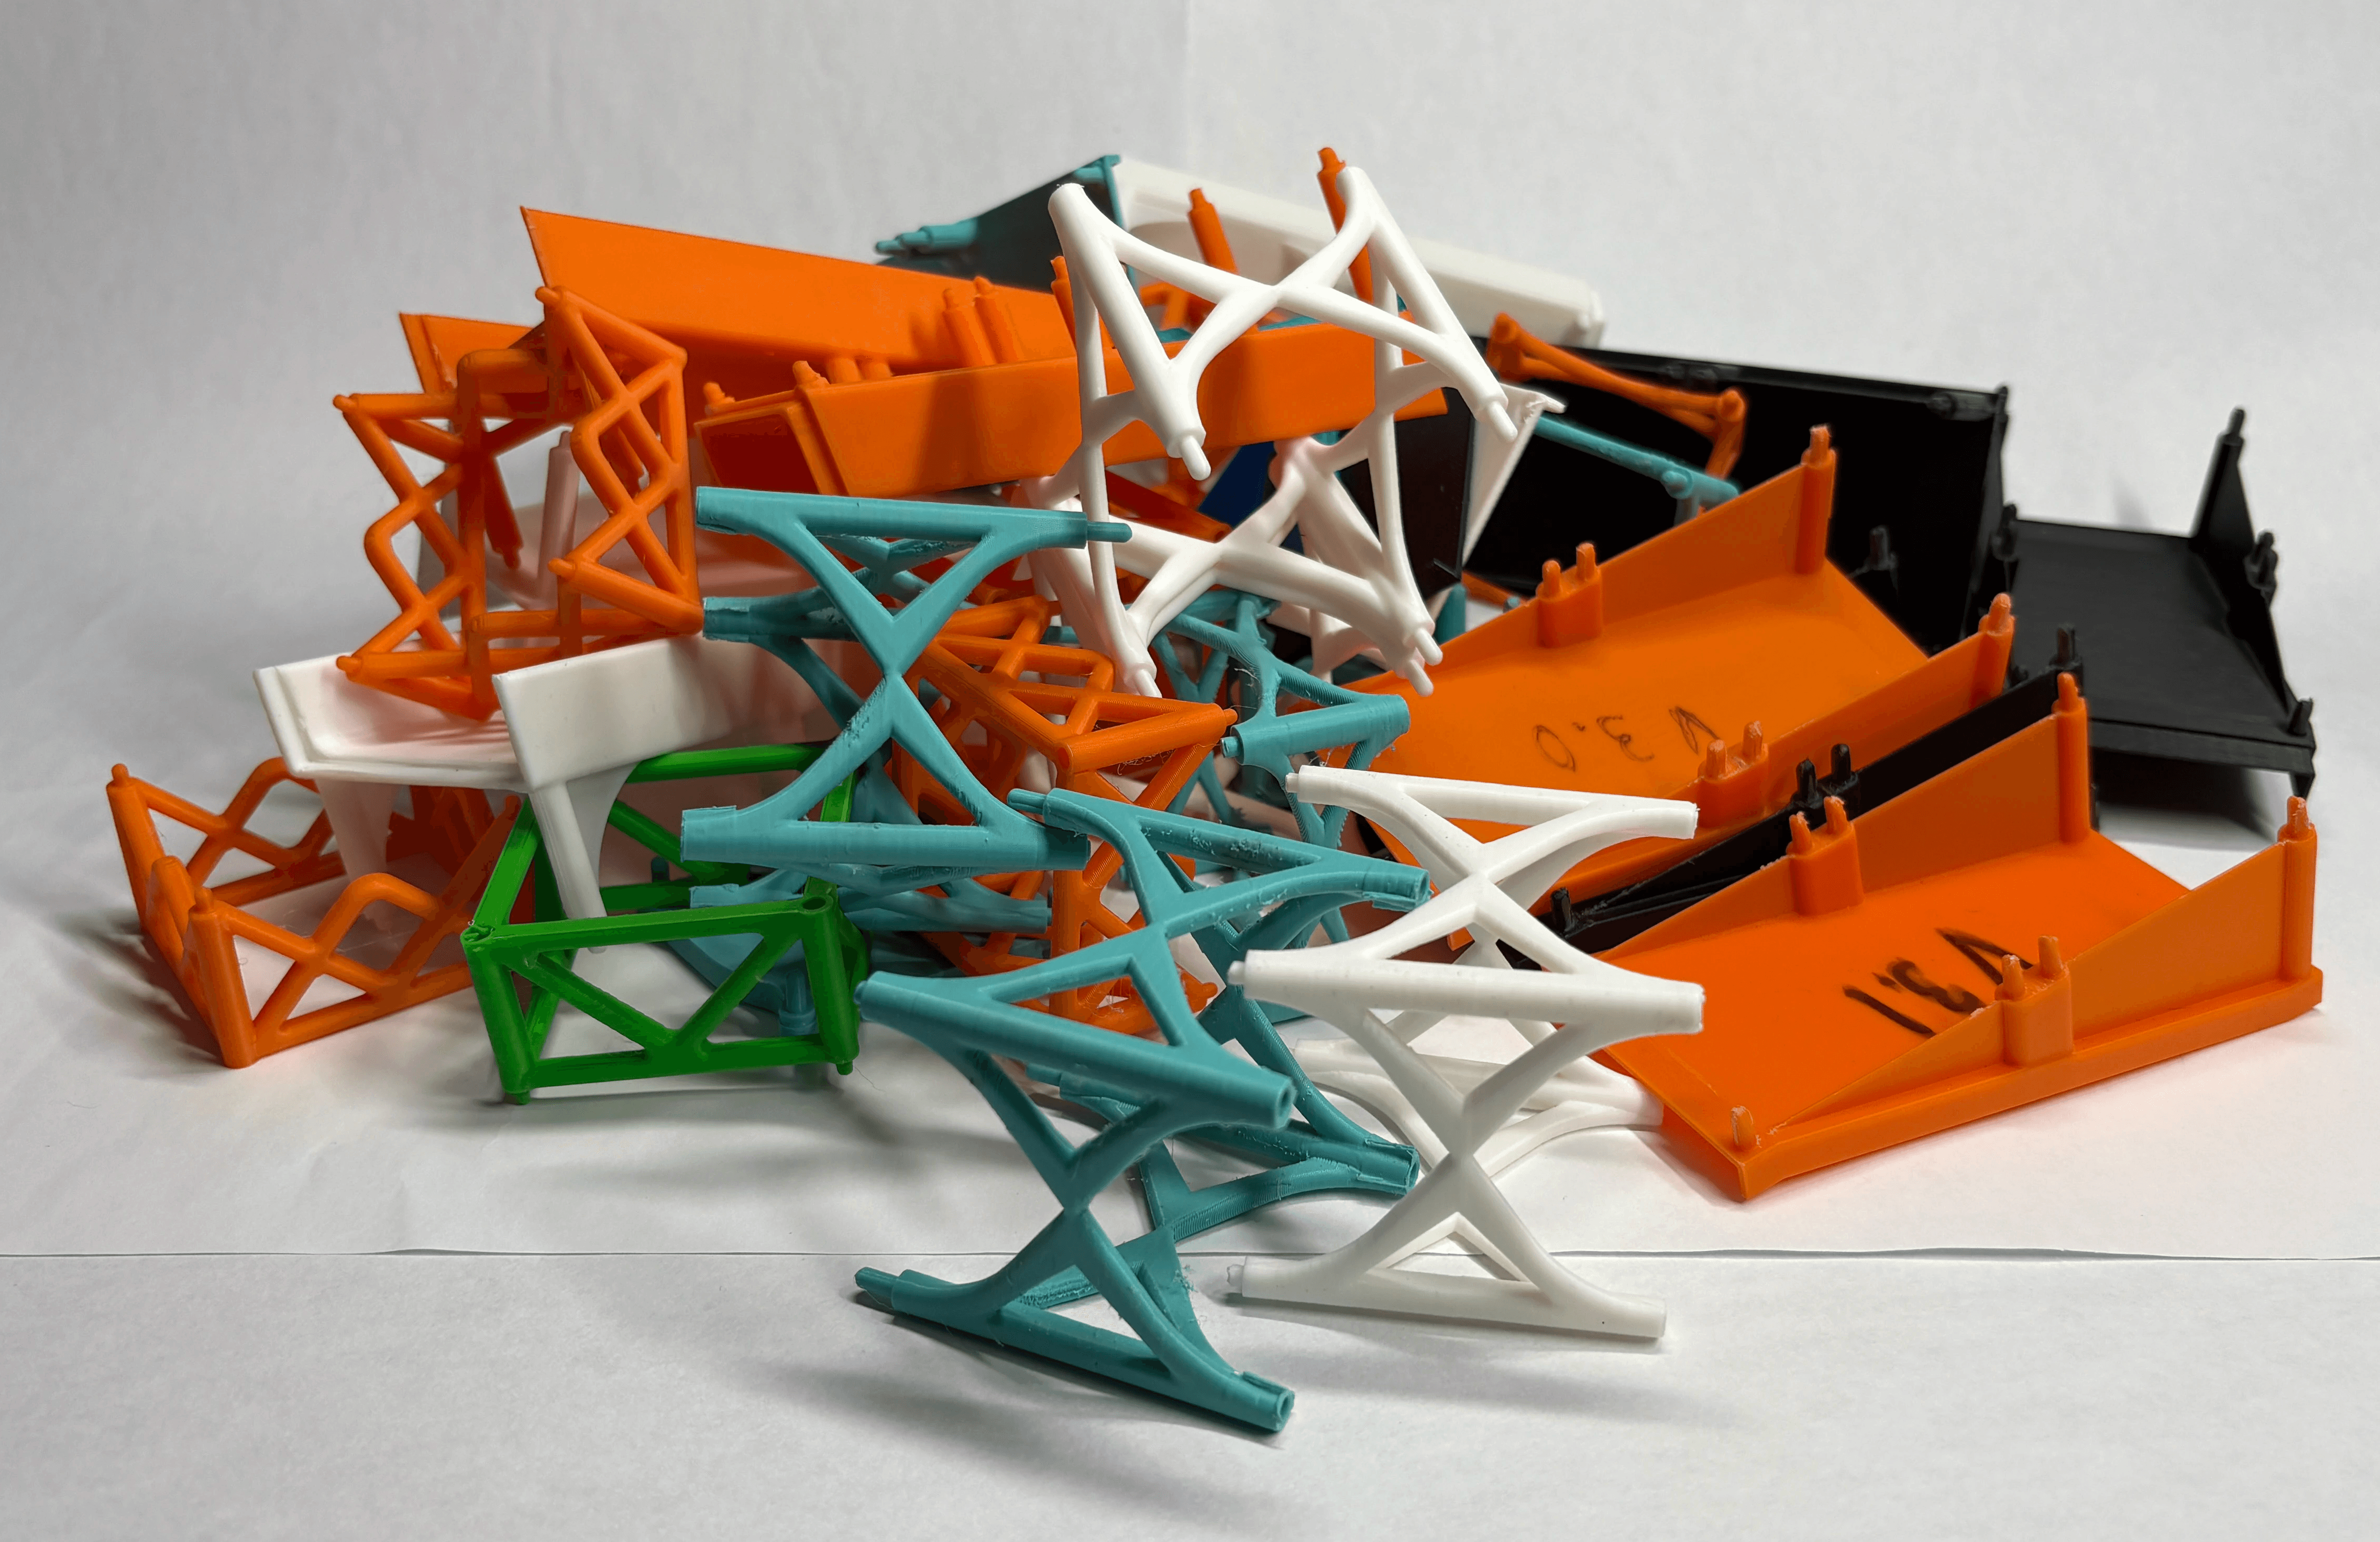
Despite my best searching, I couldn't find a method to manufacture the parts that wasn't FDM 3D printing, so I printed out all of my parts.
The box was built out of MDF that was painted with an oil-based primer and spray painted blue. This theoretically makes the MDF water resistant, though the acrylic lid catches a vast majority of spilled water.

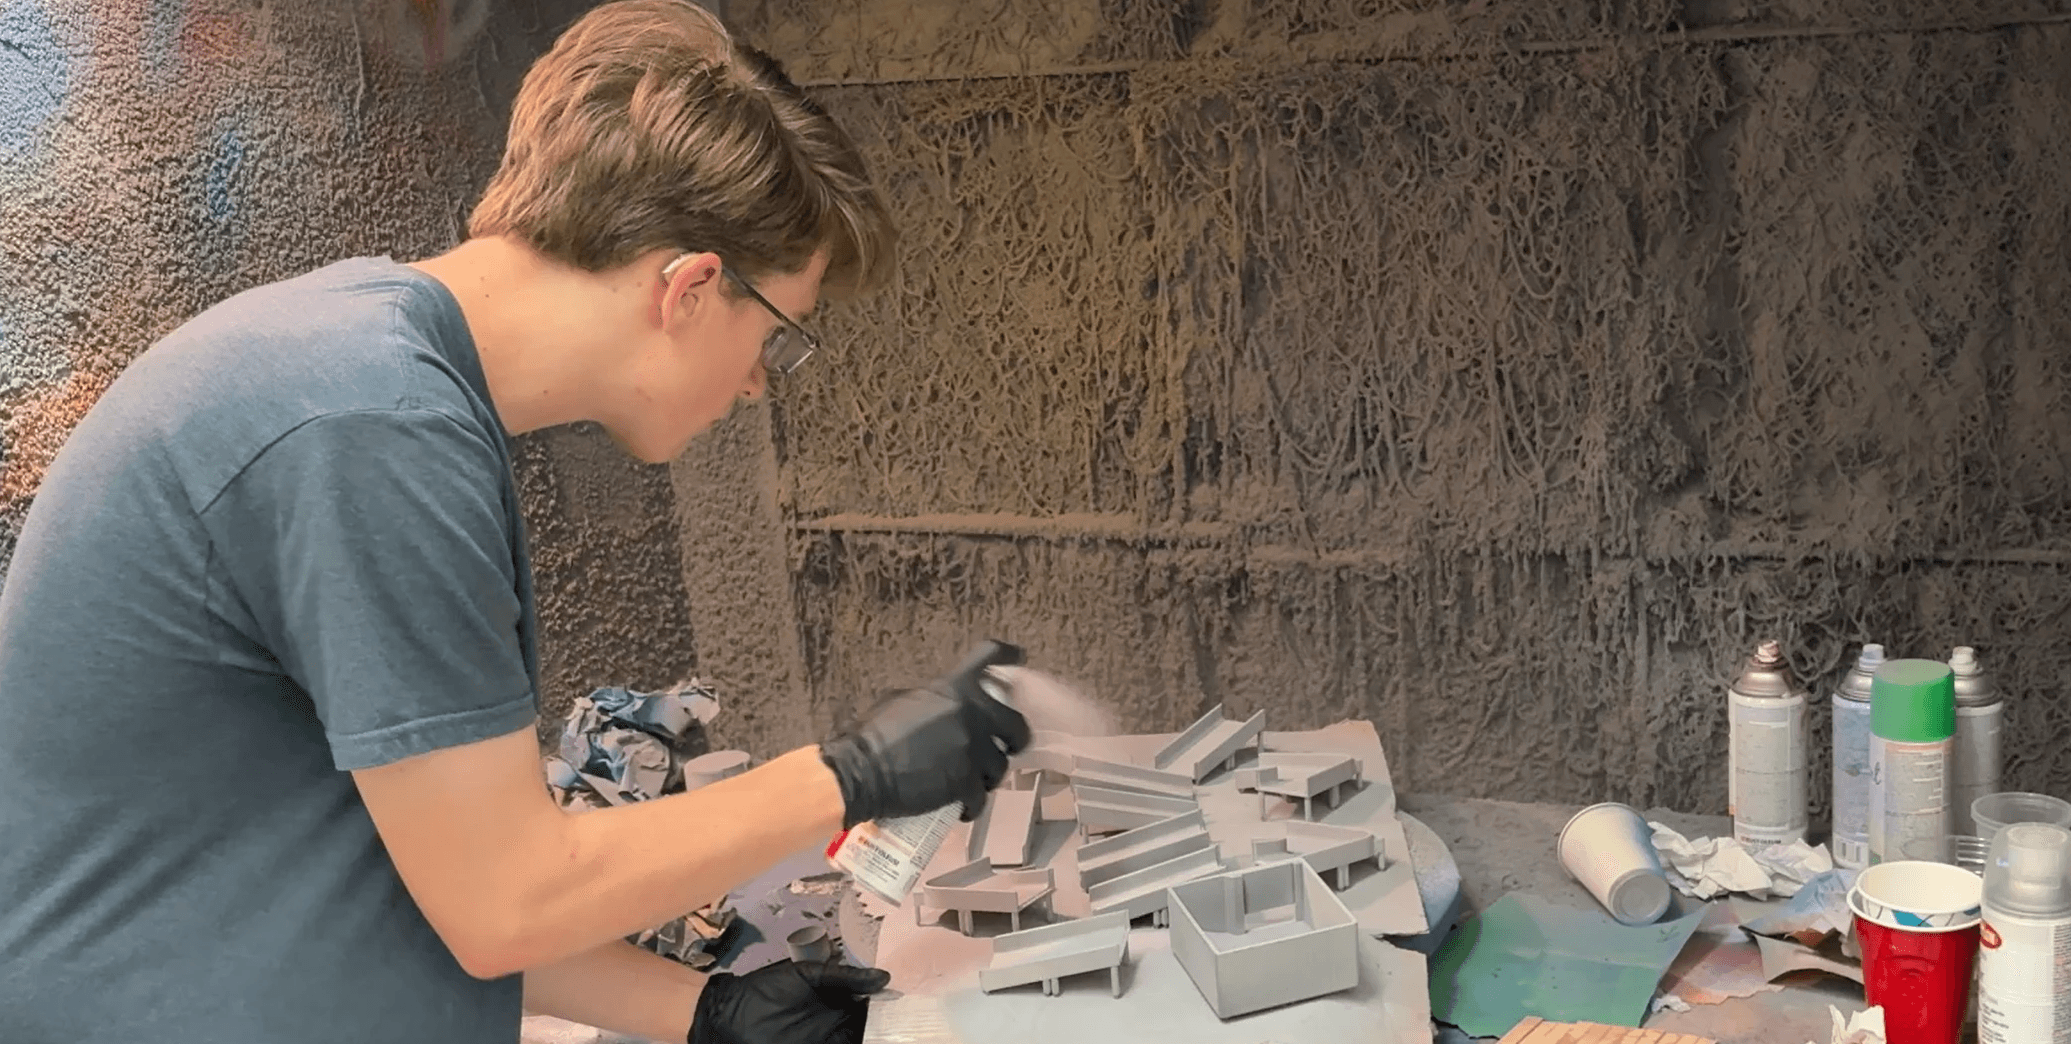
Printed pieces were printed in PLA, treated with a light sanding, some automotive filler, more sanding…
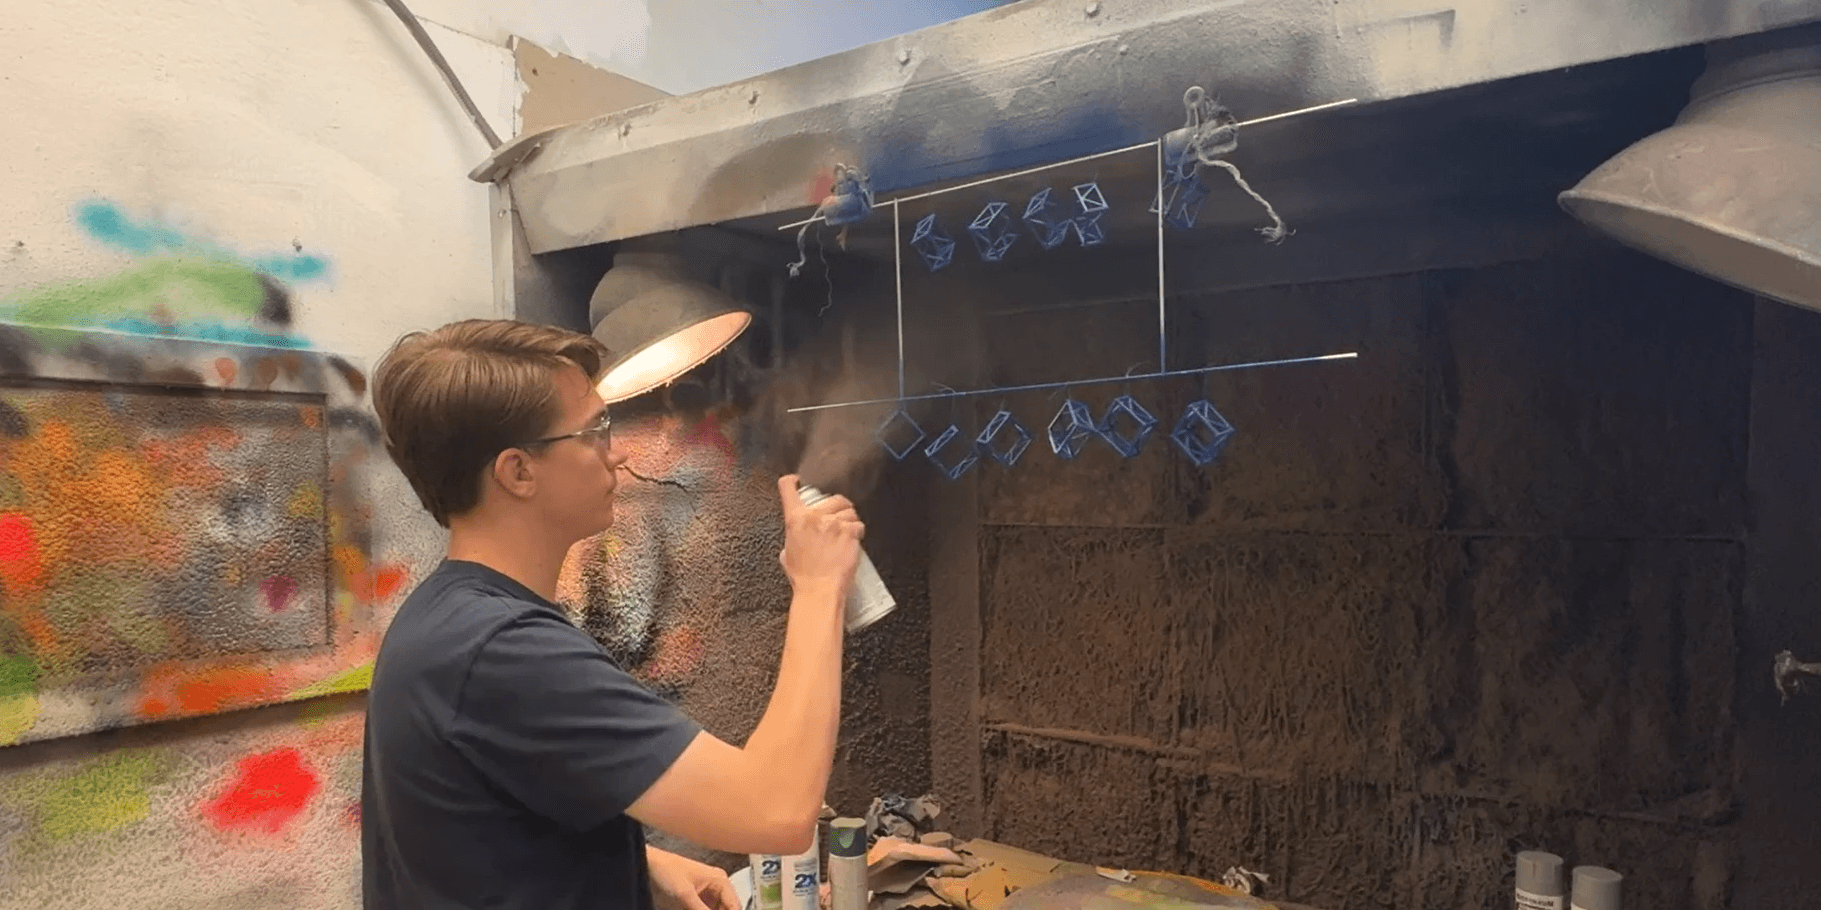
… and a color coat and clear top coat for durability.
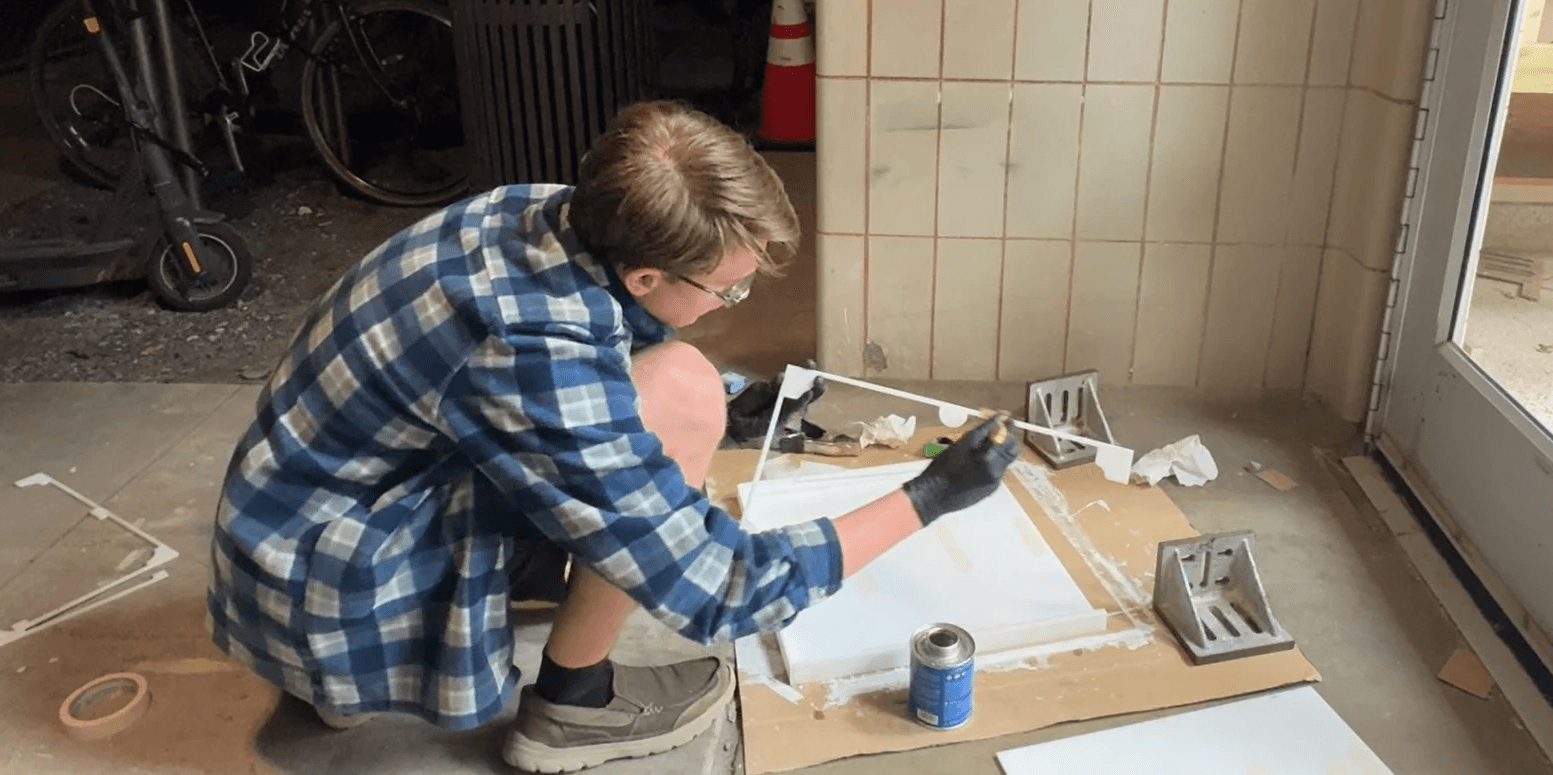
I used Weld-On 4 to glue the acrylic parts for the lid and the water reservoir together. It was my first time using it and it took a while to get the hang of it, but it worked well.
Introducing…
Testing
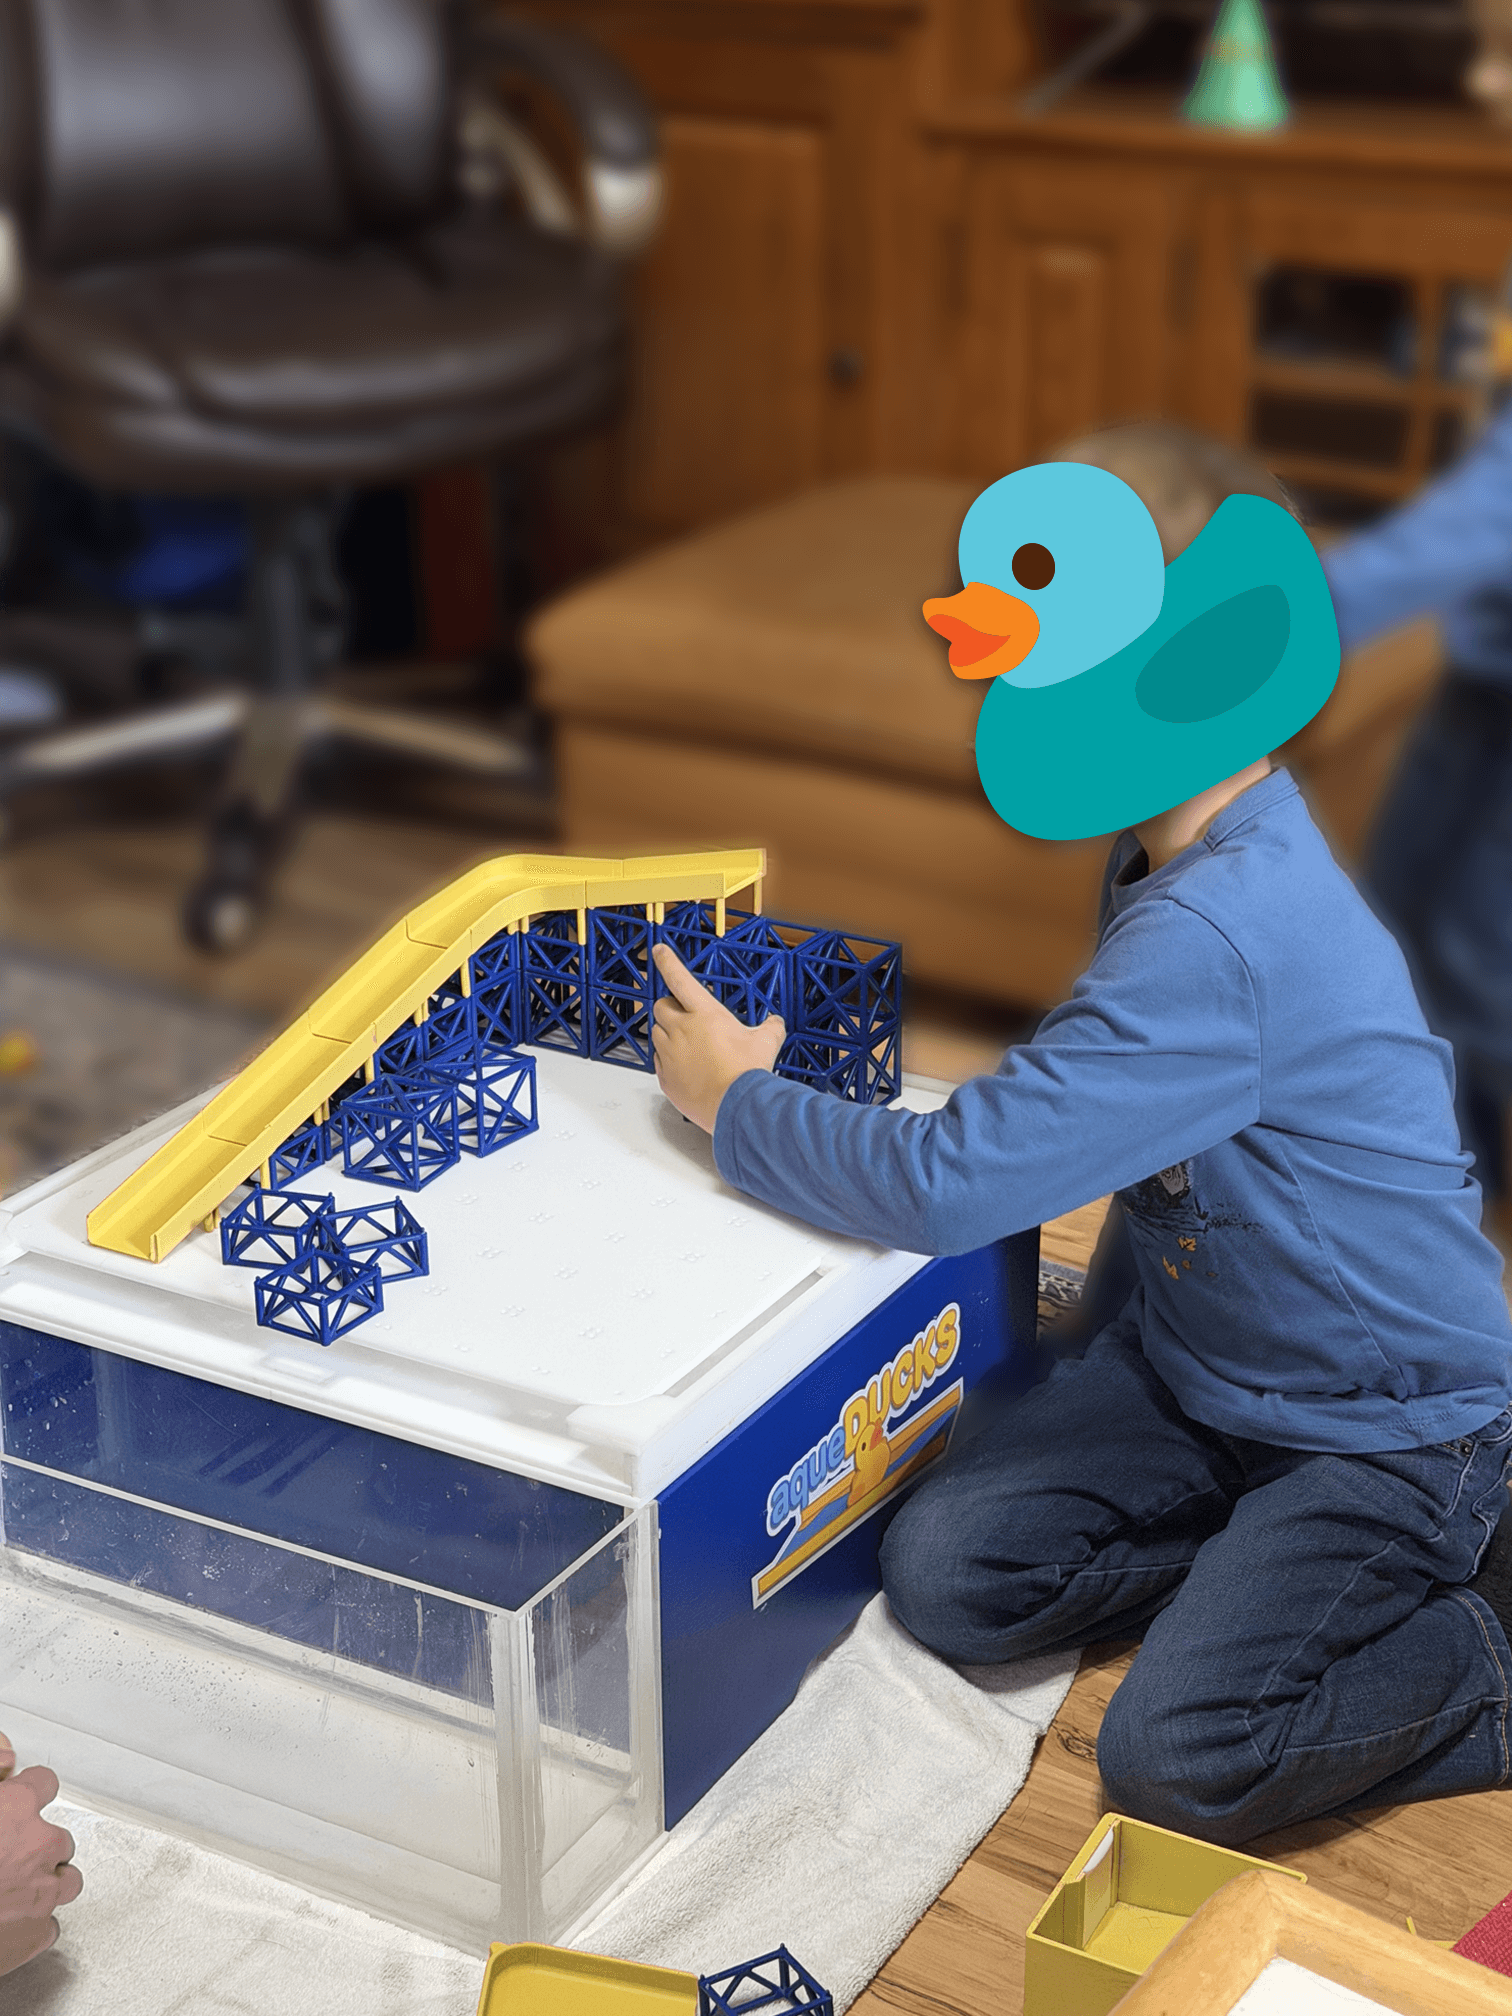
I tested Aqueducks with some family friends' kids, who we'll call Splish (4 y.o.) and Splash (7 y.o.)

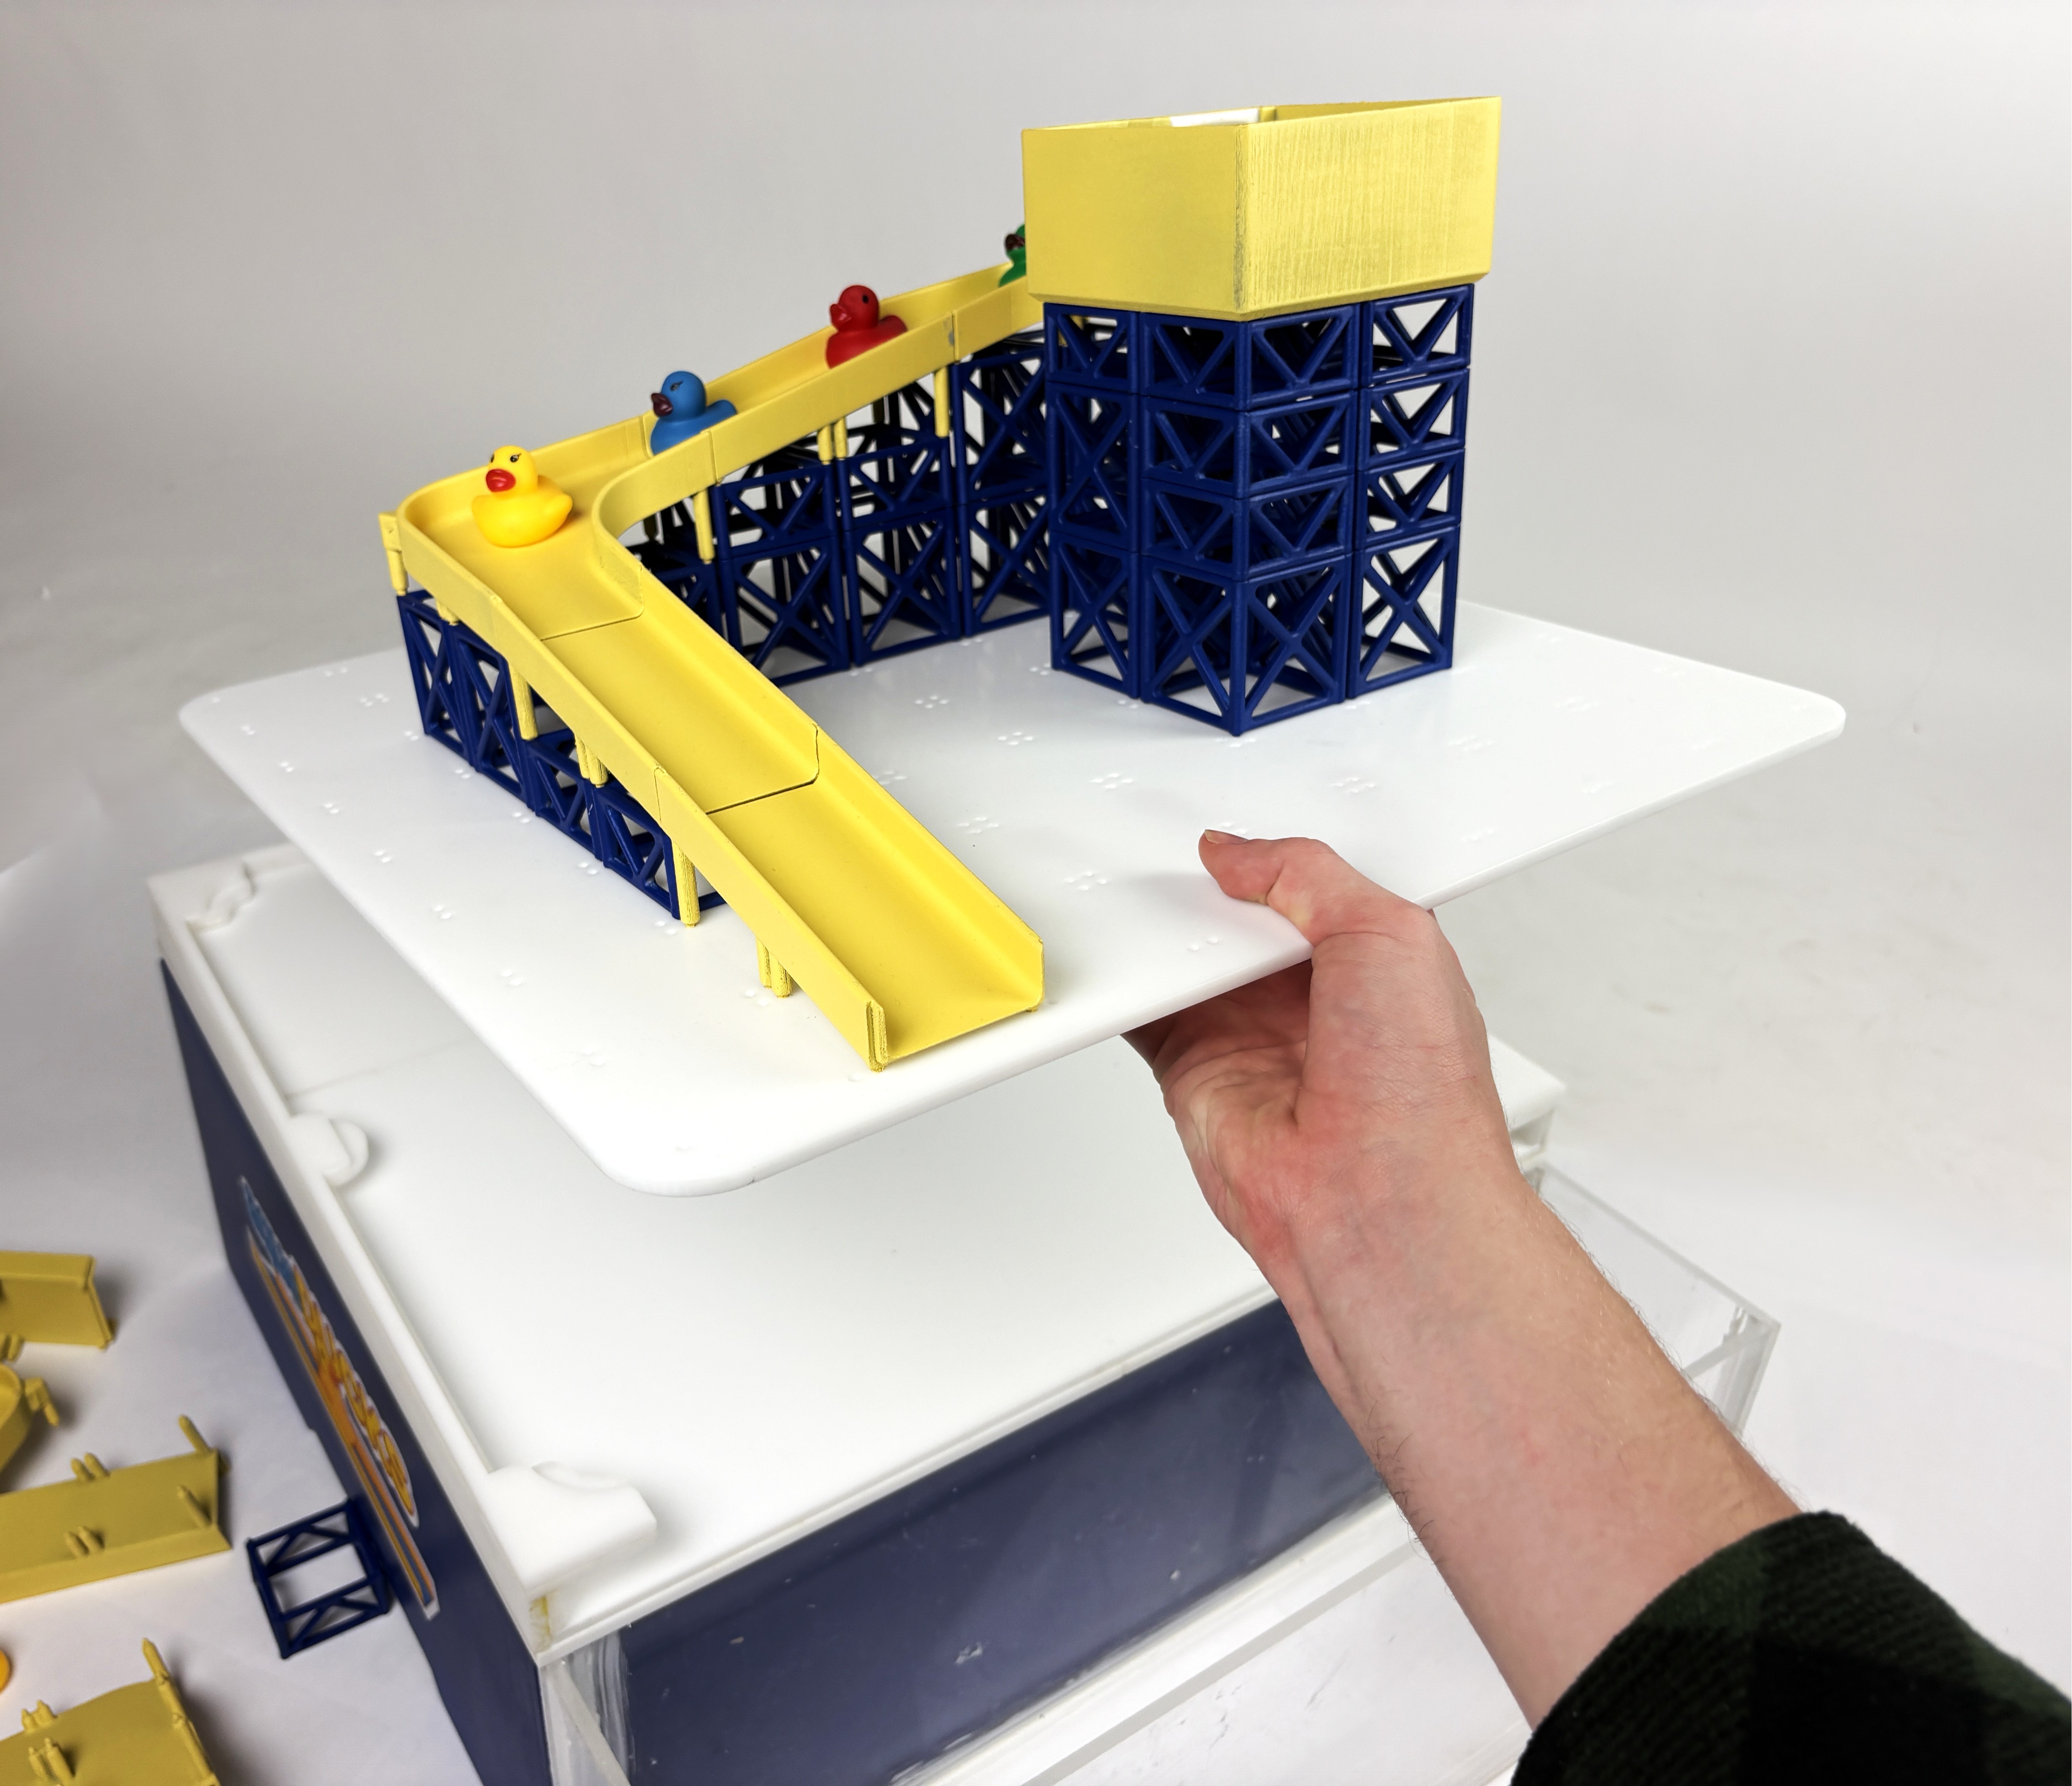
I showed them the basics of how the pieces connected and they got started. Due to the paint and the print orientation of the yellow ramp pieces, they struggled a bit to put those on, but generally understood the concept and learned quickly how many support pieces they needed.
Although Splash did more of the building, they both got to enjoy it, which I took as a success for one of my goals based on the TIMPANI study that it should be easy for multiple children to play together with the same toy.
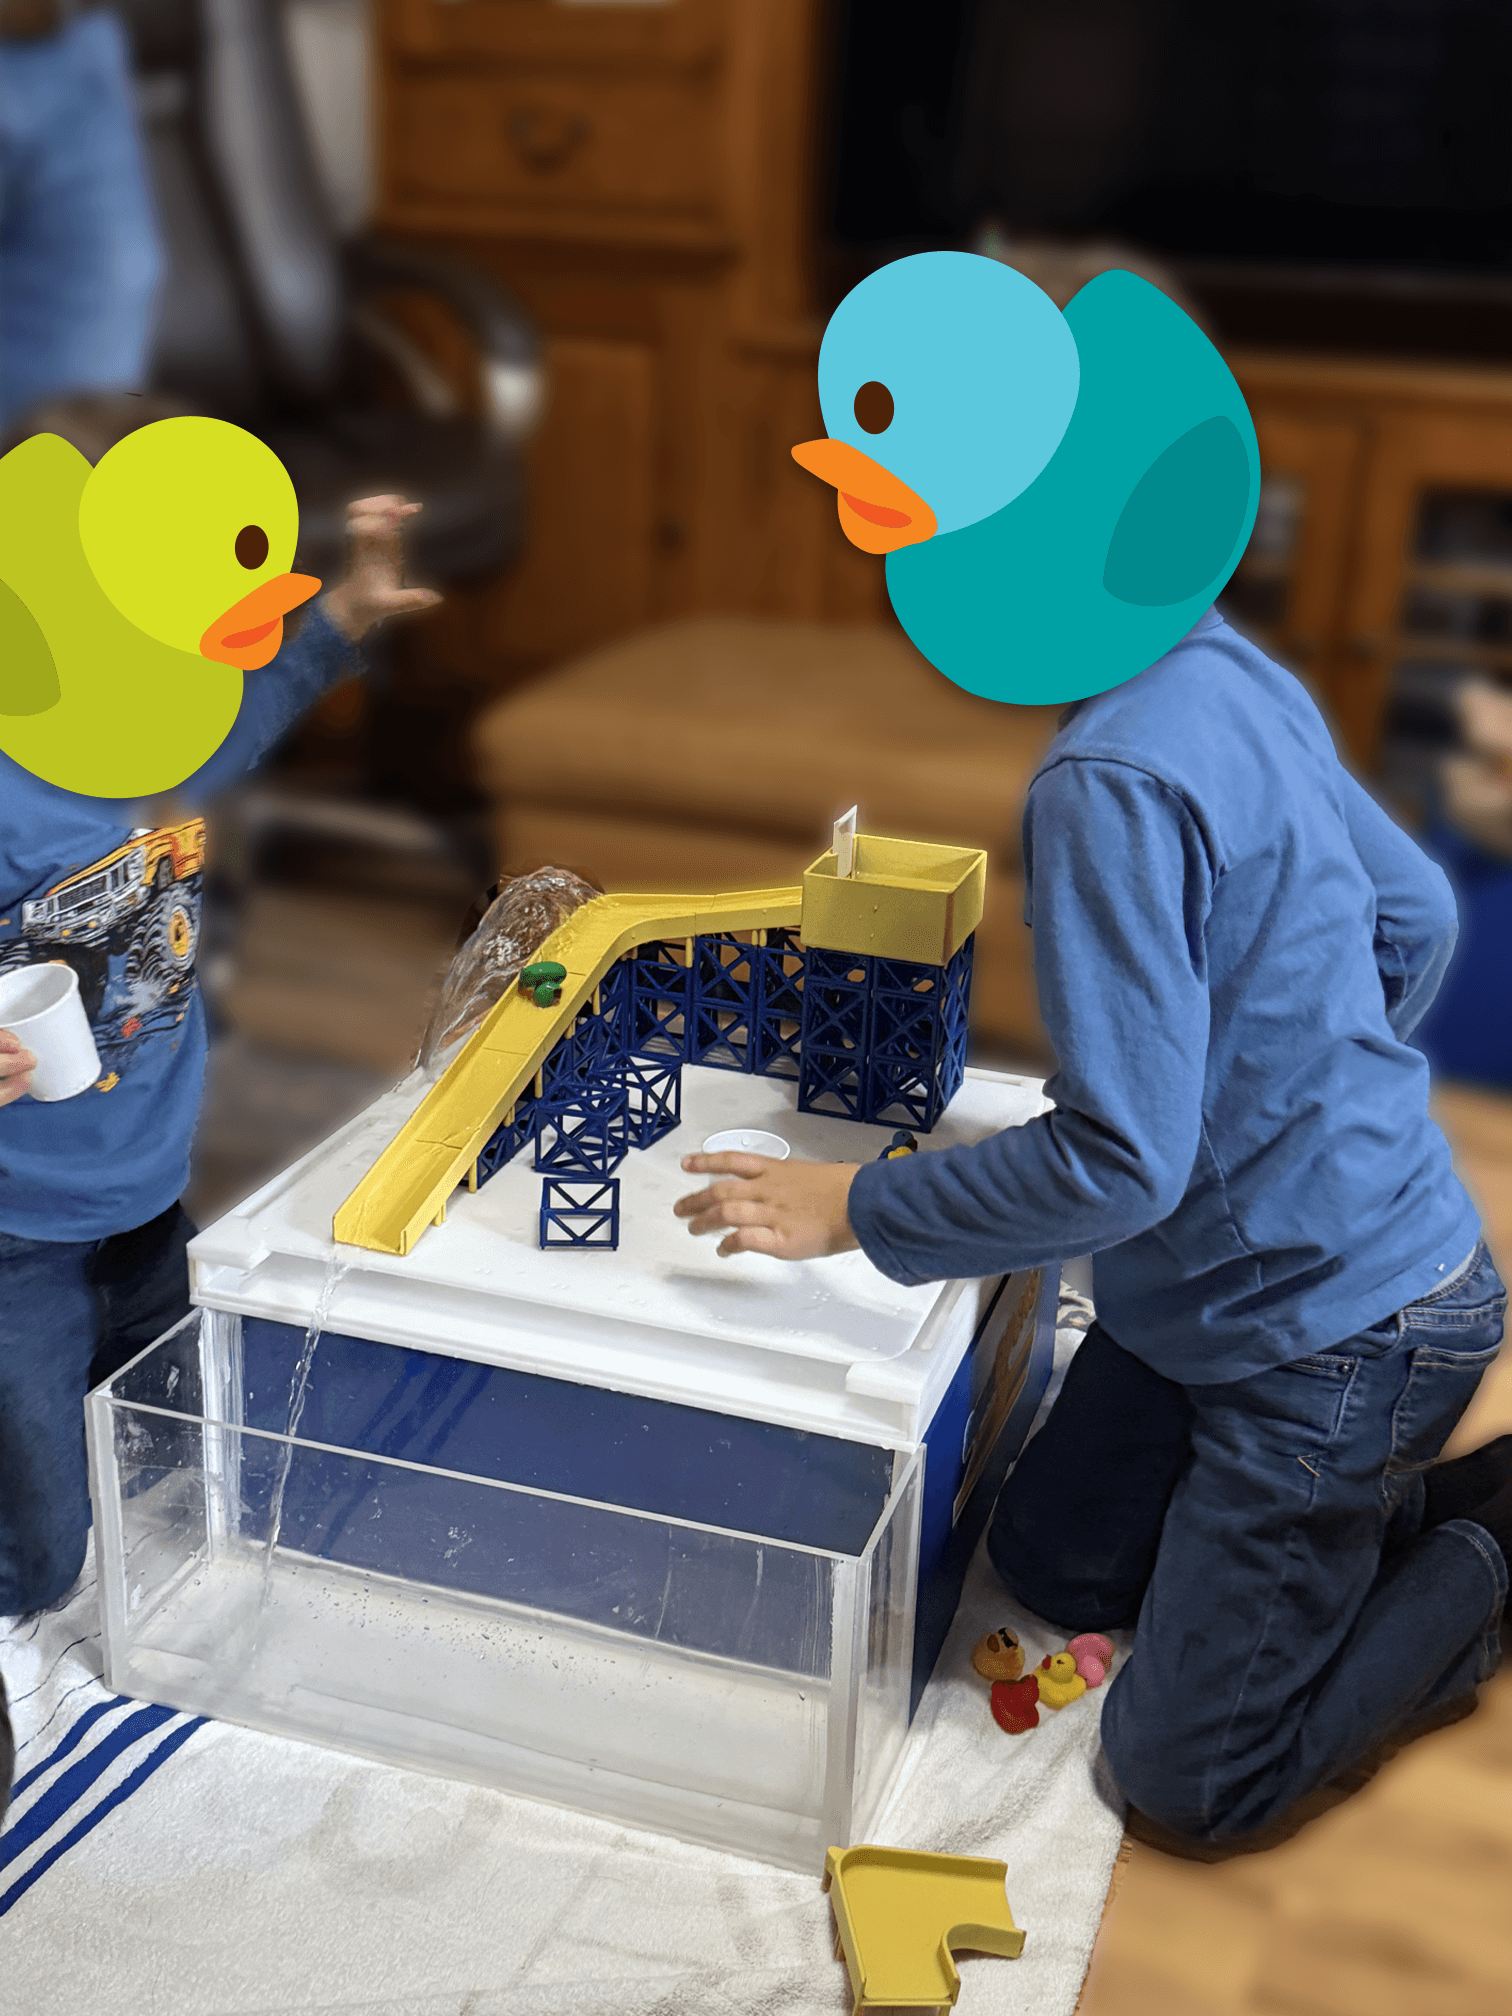
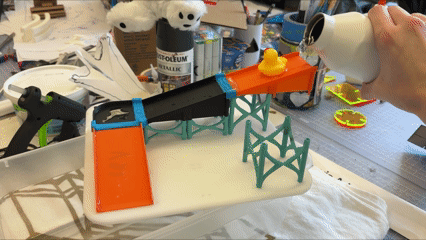
They were very entertained by watching the water flow after opening the water tower door. Despite my warnings, they opened the door too far and let out too much water, which while very fun, made a bit of a mess.
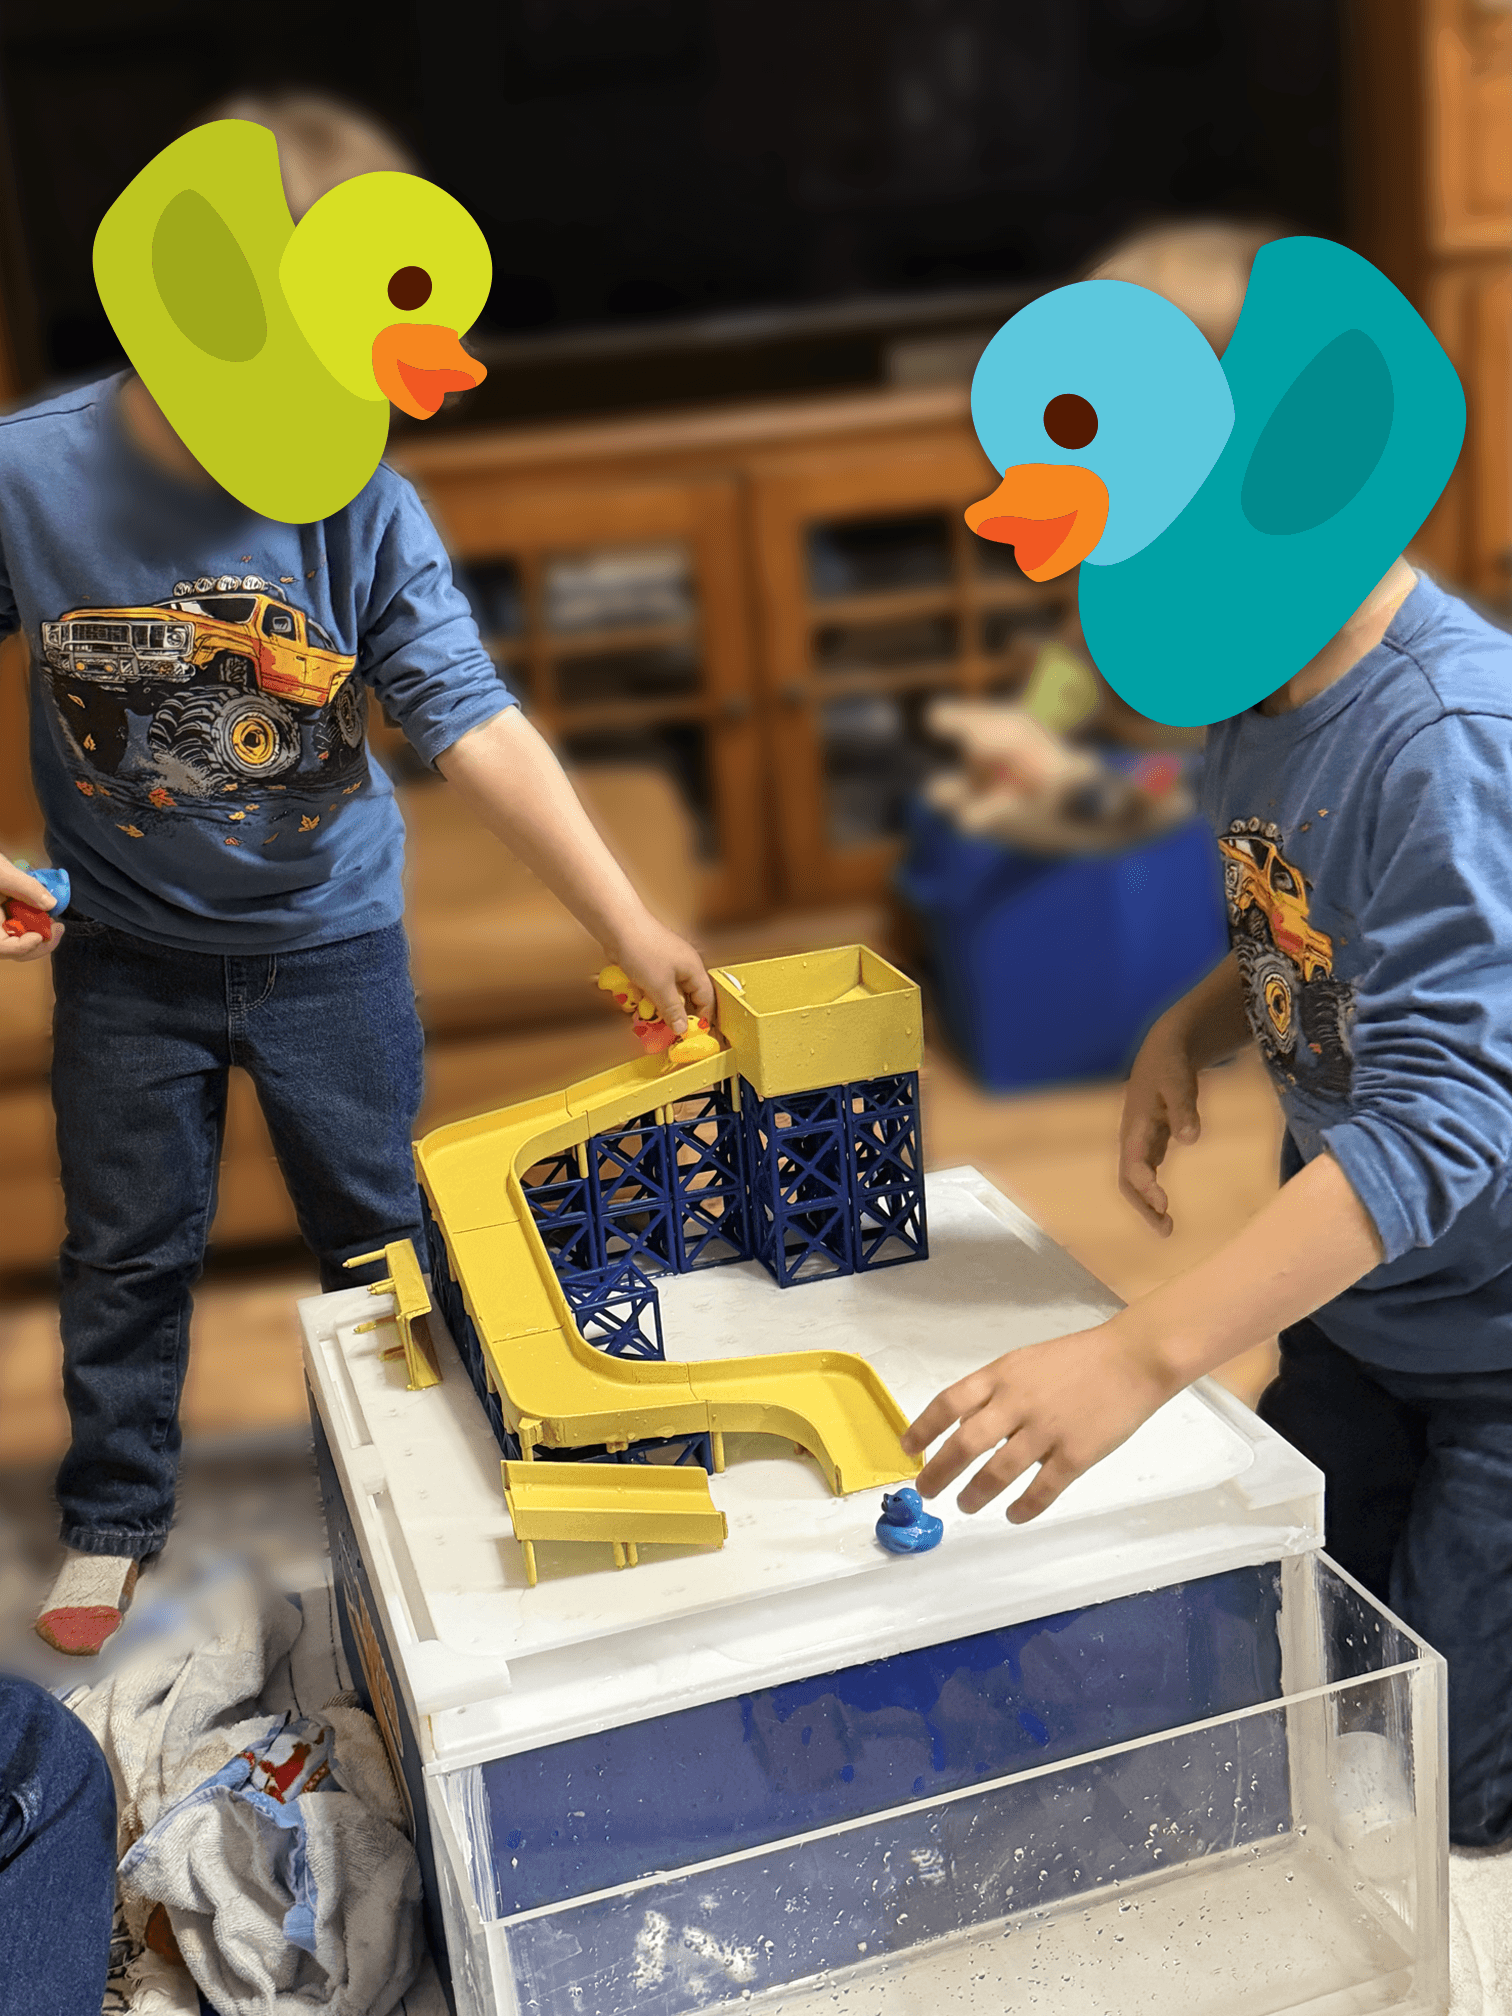
They also went in and changed a part of their path, which was not as easy as I would've liked, but was cool to see. They also started trying to stack several ducks on the ramp, which didn't work well and they frequently got stuck.
Testing Takeaways
I'm very glad I was able to test this with kids and I learned a lot from testing. Here's some bullet points:
I definitely nailed the age range I think, Splash, the 7 year old, was much more engaged, particularly during building. The scale and dexterity are solid, but I would love a better connection interface. Some of my issues simply stemmed from the paint, but it was also just a little tricky to assemble in general, even for me. Disassembly to change something near the bottom of the duct was also very difficult as you have to lift up pieces to fit the new one in. It also certainly requires some setup from parents, so I'd like to explore ways to make it easier for the kids to setup and clean up themselves (lighter, better water vessel, etc.)
The walls for the ramps need to be higher and curved inwards, which was also something Splash suggested.
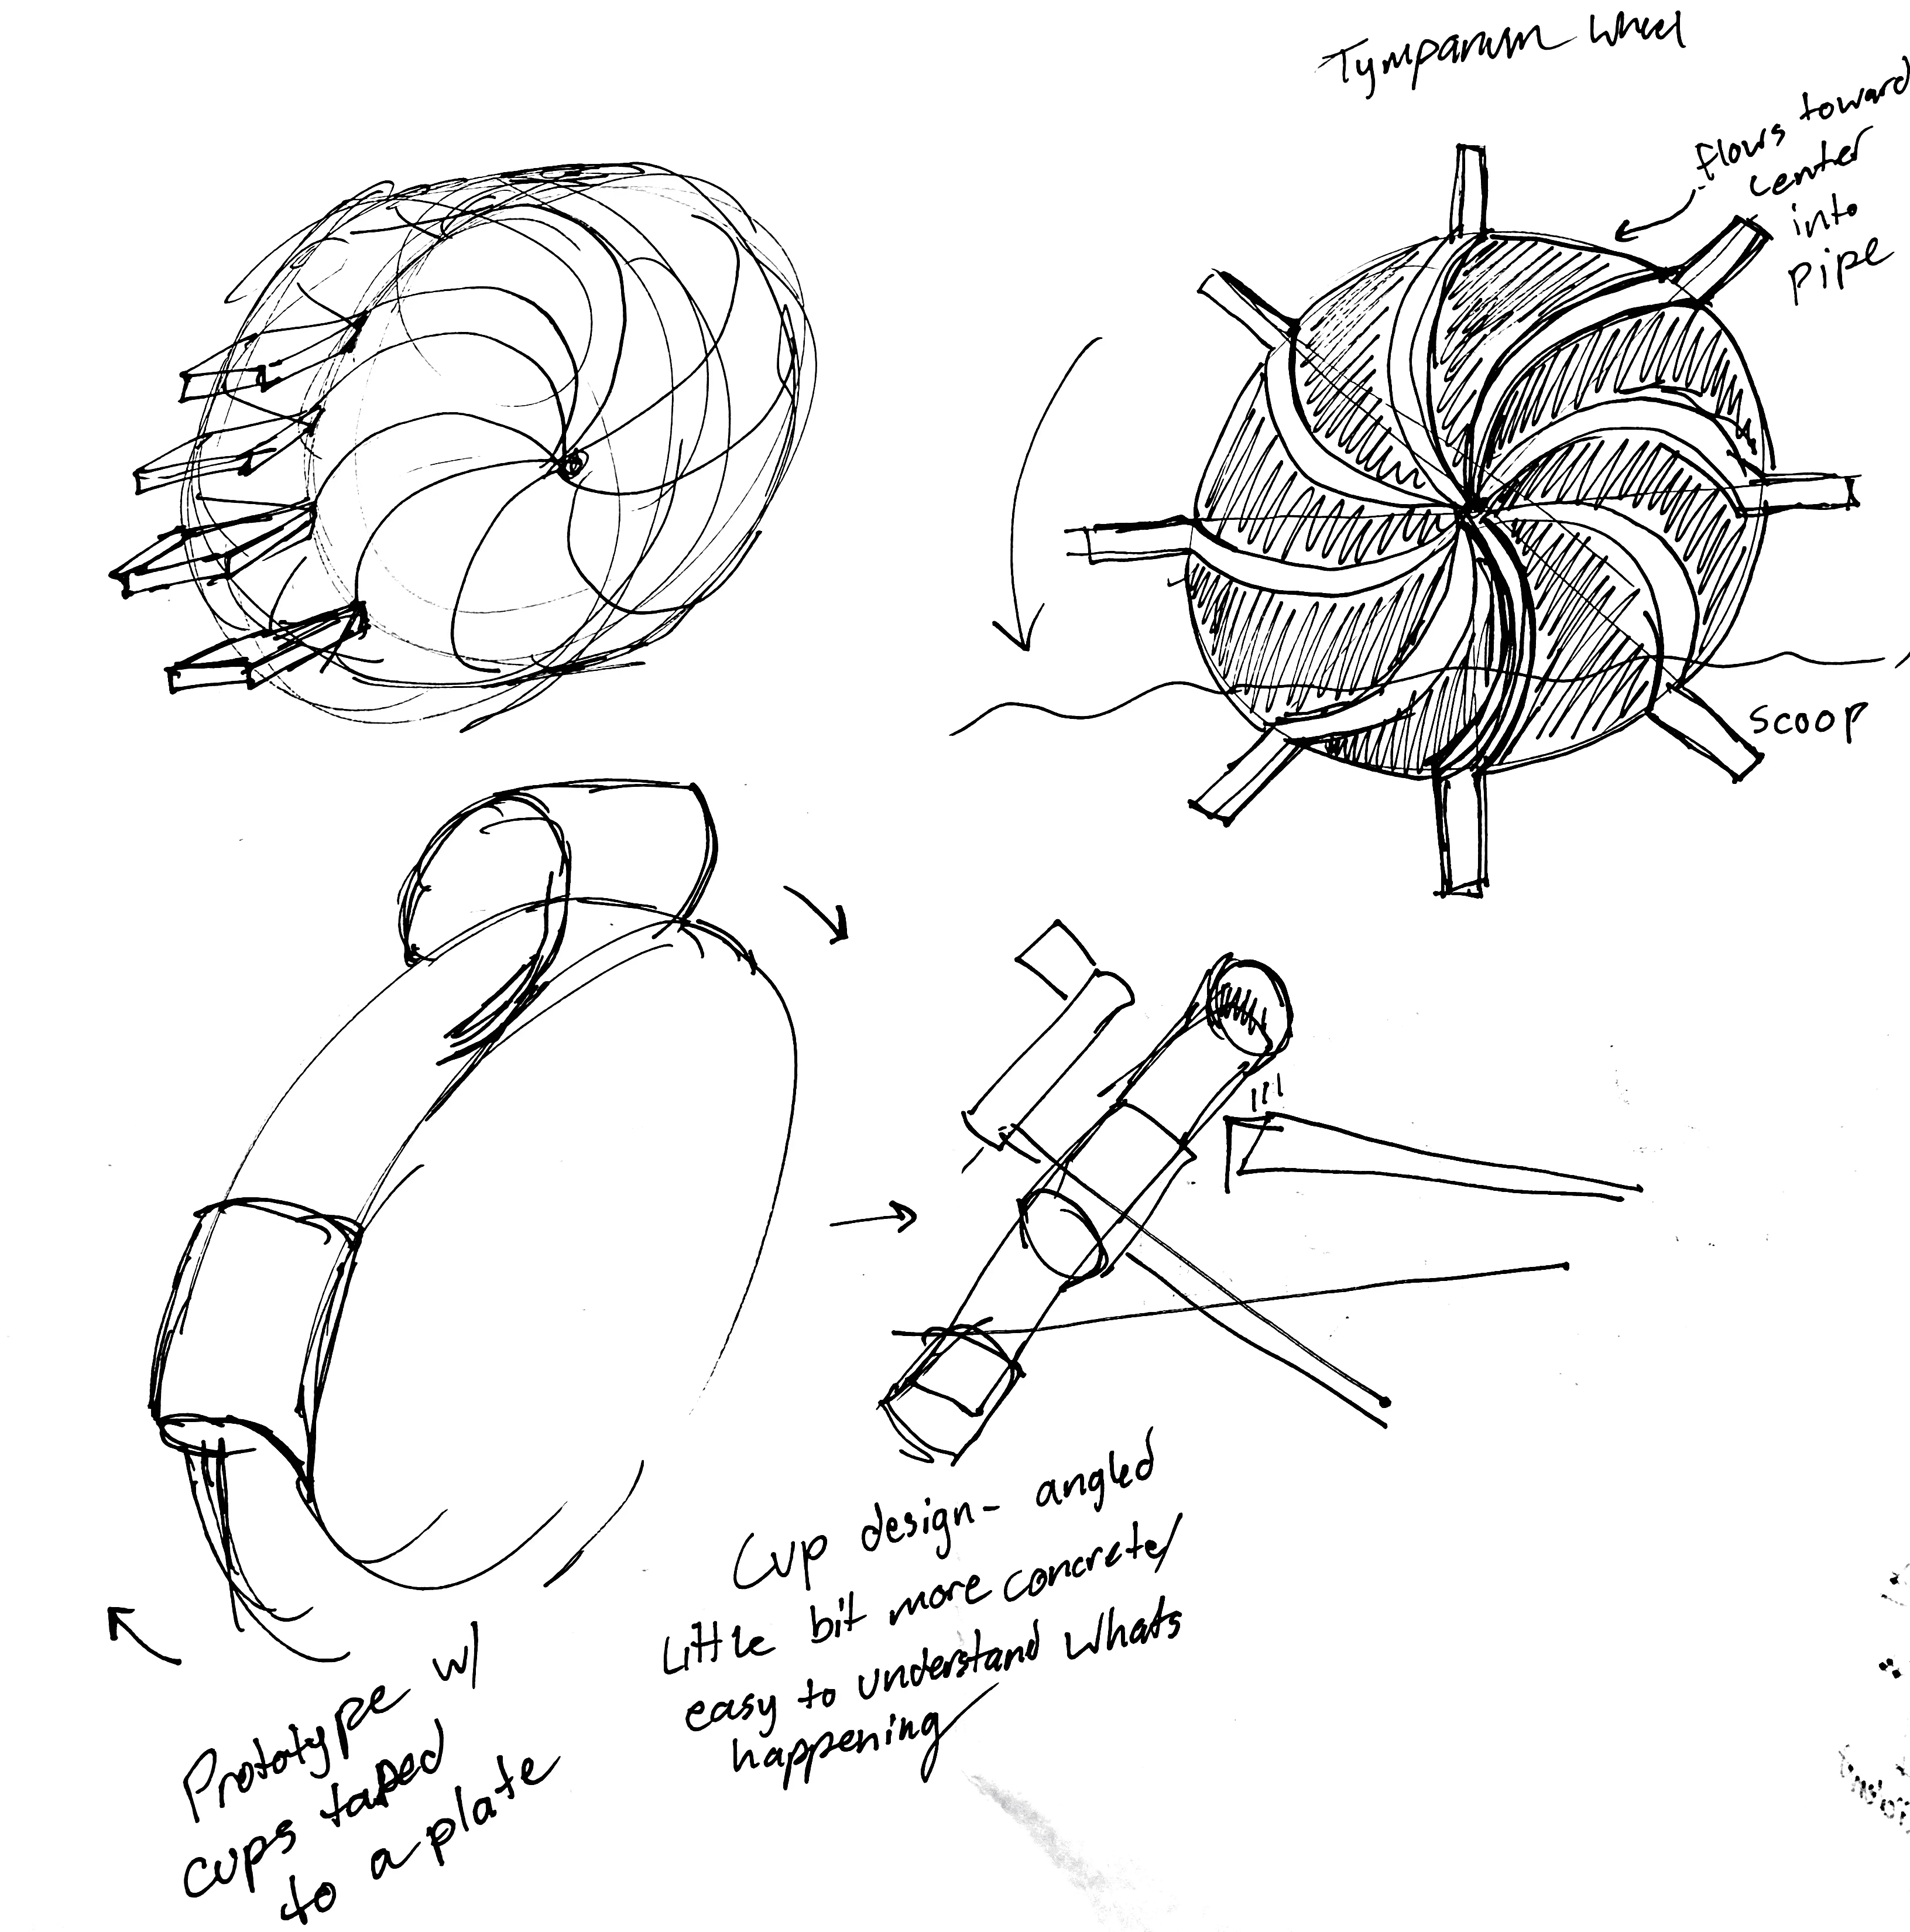
The water tower is not the most ideal method of dispensing water. I would like to explore more options of moving the water up high that don't require power/batteries, like water wheels or hand pumps. Additionally, these would allow for more even and consistent water flow which would help make less of a mess and help with the next point.
Ducks frequently got stuck, especially if they tried to put multiple on the track. Some kind of smooth, reduced friction surface would help, and then fixing the water flow to be consistent over a longer time rather than a bunch of water all at once would also help.
Regardless of these things to fix, I got the seal of approval from Splash, with him saying, "Aqueducks is my favorite toy ever!", so I'll take it! ;)